How To Make A Wig Like A Pro | Pluto'S Beauty
- Posted on 28 November, 2022
- Lace Closure
- By Anonymous
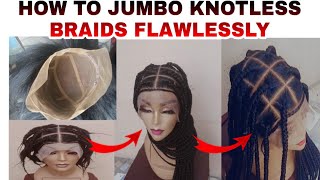
In this video I will show you how to make a 5x5 lace closure wig.
What'S up you guys and welcome back to my channel and let's get started with this wig making video, so I'm going to be using four bundles of 20 inches a 5x5 lace closures, some needles and thread, and that's pretty much it so I'm going to get started With placing my Dome cap on my mannequin head, I always use the mesh Dome cap because it's breathable for my scalp, so I recommend that one and this is how it should look. But you know what I'm going to go ahead and get started with 3C curved needles, so sis make sure that your needles are a c curve, because if it's not it's just not going to give you what it needs to get and please ignore the thumbs. In my nails, okay, that's not important in this video so anyway, so I'm going to tell you guys the most effective way to creating your wig by hand is doing exactly what I'm doing right now in this video. I am doing the over and under method. This wig is going to be so secure down and flat, Hunty that you is just going black girl. This is my hair. So literally really one is literally two things you need to keep in mind when you're sewing and making your unit. You want to make sure that you sew over the weft and not through the weft and two. You want to make sure that you sew through the mesh cap and not like well on it and not through it. So this is how our first track should look that went pretty fast, so this video, you guys, is going to go kind of you know swiftly, because I'm just giving you like the basics on how it is to create your wig. Now we are on to our next bundle, and I'm literally just going to do the same thing that I did when you guys saw me laying down the first uh track. I'M just doing the over and under method - and I am literally sewing like on top of the mesh cap and it gives you a guide like you know it has like little holes in it and things so like you, don't have to worry about. You know anything else, so just watch How I do and I'll come back when I have something else to talk about laughs. Thank you, foreign foreign foreign guys. So this is how everything should look. So now, what I'm going to do? I'M going to jump right into sewing down my lace, closure? Okay, so just to kind of explain it to you guys, because it's just the best way I can say, is that it's just going to take you some time to learn how to place your lace closure, where you want it, so that it lays down flat. But just to give you the basics you want to like, when you put place your lace closure on your Dome cap, you want to make sure that you pull it Forward just a little bit over your Dome cap, so that it's not directly on that elastic band And one thing you want to keep in mind is that you want to sew down each section separately, so you want to sew down the right side. First, the left side. Second, and then the back is always last. Why is because that is your final stretch? That'S how you're going to get your complete flatness is sewn down the back last. So what I have did I have taken some t-pins and I have secured my lace closure down on my Dome cap and I'm starting with one side of the lace closure first and then I'm just going to work my way around the whole head. It is inevitable that you guys follow this step, because, if you don't you're going to get bulkiness in your wig, thank you. Thank you, foreign. Thank you. Thank you. Thank you, foreign. Thank you, foreign. Thank you. Thank you all right, you guys, so we are moving on to the fun part, and that is the coloring and I'm just showing you what I'm using right now is the blonde me hair, developer and color lightener. So pretty much. I am going to be using like three things: I'm going to be using this to protect my hair and to make sure that I get the best highlights possible, and this is by the blonde. Is it I think, blonde me or blonde one of the I'll leave it in my description box also um another one of the things? Is the volume developer for a seven percent and I am going to squeeze a hefty amount of that into this bowl? Yes and then I'm going to be using the blonde bleach, I'm going to use the last bit that I had in one bottle and then I'm going to open up another jar and I'm going to use about two or three scoops out of there. I think no, I think I used both four or five Scoops. Oh, I don't know we'll see how many scoops, but you need enough because I have 20 inches, we got 20 inches. We got a color girls, so you know you're gon na need some bleach, you're gon na need some product, don't be stingy, don't be selfish and please make sure that you are wearing gloves when you are. You know dealing with products as such and I'm also going to be using 30 volume developer. Now this is going on a wig honey. I will not recommend this type of concoction on your real hair, because it'll just be too strong like let's just give. It is what it is, but this is for a wig, so we can get away with it. Yay, okay, so I'm just gon na stir a store restaurant, I'm gon na Stir It Up Until My Line. My happy heart is happy, so I'm gon na be here for a little bit, y'all, just stirring and stirring. But now you want to make sure that you stir it up all the way to the point where you don't see: no more lumps and grooves in it. So you do got to stir for a little bit um, not too long, though, but just make sure that you ain't got no more lumps and glue and grooves in your bleach and make sure you have enough product in your um your base and Bowl. Because, like I said the longer your hair is the more product you're going to need. So if you have like a 12 inch, wig or unit, you really got to worry about too much hair bleach, One Bowl will be just fine, but me, I'm gon na have to do two bows because I have 20 inches and I'm doing highlights so highlight some More detailed and more particular and people are nosy, so you don't want to make you want to make sure that your highlights are popping okay, you guys so right now, all I'm doing is sectioning off the hair, and the best way I can explain highlights is just Do what you want to do like literally like not do what you want to do, but just section off the pieces of hair that you want highlighted like I know people say you know, use a rat tooth comb and do the the weaving method. You know what I mean: yeah, that's cute, but it's not enough. It'S not enough highlights we need we. If you want highlights, if you want High lights in your wig, you have to make sure that your your sections are chunky. You got to make sure that they are thick. You got to make sure that you put pull out enough hair to color girl, don't be doing that weaving method and think that, oh you know you get like a little two or three inches of hair. You people gon na see those highlights they're gon na see it it's gon na make. Oh, your hair is cute, but they're gon na be like you know, you want people like damn. I love her hair like damn. I want my hair to look like that. Like oh, I want my hair like that. That is what you want not on your hair is cute boo. You want popping so just what there's really is like no method that I'm following it's just the Ariel method, My Method, you know I'm just doing my own thing, I'm sectioning out pieces of hair that I want to be highlighted so and that's just all. I'M gon na do and you should do the same thing girl, because when you done you can be like wow foreign. Thank you. Thank you, foreign, no, no foreign guys. So, after all our hard work, this is how it should look a hot mess, but a good hot mess, because we are about to tone everything out. As you can see, this is the color that I have received after going in and highlighting my unit once so now what I'm going to do and if you guys see, I got my little Caution over there sitting over to the right, but all it is is Some developer, I'm going to be using 40 volume developer and I'm going to be toning, this hair and getting the brassness out and just correcting any of my mistakes that I may have had like from the aluminum foil. Okay, I tell you that is one word. Listen anyway from the aluminum foil, because sometimes if you like, squeeze that foil too hard, you can create like a crease and stuff in your hair and an imprint, and that that bleach will leave that imprint in your hair. And you will see that. But the key to doing that is just getting you, some developer girl and just sectioning out your hair and putting it on the whole unit. You ain't got to be cute. You can literally just have fun with this part and just make sure you saturate the whole wig and you're gon na see how it turns out in a few minutes. But all I'm going to do is just saturate this whole unit in developer and just even out the color that Bryson is and just make it more pigmented before it even hit the sunlight foreign. Thank you. Thank you, foreign foreign foreign, Ed, this hair and look at my highlights. You guys I'm gon na say one thing right now. My camera is not giving me any justice, because these highlights are way brighter than they look on video. It is extremely beautiful in person it's like a caramel, just honey, glaze type of highlight drip situation going on girl. So literally right now all I'm going to do is I'm Gon na Keep It cute and quick? I'M just going to take my cheese straightener and I'm gon na just drag it through the unit just to tame down the frizziness a little bit before, I even add any curls into her. I did add a few like long layers in her that's going to be coming in the next video. So don't worry about that um, but right now all I'm gon na do is just run my straightener through it very quickly very easily. I'M not trying to be cute about it, I'm just trying to tame down the frizz and in the process. I am making sure that I apply Heat Protector so that my unit has longevity. So just watch me as I just prep her before I start to style. Her thank you, laughs, foreign. Thank you. Okay, you guys so right now, all I'm doing right now is just putting in some light beautiful soft flowy curls, I'm just taking my barrel and I'm curling away from the hair. I'M going to be doing that momentum. All the way throughout the whole unit, so if you ever want that Farrah Fawcett Kim Kardashian will fare faucet that fair faucet look, then you want to make sure that you curl away from the face and just kind of curl inward to the back of the hair. Like a fan - and you will get that flowy luxurious, Vibe girl, but I had fun with you know, showing you guys how I make my unit just continue to watch the video, and I will be coming to you guys with some closing credits. So, let's get back into the video! Thank you. Thank you, foreign. Thank you. What is up you guys? So if you made it this far, then you can finally call yourself a official wig maker. Look at this look what we do you guys. These are our results. So there's one thing that I did leave out that I should have put in. I did not record myself cutting off the lace, so the next video that I do make. I am going to record myself cutting the lace off, but just to give you just like a little bit of advice on how to cut your lips. So when you cut your lace, you kind of want to make sure that you cut like close to the hairline. If you cut in the hairline, that's okay, like maybe one row in that's fine, like don't cut too much of those knots off. But when you cut, you want to kind of go in like a zigzag motion, because when you put your unit on you, don't want it to look like a blunt cut. You know what I mean you want it to be kind of believable. So when you kind of you can even get those scissors from the Arts and Crafts place or Michael's, you know exactly which ones I'm talking about they kind of come in like a little design like little squiggly form. Those will help you, but it's pretty simple. I do is going like a little zigzag motion and you can cut it off and it looks something like this, but look at our highlights. You guys I am getting so much better with the coloring hair. I am so happy. I have been trying to achieve this. Color for years on my own, like for years, I have been trying to achieve this color and then it just kind of took me back. I remember my grandma rest in peace used to tell me I was like Grandma. I can never get the color that I really want when it comes to me like making my wigs and dyeing my hair. She was like, I think you just got. Ta take your time. She said you just have to be more patient. She was like just give it just a little bit more time and she was so right. All I did was let this sit up there. I just gave it some time and literally the second process of me coloring this hair. When I put the developer on there, as you guys, saw put the developer on this hair, I let it sit overnight, because it's just developer, it's not bleaching the hair, if anything, it's kind of it's just toning, the hair and just making it all in one color And, as you can see, this is what we've done, since this is what we got tell me what you like tell me what you like this is what we got. This is what we got uh welcome to poodle Pluto Pluto, please say: welcome to poodle poodle. Poodle. Welcome to Pluto welcome, welcome to Pluto welcome, welcome to Pluto Pluto, okay, I'm stop tripping anyway, foreign I've been making wigs for 10 plus years and look at this I mean I can be better, of course, but all you back, oh civilized civilize me now. If you want me to make you awake, if you want something done to your hair, if you want your hair to look something like mine, if you want it to look like mine, I have the Etsy stuff and this wig is going on my Etsy store and If you go to my YouTube to the home screen, look at the like the little picture that thumbnail situation. I don't know, look at that. You know you're gon na see it right there, it's gon na, say Etsy, so just click on it. You know like where people can list like their Facebook and their Instagram and their YouTube and all that stuff yeah, just click on that. I don't know why. I'M like a singing that but uh I'm not a singer at all, but yeah this. These are our results. You guys, but yes, and because I talking to my cities on you to me and to my students on udemy, if you have any questions, comments, concerns leave them in the uh comment section below and I will answer them for you. But yes, y'all 20 inches honey, she's living she's, luscious, she's everything you want to be: okay, yeah all right. Moving on I'm done this is it. I have some ways into this unit and if you guys want me to show you how I add my layers just leave a comment or ask me and I'll show you how I add layers. But this video was strictly on how to make a 5x5 lace. Frontal lace, closure wig, but just how to make a wig I kind of added some extra stuff in there for you. You know like how to color and all that stuff. I gave y'all some of my secrets. You'Re welcome! So don't don't sound about it. Um company
Comments
Erica Oliver: Gurlllll, fabudamnulous don't know it's a word.