Watch Me | Make A Closure Wig On A Sewing Machine
- Posted on 11 April, 2022
- Lace Closure
- By Anonymous
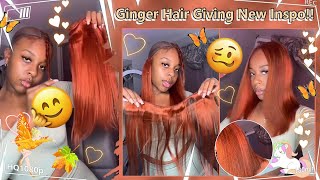
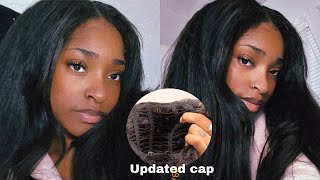
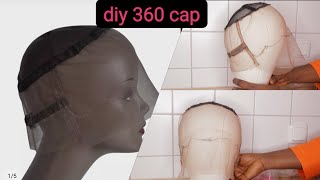
Hey y'all, so let's get right into the video um. So this is just me taking out the excess um space in the cap, because my client she wanted a snug fit. So that's what i'm doing it's just pulling forward the um the excess cap and then i'm just tying it down. This is a super easy process, especially if you know how to sew, and you know how to pull forward the um the extra space, if you guys want a more detailed video on that. Let me know, and i'll be more than happy to go ahead and film that, for you, this is the closure that my client have provided. I'M just going to pull it down in front of the cap about half an inch, because you want a little bit space in the front and then i'm going to pin down the front and i'm going to pin down the back. You should have four equal flat sides on each side. As you can see right here, then i'm going to sew down the whole perimeter of the closure. I like to pull the needle through the thread and then pull through before i start sewing and then once i start sewing, i like to go under the closure, and then i like to take the opposite side of that needle and wrap it around the needle and Then pull the needle up and pull the thread through, and i do this all throughout the closure until there's no more thread, but usually i have enough thread to go around so yeah do so do so before i actually sew on all the bundles to the wig. I like to double my left. This is how i double my list. I just take the um end of one bundle and i put it together, just like so like the tracks sitting on top of each other, and then i hold one end of the bundle and the other end on the sewing machine and i'm kind of like not Pulling it, but i'm like guiding it through, so that the um, so that the the thread doesn't go all over the place. If that makes sense me so do so. This is what it should look like once you have doubled your wefts. They are now together. So now it's time to sew onto the actual cap, so when sewing onto the cap, you want to make sure that one hand is guided on top of the track and the other is guided onto the cap. You do not want to stretch the cap at all because stretching the cap can cause bumps and make ripples in the cap. This is not what you want. You want a flat um track sewn onto the cap, so make sure that you're not pulling, but you are guiding the cap and the bundles through the sewing machine. So what you want to do at the end is backstitch. You also want to do this. In the beginning, you hold the reverse button on the sewing machine and move forward, and you'll do this about two to three times once you're done with that. This is how the bundle should look on the cap. Look at that super neat super flat, and this is what you want throughout the wig. So another tip would to be holding your um cap in the bundle like a hamburger so having one hand um on the cap to see where you're guiding the track at and then another holding under the cap and under the bundle. So, as you can see, my right hand is positioned kind of holding the bundle and then the left hand is guiding and seeing where the cap is, i'm not necessarily stretching, but i'm just making barely enough room so that i can see what i am looking at Before i sew um, so this is how the wig ended up. I did go ahead and sew on an elastic band, because my customer did want a snug fit um. This is the inside of the wig, don't mind it. Looking bunched up, it was completely flat. There was no ripples, it was no bumps so right here, i'm just going ahead and bleaching the knots you want to make sure that the consistency is like toothpaste. It'S not too runny. It'S not too thick, because you do want those notched knots to get bleached. But you don't want it to where the not the bleach will seep onto the hair. So this is like a perfect consistency, um and stuff, but yeah you guys so um for the rest of the video. I was just customizing, the wig. I, if you guys, want a video on how i customize my wigs, please let me know in the comments below, if you have any questions as to how i did something on the sewing machine, please let me know in the comments below i'll be more than happy To answer, and if you guys want a more detailed video on the sewing machine, let me know, and i'll be more than happy to make that video for you guys, but for the rest of the video i'm just going to be customizing and styling the wig. So i will talk to you guys in the next one. Bye. Do don't stop this great keep? Could you keep calling me me? Sometimes
Comments
Mara: Your voice is so calming. I Loved this tutorial, you demonstrated it in a very clear way!!!!
Black Barbie Doll$$: I would love to see how you sew down the extra cap. Please make a video on that!
Jerica Wharton: Hey can you do a more detailed video using the sewing machine. Thank you
Olowoyeye Oluwanifemi: Do we have to sew the wefts together if the hair is double drawn? Also, why do we have to sew the wefts together? 2. What if the bleaching touches the hair, will the hair be bleached? 3. How were you able to bleach the knots without bleaching the hair? 4. Does plucking means removing some parts of the hairs on the edge?
lifeofAB: Howdo you avoid the hair getting stuck in your machine??
Lokenya Mccorvey: What caps do you use
Lobeatz: What’s the name of those curling irons
Official Keona Jordan Music: Awesome. What curling iron is that?