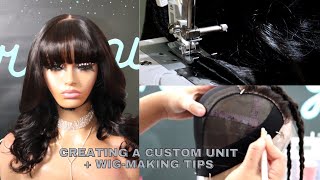
How To: Make A Lace Front Wig On A Sewing Machine | Beingbrittanybee
- Posted on 19 November, 2022
- Lace Closure
- By Anonymous
Hey, gorgeous! In this video, I'm showing how I make my wigs using a sewing machine. Everything you'll need to make your own is listed below. Thanks for watching! xo
Like, comment, and subscribe!
WHAT YOU'LL NEED:
Hair (this is the hair I used):
Mesh cap:
Metallic pen:
Scissors:
Seam ripper:
C-Needle / Thread / Measuring tape / T-Pins:
Sewing machine:
Mannequin Head:
Mannequin Head Stand:
My Amazon Storefront: https://www.amazon.com/shop/influencer...
____________________
My Blog: https://beingbrittanybee.com
____________________
Connect With Me :
Instagram: https://www.instagram.com/beingbrittan...
Twitter: https://twitter.com/itsbrittanybee
Pinterest: https://www.pinterest.com/beingbrittan...
Facebook: https://www.facebook.com/beingbrittany...
https://www.bloglovin.com/blogs/beingb...
____________________
Subscribe to my newsletter and never miss a thing!
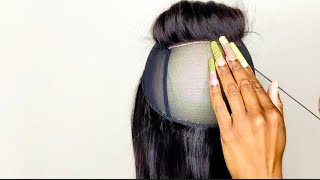
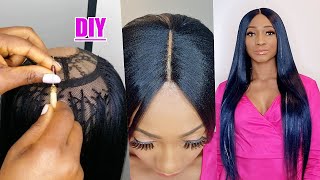
Foreign, hey guys welcome back to my channel if you're new, here I'm B in this video, I'm going to be showing how I made this wig using a sewing machine. So if you want to know exactly how I did this keep watching I'm going to start by measuring the wig cap, I want to get it to about 13 and a half inches. That'S the perfect size for my head and everything is going to be in this. The description box down below everything you'll need to make this wig with um, but before I do anything else, I'm going to cut the lace off of this cap. Usually I would well usually you want to get just a mesh cap, not one with the lace front. Making thing, but this works for me: there wasn't any mesh caps in the store, so I got this one and it worked out perfectly. So all I'm doing here is just cutting off that lace. Now I'm going to start mapping out exactly where I want the tracks to lay and I'm doing this with a metallic marker. So after I start my first line where I want the first track to lay I'm going to put two fingers there, because that's the spacing that I want for this particular unit - and I know that seems like a lot of space in between each track. But trust me it'll work out in the end, this will ensure that your unit is flat and you don't have to worry about any tracks showing in the back while you're wearing this wig. It all works out foreign. Now, I'm getting the lace ready. Well, the lace front ready to go on to the mannequin head before I put it on there, I'm going to cut a split in the middle of the lace. Just so I know where the center of it lays. This will ensure that the wig isn't lopsided. When I place it on the mannequin head here, I'm just putting the measuring tape back where it was so. I know exactly where to lay the lace front, foreign, the size of the lace front down and make sure everything is secure. Before I finish, mapping out the rest of the wig, thank you before I finish. Mapping out the rest of the wig cap, I'm going to make a part down the center of the lace front and braid both sides just to get the hair out of the way. While we're sewing and finishing the rest of this up foreign all right now we're back to mapping I'm going to go ahead and put that measuring tape back up there, then I'm going to finish out the top and the sides foreign foreign. So this is what it looks like I'm going to take this needle and thread in hand. So the lace front down, so I am using a curved or C needle and I'm going to wrap it around the thread around it just to make a knot and just pull through there. As you saw and that'll make a knot, um going on to the lace front and the cap foreign foreign foreign foreign, now that that's done, this is what it looks like now, I'm going to start sewing. So what you see me sewing here are the tracks, I'm taking them and sewing two pieces together, so the bundles that I had they were already folded, so I am just going along that line and making sure that they are sewn together. So what I'm not doing is placing the tracks right on top of each other, I'm putting them side by side and, as you can see, I'm kind of pinching it through the sewing machine side by side and getting them as close together as I possibly can. And that's how I am sewing them on there. So the settings that I have on the sewing machine, um or zigzag, and I'm assuming that you guys already know how to use a sewing machine. I'M not going to go down the instructions on how to use it and do it um, but there are videos, of course, on YouTube that you can watch to know how to sew how to set up your sewing machine and everything. It'S pretty simple um. Also, while I'm doing this, I am taking my time. I sped up the video while I'm going to speed it up here in a second, but I am taking my time doing this. This isn't something that goes by very quickly, especially when you're. First, learning: how to do this? It takes a while to kind of get the hang of it, but take your time when you're doing it and everything should work out fine foreign foreign foreign. So when I get to the end here, I hit the reverse button on the sewing machine and that will just ensure that everything is nicely knit together and it won't fall apart all right, so I'm finally going to cut the lace off of that mesh cap that I started with, and after I'm going to start sewing the tracks onto the cap, I'm also going to hit the reverse button to sew down that first track to ensure again that everything is nice and knit and it won't fall apart. Also, the settings are still on zigzag, the same as when I was sewing the tracks together, foreign foreign foreign foreign tracks that I created that I made on the top I'm going to put single web tracks on there, because I don't want it to look big and Bulky at the top foreign foreign - this is what it looks like now that it's all done and I'm going to cut those strings. There should be loose strings all around that cap, so I'm going to get the scissors and cut that off. Thank you, foreign. So this is what our work our Masterpiece, should look like when it's done nice stitches zigzag across it is finished, and this is what the wig looks like. I hope you guys enjoyed this video. If you did, please give it a thumbs up if you're not already. Please subscribe, I love to have you here until next time. Bye,

Comments
Esther Nabuduwa: It's nice
Harvey Steele: ᵖʳᵒᵐᵒˢᵐ ⭐