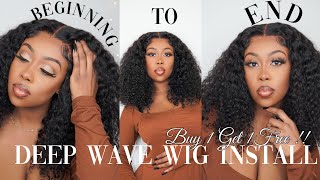
Make A Full Closure Wig With Just 2 Bundles (200Grams)!!!
- Posted on 22 October, 2022
- Lace Frontal
- By Anonymous
Hi guys, this is a video I believe will be helpful to people who prefer natural looking wigs, for cooperate ladies who don’t want too much volume and for anyone who wants to save up on good hair!!!
To purchase wig: https://instagram.com/slayedbyvo?igshi...=
Hair details: 16” 16” + 16” 5x5 Swiss HD lace closure
How to sew wefts: https://youtu.be/VKoQIaLV7Lg
#5x5closure #HDlace #diywig #wigmakerlagos
Hi guys welcome back to my channel so today, guys I'll be showing you how to make a full week using just 200 grams I'll be sharing with you, the do's and don'ts. So please keep on watching. What I have here is my company's hair. These are raw single Donald hair. Each Bond is 100 grams. What I have here is 16 inches, so definitely these two bundles will be 200 grams. I just want to show you what one bundle looks like very nice very full. It is double drawn, very luscious, as you can see, I'm coming it out for you to see the thickness of it. Also, this is our 5x5 Swiss HD lace, closure uh made with exactly the same hair as you can see. It'S really good and really nice um. The first thing I like to do is to sew my label on it, because I just feel it's better this way, instead of after making the hair gets a little messy. The next thing I like to do is to customize my wig cap. This is a custom measurement for a medium size, like an average medium size guys, if you want a video on this, please encourage me with likes, encourage me subscription, because I actually do charge people for to teach them how to customize a dome cap. Now, as you can see, a 5x5 closure is perfectly laid flat on our Dome cap. Now anything after a four by four is quite difficult. So I have a separate video on this. It'S already a detail. It'S already scheduled to be published in four days time. So don't worry about me saying I would do and then I will still not do. Okay, guys I'll just be showing you how I Stitch, I will do one blanket stitch method here. Thank you and I always like to leave enough space so that when I'm attaching my last weft to it they'll be it won't look bulky and messy. Yes guys. It'S very important that you attach your last weft to your closure, I'll, be showing you and then I'll be explaining. Why so, please keep on watching foreign so guys. The next step is to put your space in for your weft to sew in I like to do one inch spacing when I'm sewing in my wefts, so yes I'll be using a crayon, I'm using my kids crayon guys. Please don't report me to these children. Yes, Koreans are very economical and honestly, I feel they are better than Sharpies one shop. Is they drive really fast and they really do stain the lace and hardly come off, but crayons actually are inexpensive and they come out really really fast. Now, when I get to two inches, I like to just put a dot on 0.5 inch spacing just in case. I have extra webs to put there, which most of the time I do not foreign now. The first thing you want to do is to make those straight lines. First, before you go to the side, always do this first, because you don't want to make a mess and draw the lines that are not really accurate. So I like to bend the first one down to the nape, however, because I will not be cutting the wefts, I will be like folding. It there's really no need to bend it down to the nape, so I just draw a straight line which honestly wouldn't matter - and you will see why - so you just want to draw this side and then go to the other side and then draw the other side. As well guys put on my lines, they actually meter outside camera. I promise you so this is what it should look like. Now. I have a video on how to make a bob wig and there I explained in details how I do my sew in so please go and watch that video and you know exactly how I do my sew-ins. What I'll be X just be explaining to you is how I will be bending the weft, so I don't cut them. Everything else is in the other video. Now guys. I want to say this: there are, how will I say it, rules on how many bundles or grams, you need by length, okay to get a full look for 200 grams. Please do not use more than 18 inches. Okay, anything from 18 inches is going to look really scanty. Okay and then you have to use 300 grams, so from 8 inches to 16 inches, you can use 200 grams and get a full look. 18 inches is honestly a Rick's. I would advise you to use 250, at least, but if you want to use 200 it will still be okay right, so anything more than that you do not want to use um two bundles. Also, it would be advisable for you to use a wide closure, meaning anything from five by five to a frontal. If you want to use just two bundles using a two by four, a two by six, it's not going to be easy. So this is how I do my weft bending I actually sew into the weft, okay and um. I double blanket uh this teaching and this will just help it to be really really flat. You don't want to go under the web. You want to go through the weft one or two times double your blanket stitching as I did there and then you can move across the same vein. I want to say a big thank you guys for liking, commenting and subscribing to my channel. I really do appreciate your comments. I appreciate your likes. You can always leave um your comments for me. I will reply. If you check my comment section, I literally reply: everyone, okay, um, so just feel free to leave your questions, and then I reply you as soon as I can again I'll, be pushing the web up to the next line, burning it over and then pressing into the Weft um to get a flat Bend if that makes sense. Now this is what one gram sorry, what's 100 gram mousse like that is one bundle, as you can see it's full and nice and the wefts are just right. I told my manufacturer exactly what to do. Like the length of vest that I need, okay, all these things are things you need to discuss if you're a hair supplier, so we'll just be sewing in our next bundle, I'll be rushing it as well, because what is there to see now not the same, we Can always go to my previous video to see how I do my sew-ins again band cup. I literally did not cut this hair till the last part of it. I bent to the end even the part that was supposed to be very close to the closure. I bent it as well once you sew through the weft trust me it's going to be really flat. I also have a secret method on how to bend um towards the closure and I'll be sharing that later, because currently, I'm charging to teach people uh. Some of these things, so this method, I'm showing you is actually nice. Obviously I have my own signature, look and trade secret that I work with foreign. Sorry I forgot to mention the bundles are not single, they are double. I doubled the weft I mean the wefts. Are not single, I'm not showing them on single? Now again, I want to say the reason why you need to sew your last work together with your closure is that it reduces the tension, tension and pressure on your closure. That is why sometimes you see through their closures will be tearing you need to sew them together to increase the durability of it. Now, that's the last part of our weft. I didn't feel the need to bend that because it was really small and it's going to be really difficult to bend. So I just cut it off. Another secret of mine is that I do not sew. I mean I do not um secure my thread near the closure. Ever I always go to the line below that is under the weft and then do my stitching there so that if you want to patch your closure to the side like really deep like a deep side part, all those thread ends will not be sticking out. So always do this: if you're a wig maker and you're like user needed on trading, is sewing machine, so I'll be securing it and that's it guys. It'S quite easy to make a wig trust me. If you follow these steps and that of my last video to be doing an amazing job, so I'll just be showing what the hair looks like before, I wash it and then when it looks like after styling. So this is what it looks like. As you can see very full for my comfort, ladies my natural, ladies ladies, who don't like excess volume, ladies who are trying to save money, this is for you. This is what it looks like called I'll, be leaving a separate video on how to professionally style hair and get your closure to look flat and beautiful. So this is what it looks like, as you can see, is quite full natural, full um and nice and luscious. So if you want to purchase this has sent us a DM. Thank you for watching this video comment like subscribe to my channel bye.

Comments
Chioma Maduabuchi: Very detailed. Thank you for sharing.
Hyazintha: The hair is ❤️
Charity Eboigbe: This is very detailed and nice. But which needle is best for sewing curved or straight needles.