Detailed Straight 20 Inch Wig Install Tutorial | Beginner Friendly Af | Bestlacewigs
- Posted on 30 November, 2022
- Lace Frontal
- By Anonymous
▶This HD lace wig is from https://www.bestlacewigs.com/ Use my coupon " Mani " to get $30 off for all HD lace wigs.
✿Direct link for the same wig: https://www.bestlacewigs.com/hair/Skin...
▶▶Cyber Monday Sale
Up To $60 Off ! ▶Coupon: CYBER
$50 Off For Order Over $299
$40 Off For Order Over $199
Wig Details In this Video:
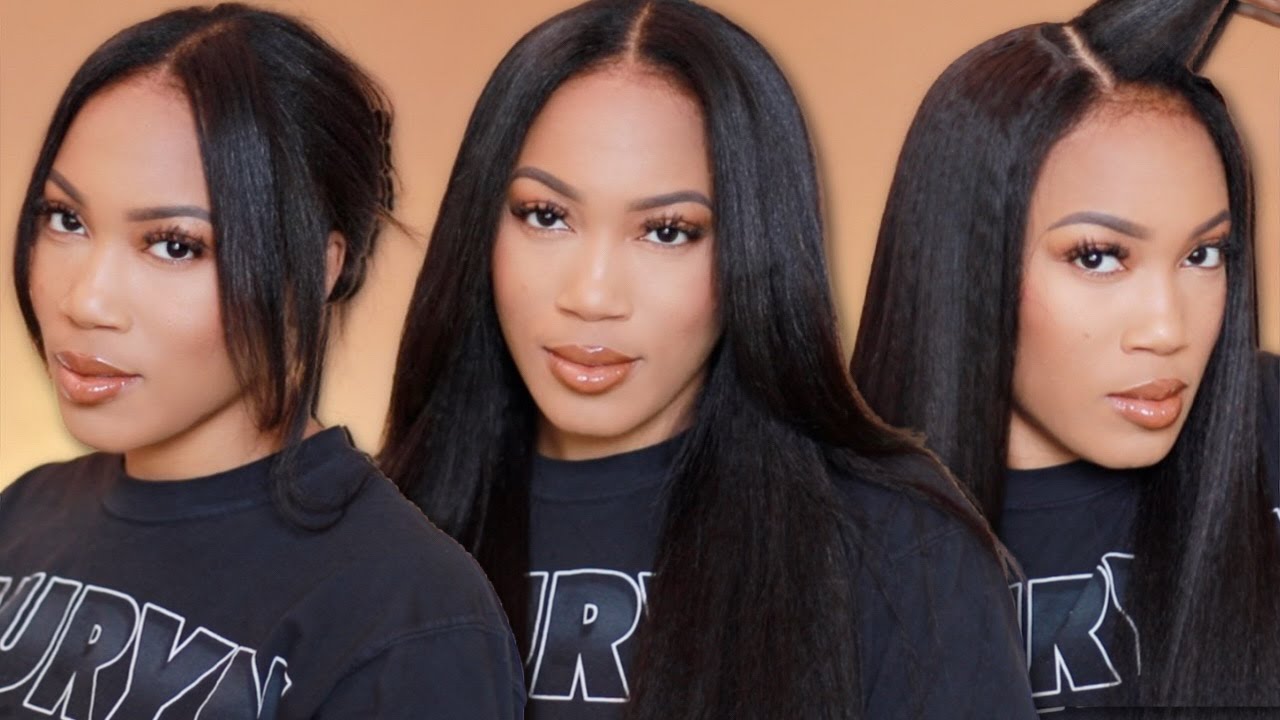
Hair Name- HD03/ Hair Color- Natural Black
Wig Length- 20in Wig Density- 180%
√ Skin Melted HD Lace
√ New Clean Hairline
√ Whole Front Bleached
√ 13x6 Parting Lace Front Wig Cap
More HD Lace 13x6 Lace frontal Wigs: https://www.bestlacewigs.com/c/Best-13...
More Affordable Lace Wigs: https://www.bestlacewigs.com/c/Best-Su...
Keep Up with Bestlacewigs:
Instagram: http://www.instagram.com/bestlacewigs
YouTube Channel: https://www.youtube.com/user/bestlacew...
Products used: Mr. Pen- Elastic Band, 0.6", 11 Yards, Black, Elastic Band for Sewing, Black Elastic Band, Elastic Straps, Stretch Elastic for Sewing, Fabric Elastic Band, Waistband Elastic https://a.co/d/9kZJuXQ
Motanar Professional Grooming Scissors for Personal Care Facial Hair Removal and Ear Nose Eyebrow Trimming Stainless Steel Fine Straight Tip Scissors Men https://a.co/d/8aqqqhI
Nairobi Wrapp-It Shine Foaming Lotion, 8 Ounce https://a.co/d/7LH6UBX
Fantasia Liquid Mousse Spritz 2 oz. Super https://a.co/d/cA9NLIE
Ruby Kisses Cream Foundation 3D Face Creator 2-Color Foundation and Concealer, 12 Hour Wear Long Lasting, Medium to Full Coverage (Level 15) https://a.co/d/0Pgtw7S
Aunt Jackie's Flaxseed Recipes Curl Mane-Tenance Anti-Poof Defining Curl Whip, Smoothes and Defines Dry, Frizzy Hair for Natural Curls, 15 oz https://a.co/d/gItGfeW
My Socials
IG: @kamanijeann
Twitter: @kamanijeann
TikTok: @manijean888
Wig IG: @wigssoldbymani
Email me for business inquiries only [email protected]
Hey guys and welcome back to my channel welcome if you are new here, what's up, what's good glad to see you here tuning in, if you guys would like to see how I installed this wig keep on watching, let's get into this mode so starting off! I already have my wig cap stretched out and on my head and I'm cutting around my ears to yeah. This is basically just first step step number one rule number one get the wig cap on your head and cut around the Ears Boom. Now that that's out the way I'm taking my Erica J hold me down glue and I'm just slightly placing a thin amount around my cap, foreign, I'm taking this Popsicle stick and I'm just kind of smoothing this glue around my cap and I like to place my Glue as you guys seen just right above my hairline, like my hair, is clicked back up underneath baby hairs, edges whatever is pushed to back, so I can have room to see where my hairline is and yeah I'm just taking that glue and smoothing that all the Way around and I'm taking my blow dryer on a cool high setting and blow drying that down until it is all the way dry. It'S not going to get all the way clear, but it's going to get clear enough. Okay, you might have to do it for a minute for it to get all the way clear, but for the most part it's dried down. So I'm taking my scissors and I'm just cutting around this cap, now that it is ready to be cut and yeah like since it's transparent, you can see where the glue is, and you can easily see where to cut off the cap foreign with my skin. I usually use Ruby, kisses cream foundation in the shade rd15 or rd15, as you know, but I was like, let me be a little different like let me use my Foundation that I use on my face like might as well right like it should match. So I'm using Born This Way Too Faced foundation in the shade Spiced Rum boom. Here it is, I was like it, but it is a liquid, so I don't really recommend if you don't want to get makeup in your hair. I don't really know if I got makeup in my hair, but I'm pretty sure I did, since it is a liquid, but nevertheless, now that we have the wig on our head, let's get into cutting around our ears. So I just parted a little section around my ear to see where to cut it and boom just got ta boom, just slice that right on off do the same thing to the other side. On the other side, I don't really have to pull the hair back to cut it. It kind of just I kind of just see it, but on my right side I do kind of have to map it out to get a better leg and to get a better cut, but um yeah you guys now that that is done, pushing that wig back. I'M taking some extra rubbing alcohol and a paper towel and I'm just cleaning off my skin of makeup oils. You know they just you. You got ta clean it. You got ta clean your skin because the lace is not going too late. If you do not clean your skin, but I say it in every video, you guys you guys should know it by now, but um yeah guys since that is done, dried down. I'M taking my same glue. The Erica J hold me down glue. I did four layers of this and, with this time with this install, I made sure to keep the glue near to my cap and not dragging it so far on my head, so that my wig won't lay so far down. So I can have a natural looking hairline to me. You know, like I said in my last video you guys I don't like when my forehead gets like bitten up like taken away from the wig, not from the wig but by the wig, because I put it down too far low. On my forehead, I really hate that look so this time I was like. Let me let me focus and keep it where it needs to be so yeah you guys. This is the last layer that I did you want to make sure to blow dry it on a cool setting on a cool high setting. It quickly dried down um until it is tacky and completely dry, not completely dry, but tacky. Okay, you want to touch it in for it to be sticky and then boom move on to your next layer. So this is the fourth layer that I'm doing here, showing you guys I'm using a thin amount of glue, not too much so that it can spread around evenly foreign okay. Now the most one of the most important steps is putting the lace correctly on to your head. So really, you should be able to see where the glue is dried down at and just place that lace right where that glue is, and also you can tell by your cat, because your glue is going to be really close to your cap. So you can easily see where your cap is okay. This is how far low I should put my weight down so step. That is what I did and I pressed it into my skin so that it can get a nice hold and I put around my elastic band, I let that sit for like 10 to 12 minutes and in the meantime, I like to style my hair. So right now I am parting, my hair into sections Pro tip and using my wax stick. My caricare wax sticks so that I can hot comb them through and really get this hair to lay flat, because when you have straight hair or any hair in general, any texture. You want to go in sections and lay down each part flat. So it can give you know really molded to your head, like it's coming out of your scalp, like no humps, no bumps, none of that just straight sleekness, so yeah highly recommend you guys to do this step. Don'T use too much wax either just enough boom. That'S all you need and hot combing it I like to use my hot comb, really slow. Like really press that out, you see how slow I'm moving like yeah, so repeating that to the other side and yeah. This is just buying time, as my lace is laying, but also key step now that the lace has laid down for long enough. I'M taking these little scissors here and cutting two sections out and then taking a razor and starting to cut my first layer of lace off now. Rookie mistake. I cut you see that right there boom I cut off some of the hairline. I should not have done that. We needed that. I needed that, so it looked a little funky, but that's okay, just learn from me: okay, make sure to really pay attention when you're cutting off the lace and don't get too close. Do not get too close to the hairline get close. You feel me, but not too close to the point where you're cutting off your plucking because yeah but yeah, you guys make sure to cut off your lace in like a really Jagged motion and it's really self-explanatory. Like you guys see what I'm doing for real for real, but not that that lace is off I'm taking some of that glue, because this side here was being a little stubborn. She did not lay down. So I'm taking a little bit of glue, letting that blow dry well, smoothing that out. First then, okay blow drying it cool high right and then that should that bow dries really quickly. I'Ll just take my fingers and press that glue back down and boom voila. So now, to get this place a little bit more melted, I'm taking my icy Fantasia foam, holding Spritz or liquid foam holding spreads. Everything will be linked down below, but yeah, I'm using this and I'm using my finger to kind of tap that product into my lace directly onto the lace and um yeah. I'M just trying to further this smell, because this lace was an HD lace and I'm used to HD lace now, because companies have kind of upgraded and just switched over to HD, but this was a transparent wig, so it wasn't really laying how HD would. But we did our best right. We worked with what we had with the transparent, still was giving scalp at the end of the day, so I'm taking this fluffy brush and some rd13 actually gotcha rd13, which is a little bit darker than my skin complexion. I just patted that around the lace slightly to get this more melted, but yeah elastic band is the one we're letting that sit and styling the hair. So I'm kind of just getting this part together. You feel me kind of pushing that hair to the back so that it can give a clean Moon part like a flat install instead of the hair, just laying any which way and I'm taking my wax, stick and pressing this hair out. Now that I have my part, I just had to show y'all how tiny my head is. I don't know if it's these companies that are sending me big, ass, wigs or if it's my head being tiny, but this wig was just not laying down like it wasn't flat on my head, like it's bulky as at the back like it looks crazy but yeah. I decided to show y'all because it kind of messed up the install like it was a good install, but it wasn't given flat and it's like how a bust down should wah wah wah anyways band is off. We are getting our baby hairs together now pulling out the sections that we need and honestly when it comes to baby hairs and sections and like mapping them out. It makes sense when you pluck your wig correctly, like you, don't have to do too much but yeah either, even if you decide to do minimal, plucking or a lot of plucking, because sometimes I like to do minimal like with this week. I didn't do too much. Plucking, just because I really honestly just didn't feel like it and it's going to melt either way so yeah, you guys, that's the baby hairs that I pulled out for this install taking my hot comb and I'm just pressing these hairs out so that they can lay A little bit more flat and yeah, that's that I'm wrapping that right on up - and I am getting my tweezers and plucking this part, because she was very tiny. So I had to honestly I'm going to pluck it some more now that I have this wig on my head, because it's still kind of small in the back towards the back, but yeah. You guys make sure to really really pluck your part in a straight line and really just kind of get those hairs to out, so that you can have a natural part. Take your time with it, because I was not really taking my time. I wanted it to get done, so I wasn't really. I didn't pluck it to the best of my ability, but yeah make sure you guys get a wide enough part. Nothing crazy, but you don't want a tiny part, so yeah now that that's out the way, I'm curling my baby hairs with my kiss Pro flat iron and a half of a inch and the ones in the front I like to curl upwards boom, get that fluff Right you got ta hold it release right hold. It then release like once you get that curl boom and then I'm going to comb them out to give it more of a natural look. I feel like it kind of just adds on to the fluff, when they're kind of more fluffed out by combing them out so yeah, I'm taking my Nairobi holding foam and that's what I'm going to be using to be doing my baby hairs. Today, I use a little much. I didn't eat that much, but it's okay. It literally doesn't matter like the more that you use the more that you have to work with. If you up or whatever the case may be so yeah, you guys just getting these baby carrots right, I'm gon na shut up now and let you guys just watch me: do my baby hairs, foreign foreign, so just stepping in real, quick, I'm just showing y'all. I was a little irritated, well, not irritated, but frustrated with the way that it wasn't swooping like the Sideburn like it wasn't. Swooping like it wasn't giving that Curly effect, which you guys would see. I fixed later when I started to use some gel, but since I'm new to using foam on baby hairs like pretty much a rookie with it, I haven't really mastered getting the foam to work on my sideburns to where I can have like a curled effect. But you guys will see how I finished here in a second using some ORS holding chill foreign foreign now to my liking period. So I'm laying that down. While I straighten out this hair in the front and kind of in the back. I honestly like to straighten out my wigs on a mannequin head so that I can get it tracked by track and really get the hair, sleek and pressed out. So that's what I do, but I do part out the frontal when it's on the um mannequin head and I just leave that b until I actually put the wig on and then after I ironed the rest of the hair in the front. So yeah, that's what I did just did that and boom. That lace is looking right. The lace is looking together, I'm taking rd13 in this slim makeup brush and I'm getting this part together. I had to pluck a little bit in the front, so I can look a little bit more natural and then I'm taking rd09 yeah rd09 and I'm really y'all see that concentrating you have to concentrate. You don't want this to look wonky it it up. You don't want it to look wonky, then I'm just smoothing that out, so it can look seamless and then I'm taking this black hairspray and this comb um this little trick to make the wig just to look more put together and boom voila. We really done like that's the end of the tutorial, hope you guys enjoyed watching this and um. Thank you all for 70. 000. Subscribers, like are you kidding me, I'm so happy that you guys are tuned in and loving my content, because I love making it for y'all y'all, put a smile on my face every time you guys comment so make sure to comment. Leave a thumbs up. This wig is from best lace, wigs and yeah I'll see you guys in my next one see you

Comments
Mani Jean: Ngl y’all I had to remelt this lace a couple of times to get it looking super seamless I don’t know why it was giving me hard time but it is HD lace, since I’ve melted it more it looks so clean
Jamie Kelly: omg I graduate from college in two weeks and I have a 20 inch wig I’m gonna install !!!! You came in clutch mani saves the day YET again
RoyGirls: It looked rlly gooooodddttttt u slay these every time❤
April and Chrissy: Love your videos ❤ keep up the good job
Im Probably High: This would be my first time buying a wig, how long does the shipping usually take?
TiaLuvv: Hi I’m new to your channel ❤ Can we get more beginner tutorials please
earthtofaithh: i love your videos!! Any tips on how to install wigs when the wig seems to not fit and lay ear to ear properly
Diary Of Shamika: i faithfully watch your videos it's so therapeutic ❤️
Cece Baybee: Can we get a update plucking tutorial? Love your videos btw❤
Jasmine: love the vids good work
Kelisha Lewis: I love your videos, by any chance do you have any bleach and plucking videos?
Introvert ...: Can you do more videos where you color the wigs like you did with the skunk stripe video
sonder: i love ur vids and ur mad pretty
Jada Taylor: Can you do a half up half down with a swoop
Blasian Jae: Do you bleach your wigs before adding the makeup to the cap of the wig?
Nina Negedu: This wig is laiddd!❤
theegoodas: I cut the clips off in the wig .. I feel like it makes it look flatter
Svraya: helloo I wanted to know if you could make a video on bleaching and customizing a wig plz ❤️
Amirecal Jackson: why we dragging our words sis?? You’re doing a great job though.
madison: do u recommend using spray glue or white glue for your bald cap
They.envymeris: ❤
PrettyB Dior:
THE BARBIE: The lashes are lashingggggggg Can we have the deets
ashaRosee: Can you do an Amazon wig?
Laur3nnLuxx Inc.: i literally just subscribed and was thinking when the next time you were going to posttti lovee youuu alreadyyyyy