True Scalp Wig No Grids! 13X6 Free Parting Lace Front Wig | Hairvivi
- Posted on 30 November, 2022
- Lace Frontal
- By Anonymous
▬▬ ★☆ #HAIRVIVI BLACK FRIDAY SALE ☆★▬▬
Discount - Save Money Directly
$40 OFF PER WIG: TONI40 (until the end of Nov.)
$30 OFF DISCOUNT: TONI30 (No Time Limit)
Activity - Sephora Gift Card
Place the order during Black Friday! Get a $100 Sephora Gift Card!
2 Winners will be announced on the December 1st
▬▬▬ WIG DETAILS ▬▬▬
Wig in Video: https://bit.ly/3AEQQBa
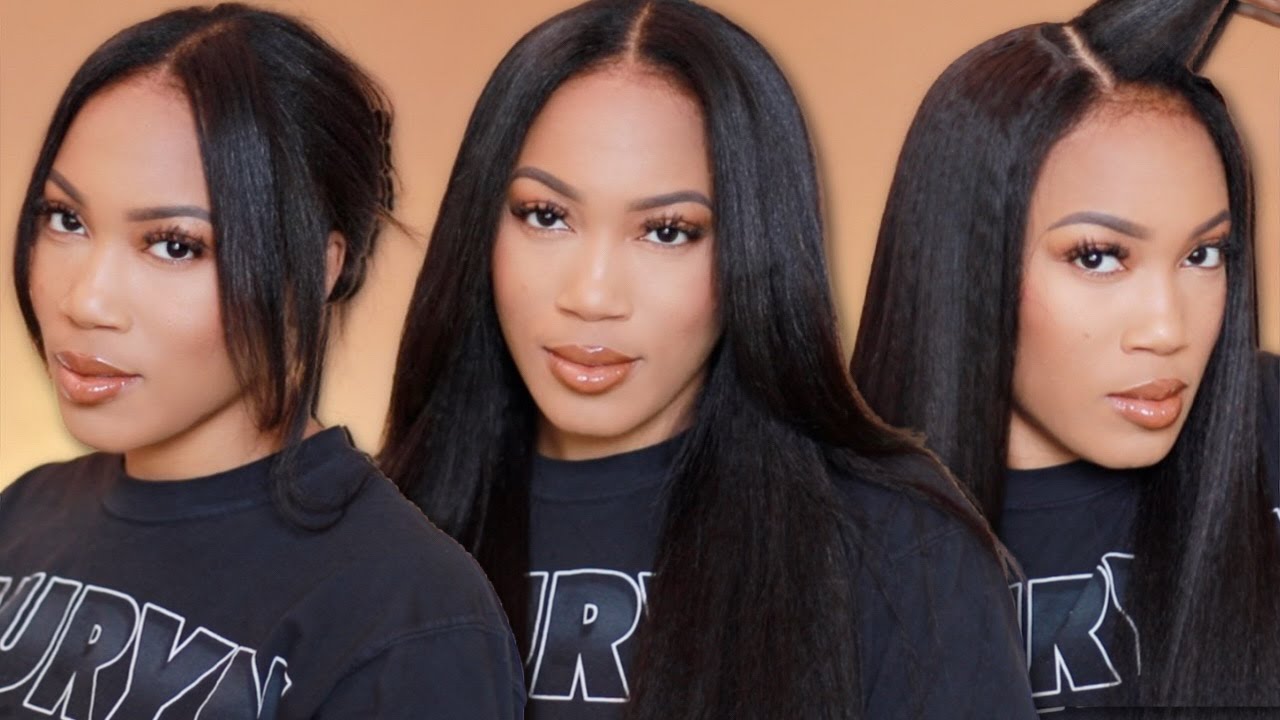
Length & Density: 20 inch & 180%
Lace Type: Invisible HD Lace
Wig Cap Construction:13x6 Lace Front Wig
HD Lace color: Mocha
Cap Size: Medium
▬▬▬ MORE WIGS FOUND HERE ▬▬▬
Hairvivi Official Website: https://bit.ly/3AJgIvF
Hairvivi 13x6 #HDLaceWigs: https://bit.ly/3gC4X3y
Hairvivi #GluelessWigs: https://bit.ly/3EZUE2r
Apologies what up, what up guys? Let'S start with the unboxing! Now the hair comes in this lovely gray and pink box. Is it just me, but it's given House of CD, the wig comes with a whole bunch of instructions, a whole bunch of tools that you need to slip down your hair perfectly, including this new product called true scalp tape. Now the instructions at the back, it's my first time using it and it has a rich variety of skin tones that would match your lace perfectly. I'M going to show you guys how I use this to install my hair, as you guys can see, the frontal itself is given. I didn't have to bleach it. I didn't have to pluck it. It comes pre-bleached clocked and the part itself is about 13 by 6.. Rather, the frontal itself is about 13 by six. It'S very, very deep. I also want to point out that the wig comes with this adjustable head, strap and this stuff is going to fit really really snug on your hair. So if you want to protect your edges - and you don't want to stick down your hair, do not fret you can actually wear this wig as a glueless unit. How lovely is that anyways closer look at the frontal, as you guys can see, it comes pre-bleached pre-plugged. It'S just 10 out of 10.. The fact that I didn't have to do too much to it. I can literally wear it straight out of the box. I'M going to leave all the links you guys need to know right down below. They are doing a very huge Black Friday sale right now, so you guys can go ahead and take advantage of that. Next, step, obviously, is for me to cut off the excess leaves and, as you guys can see, the sleeves and my skin are literally almost the same color. I love this wig so much guys. I also decided to go for color because I'm traveling really really soon - and I just want to you know - have some variety in my wig collection. Now, if you're like me, I love to actually glue down my wigs. I do not want any accidents or any mishaps, so I'm using the eBay, adhesive spray and I'm going to go ahead and put this all over my edges and use my blow dryer on cool once the adhesive spray is tacky enough, I'm going to go ahead and Lay down my front top and give it a very firm press until I'm sure it's secure. So now I'm going to show you guys how I use the true scalp tape to install my wig. This is the shade I'm using. I think this is the shade that matches my skin tone as close as possible. I'M going to go in and clean out my part with my wrap tail comb and I'm going to go ahead and segment off where I want the two pieces of hair in front to fall on my face. Now that I'm done with my parts, I'm going to take off my wig and place it frontal facing up on my mannequin head on a closer look. This is what the true scalp tape looks like and I'm going to go ahead and just cut off. You know the excess by going in an art, shape per the instructions, I'm also going to go ahead and do like a rock fitting to see how much I need to cut off, because obviously my part is too short for the tape. Once that's done, I'm just gently peeling off the tape from the sticky side and placing it directly onto my part. Don'T forget about the center part as well. I'M going to place the rest of the tape onto my center part and it's going to have this lovely slush. Look just like so, and this is what it's looking like. Do you guys see the difference so to the left? I have my frontal before the scalp tape, and this is what it looks like after the sculpting. So once that's done, I'm just using my elastic band to secure my frontal, I'm going to go ahead and do my two pigtails and use an elastic band to just secure it. Roughly then, I'm going to go in with some hair wax just smoothing away all the flyaways and to ensure the hair is as slick as possible, so for the space buns they are very easy to do. All you just need to do is a Twist. You can make it as Loose as possible. The looser it is the better for that rough look. Then I'm going to go ahead and just like start rolling it onto itself until I get to the very end and I'm going to use my got to be sprayed just secure the bun into place. Now, I'm just trimming off the front parts to ensure that they are equal and I'm going to go in with my straightener and just straighten this and curl the ends of my hair, so guys this is the final look. Let me know how you think I did right down below. Do you guys see a major difference in my parts? Are you guys going to be trying the true scalp tape? Let me know all the links you guys need are listed right down below in my description box already. Also, you can take advantage of the discount code 2030 or 2040, depending on how much you want to save and again my hair is from here Vivi. Okay. This is their Julia brown, wig and until next time my loves peace and love. Bye.


Comments
Pearl Gabatlale: Am honestly inlove with you Toni all the way from Botswana
Kea Maaroganye: That lace trick is def a winner beautiful beautiful hair !
Gracious Umukoro: It's a crime to look this good
Hairvivi Service: You are so gorgeous Toni
Ali Pearl Hair: Cute!
Che- Say Shay: Oh my GAWD❤❤❤❤
Mabii M: Love from South Africa
Blackbarbie: cute
📚تفسير الاحلام / اتمنى دعمكم بالاشتراك ومرحبا بكم: السلام عليكم ، انا مفسر احلام وتفسيراتي صحيحة ، marhaba
Azerty Treza: Love you from algéria
𝗣𝗔𝗦𝟯𝟲.𝗙𝗨𝗡: - NЕW А DАТING ONLINE u