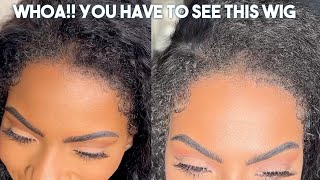
Omg!! New Method To Install Natural Hair Clip Ins!! Type 4 Hair No Glue, No Lace Ft Idn Hair
- Posted on 27 January, 2023
- Clip-in Hair Extensions
- By Anonymous
Hey fam! #msnaturallymary here In today's video I'm showing you all how to Fake #NaturalHair growth with #clipins
~~~~~~~~♥#IDNHAIR wig details ♥~~~~~~~~
IDNhair means "I Define Natural".
Our mission is to give natural products that are practical, beginner-friendly, and natural.
▶ Hurry Up!! Sale Time: Coupon Code: IDN10 to save 10% off
▶ Free shipping & Free return !!!
▶ Same Wig in the Video :
Wig Link: https://bit.ly/3Wcy90i
Lois Deep Curly Seamless Clip in Hair Extension Human Hair
▶Mary Special Coupon Code: Mary20, Get 20$ Off
➊ 100% Real Raw Remy Hair-Best Quality
➋ Paper Thin silicone wefts is only 0.5mm
➌ Can be dyed any color
➍ Lay flatter and are significantly lighter and thinner
➎ Last at least 12 months
➏ Thick and full from start to end
➐Shedding and tangling free
Length: 20 inches
Color: Natural Black-Can be dyed into any color
Texture: Curly
Weight: 240g- Glam Full Head Set
~~~~~~~♥#IDNHAIR Collections ♥~~~~~~~
Website: https://idnhair.com/ ( I Define Natural)
Glueless 13x6 3D Scalp Knots Wig: https://bit.ly/3TI1OwH
Glueless Scalp Knots Wigs: https://bit.ly/3bRSQwc
Glueless HD Lace Wigs: https://bit.ly/3bQ5bBl
Glueless Bob Wigs: https://bit.ly/3AqPfzF
Glueless Celebrity Wigs: https://bit.ly/3NLBizc
~~~~~~~~♥Let’s Be Friends on ♥~~~~~~~
Instagram: https://www.instagram.com/idnhair/
TikTok: https://www.tiktok.com/@idnhair
Facebook: https://www.facebook.com/IDNHAIR/
YouTube: https://bit.ly/3yInzoO
Time Stamps:
00:00 Intro to Omg!! Fake NATURAL HAIR GROWTH with Clip ins NO GLUE, NO LACEft Idn Hair
00:48 Unboxing the natural hair clip ins and specs
1:12 Showing my natural hair length
1:22 Washing the clip ins
2:04 Applying the styler & defining the curls
2:20 Natural hair prep for the clip in install
3:30 Slicking down my edges
4:33 Time to install the clip ins
5:39 showing how I create a flip over look with my clip ins
8:04 Final results for the first style
8:20 Showing different styling options
9:03 Half up half down hairstyle
12:11 Last style
13:50 Outro
Products mentioned:
-Aussie Moist 3 Minute Miracle Moist Deep Liquid Conditioner, 8 Ounce (Pack of 3) https://amzn.to/3BXuhIt
-Detangling brush: https://amzn.to/3YIcwH0
-Essential 17 Hair Growth Oil by Alikay Naturals: https://amzn.to/3HgV6t4
Check Out My Amazon Storefront:
https://www.amazon.com/shop/msnaturall...
Previous Crochet Braid Videos:
NO CORNROWS ‼️ FAST & EASY CROCHET BRAIDS in No time | Natural LookingDetailed Tutorial ft. Outre https://www.youtube.com/watch?v=kq7u1T...
CROCHET BRAIDS: NO CORNROWS⚠️ NO BRAIDS AT ALL ONLY 1 PACK | GREAT PROTECTIVE STYLE ft. Divatress
https://www.youtube.com/watch?v=YBXUEh...
THE BEST DIY CROCHET BRAIDS: FAST & EASY| NO CORNROWS| VERY REALISTIC ft. Janet Collection
https://www.youtube.com/watch?v=Vlsb_J...
EASY Method to Install CROCHET BRAIDS | NO CORNROWS | NO HAIR OUT| NO BRAIDS ft Trendy Tresses
https://www.youtube.com/watch?v=dZbcYF...
NO CORNROWS| EASY METHOD to Install CROCHET BRAIDS (Detailed TUTORIAL) NO HAIR OUT: ft TrendyTresses
Let's Stay Connected!
Instagram: https://www.instagram.com/iammarybenne...
Facebook: https://www.facebook.com/mary.taylor....
TikTok: https://vm.tiktok.com/ZMJwn6hQC/
Twitter:https://twitter.com/MaryTaylor7
Tumblr: Msnaturallymary
Pinterest:http://www.pinterest.com/marynatural/
// TECH EQUIPMENT:
Camera: Canon Powershot G7 X Mark II
https://www.amazon.com/Canon-PowerShot...
Lighting: Diva Ring Light
____________________________________________________________________
➡️For business and partnership opportunities please [email protected]
Are you ready for my new favorite things? Hey y'all, welcome back to my channel, it's naturally Mary here and if you are new, be sure to subscribe before you leave. I have such a great video for you all today, I'm going to show you all how to fake natural hair growth, because y'all know we are always trying to grow our hair on this channel and my hair is getting longer and I'm loving it. But I'm going to show you guys what to do as your hair grows. If you want more length we're going to be using clip-ins from, I Define natural, and these are paper thin clippings. They do come with a storage bag, which is nice and handy, and this is what they look like. These are the lowest clippings. Now I got them in lit 20. These are deep curly and the curl pattern is so beautiful, and this is the Glam full headset. So you're going to get enough to cover your entire head right. Now, I'm going to show you all my natural hair out of the braid, so you can see how long it is versus the clippings and y'all know. I love length. I love volume, so I want to add some clippings to give me a little extra judge now before we get into the insulation process, I'm going to wash the clippings and I usually co-wash it with regular conditioner. But this time I'm using deep conditioner because I ran out of my co-wash, so I'm just going to apply the deep conditioner to the hair and it's just going to make it even softer. So I'm going to do that now and then I'll come back on when we move on to the next step. Yeah yeah tell me what you mean to me: are you coming home anytime soon, all right now that we've conditioned the hair? It'S time to add the styler, the styler that I'll be using is just a leave-in conditioner, and this one is by melanin hair care, and I love using this product because it moisturizes the hair so nicely and adds a really nice shine. I'M also using my detangling brush in order to define the curls and also distribute the product, I'm going to let that air dry overnight and proceed to prep my natural hair. Now this process, for me, is pretty simple, because I don't do cornrows right now, I'm going to go through the process of just moisturizing, my hair, I'm adding and leave-in. I'M also adding some oil to my scalp, just making sure I'm giving my hair the proper TLC and then I'm going to plait up the back and then proceed to work on slicking down the front so that I can prep for my style with the clippings. Stepping on a fragile piece of art, some things lost control, how many times all right now that we braided and pinned up the bag. It'S time to work on the leave out, so I'm going to show you guys how I slip down my edges. These are the products that I use, I'm going to put a wig cap on the back and then proceed to add the all natural curl defining glaze. First, follow it up with the Eco Styler gel, and then I like to layer it with the got to be glue gel now. I know that's a lot of products, it's a lot of gel but because I have 4C hair. This is the only way that I'm able to get my hair, nice and Sleek, but also shiny. Now, the texture that I'm going to be using is not my hair texture, so I want to make sure it's as stretched as possible. So after applying these products and getting my hair, nice and Sleek in the front, I take the length of my hair and I wrap it around the back of my head, and this is what I do all the time when I want to stretch my hair in The front I'm going to allow that to set overnight and then I'm going to proceed to install my clip-ins, keep in mind that if your hair is in a silk press, then you don't have to do all of this. It'S also if your hair texture matches the clippings perfectly, you don't have to use the technique that I use. You can just take out your leave out, install your clip-ins and just lay your hair over the clippings and it'll look very natural, but I have to do a little extra because I have Type 4 hair. So it's the next morning and I'm going to take off my satin scarf and I always love how my edges turn out in the morning using the products that I share with you guys. So if you're tight for a natural and you haven't tried those products, you should definitely try that line up right. Now I'm just going to separate my hair, but I could have just pinned it back actually, because the method that I use to install my clipians didn't actually show my leave out as much so it wasn't necessary to have it out if you'd like to pin your Hair back, you can absolutely do that. So now, I'm just going to separate these clip-ins and these are paper thin. So the construction at the base of these clip-ins is going to allow for a nice seamless blend, especially if your hair texture matches this particular hair. Texture perfectly and you can actually leave out your hair in the middle. Now when I install clip-ins, I never leave my hair out in the middle because I feel like because of my texture. It Tangles too much. So I just opt to plait my hair up, but you can also do cornrows and then I just proceed to install the clippings over the braids that I've created the goal for this style was to create sort of a flip over look when my hair naturally flows Over the extensions, but when installing the first weft I decided to bring the hair forward to conceal my hair just to make sure it looked like it Blended, a little better. And although I installed the First with the normal Direction, I decided to turn the other West. The opposite direction, which is a strategy that I use quite often when I'm creating sort of a flip over or a bang look, so it was perfect for this style. This technique is also really good when you're installing your clippings in a curved manner. As you all will notice, I'm not installing them straight across, like you typically would I'm starting with the part and then curving it around the back of my hair, so that when I pull the hair back, it's going to flow over the weft to cover that weft. In the back, keep in mind that installing the clippings in the opposite direction is only good when your hair is already braided or platted up. Do not try this when your hair is left out in the middle because it will be a hot Tangled mess. It'S just not a good idea. Now I'm going to proceed to continue this process and if you've watched any of my clipping videos, I'm sure you already know that I always start installing my clip-ins in the front first. This helps me to ensure that my placement is the way that I want it. I also do this to ensure that if I were to run out of clippings you're not able to tell in the back as much as you would be able to in the front so I'd highly recommend starting in the front. First, then, in the back, especially if you're not leaving any hair out. Oh you know I will pull up on you, but somebody like you ain't alone, so now we're going to try some different styles. I thought it would be really cute to pin the side bag and then I'm going to try the half up half down hairstyle but with clip-ins. Your styling options are endless, especially with seamless paper thin clippings, like these ain't wasting no time ain't wasting no time. Hallelujah trust me when I say I ain't doing this for the fame, I'm just introducing something fresh thanks to them in Christ, blesses blesses, blesses, blesses blesses bless their favor. Now, keeping them close to me. Oh ain't, we supposed to be yeah. I just been keeping it cool like that Ocean Breeze. All this weather now the last style that I'm going to show you all is very similar to the style that I wear all the time but be sure to pull the hair back over the West in the middle. I forgot to do that, but just keep that in mind and you guys will see what I mean later and if I show you take it, that's what I'ma Do take it easy Time coming back, yeah baby, I baby this style turned out so great, but once Again be sure to use your leave out to cover the area near the crown just so the West aren't exposed. This is the area that I mean so just pull your leave out over that area and you'll be good and you can actually pin it down to help to secure it in place all right, y'all, that's the end of this tutorial. I hope you all enjoyed this clip in install all the styles that I created. I did decide to add one more weft. I did have one left over, so I'm just gon na place it over the area where my kinky texture is kind of peeking out just to make it more voluminous and to conceal that area. But I hope that you all enjoyed this tutorial be sure to like comment and subscribe. Also share this video with a friend check the description box for all the links and specifications to this hair. I love you guys and I'll see you all in my next tutorial. Bye guys, you need to relax, I'm speaking the facts, I'm getting the checks and I ain't paying the text nah, I'm really capping. I ain't on that cause. Whatever


Comments
Sister Love: I literally just did a no leave out clip ins install last night. It was my first time but I got tons of compliments. I did it like a faux side part and closed up the top with like a flip down method. Anyway gorgeous hairstyle as always
Anita S: Thank you so much for all the time and effort you put in to making such quality videos. ❤ Keep up the GREAT work!!
Alice: What beautiful clip ins. It looks just like your real hair which is really growing and looking so healthy. I love all of the styles and thank you so much Mary for a great video.
Ms oddballz: Amazing . So easy to do and versatile. You are so creative with every tutorial that you do Mary. I learned a lot from you.
Coco Love: You make it look soooooo easy. I'm going to try it and hope it comes out like yours!
MM: My hair game has improved because of you Mary
Kenyetta Whitford: Mary...you bring it every time ❤️
Monie Mone: Honnnnnnnnnnnn-TEA! You better come thru with this super cute hairstyle. Thanks for sharing. I’m sure I will mess this up but imma try… lol
Shopper: You are Awesome when it comes to hair styling, caring for your hair, wigs, etc Thanks for sharing!
Ms. Michelle Agalte: Mary's Magic is what I call it! Go head on girl! You always get it right and it looks so natural!!! Keep on creating magic Gem .
AW: Hi, I'm just starting wearing clip ins and Having trouble blending in the front, but this video was nice. You look good!
Author Lydia Green: First that purple sweater is beautiful, purple is my favorite color. Second the hair is gorgeous but you can rock any hair and style and still be cute .
Gorden & Martha Dove: Love this so much!!
Lavendar Ladybug Travels: Looks great!! Are you still doing your hair growth routine with the different oils? Your hair is really growing!
Revo GEM: Love your hair and videos. Beautiful as always
Soso Des: GURLLL you are so gorggg, naturally ♀️
pearlita nurse: Blessed good afternoon Ms Mary I love your show don't get much time to see you,I love your hair and I would love some of those hair clips you are very beautiful ❤️❤️ also your husband say hello for me , love coming from Barbados
MS JEANETTE SUZETTE HOPKIN (NEE MORRISON): OK, Ms Naturally Mary what do you have for us today. Looking great as usual, suits you.
Neka96 YOLO: I love your hair tutorials
Julia Morales: Those clip ins look so good on you! Got me thinking real hard!!
St.Marilyn: Yesssss, this is cute
Sammy Da Goat: Cuteee Makeup Lovely Hair Amazing Smile
Cha M: Love it ❤❤❤❤
Shannon: Luv it...Magic Mary!!
Jerard Bennett: long hair don’t care!!!
Eve B: Your hair is really growing. You inspired me to make an appointment at her growing hands!
MS JEANETTE SUZETTE HOPKIN (NEE MORRISON): I like trying out new wig hair style but I can't afford it at the moment. I wish I was doing this like you trying out new wigs and hair style for afro hairs. It looks like so much fun. But you are in America, USA and I do not think the wigs company support anyone in the UK .
MS JEANETTE SUZETTE HOPKIN (NEE MORRISON): I like the last hair style look best.
Stephanie Jackson: Is ur natural hair wet
Sori Yazz: A definite winner
Diane Washington:
Samantha X: Beautiful as usual ❣️❣️❣️❣️
Sandra Kelly: *Investing in crypto now should be in every wise individuals list, in some months time you'll be ecstatic with the decision you made today*