Easy Crochet Hair Clips Tutorial * Two Styles & Flowers (Free Pattern!)
- Posted on 24 November, 2022
- Clip-in Hair Extensions
- By Anonymous
Learn how to crochet a hair clip in just a few minutes! In this video, I demonstrate two different styles of clips (one with a "Lacy Edging" and one with a "Neat Edging"), as well as give step-by-step instructions for a pretty 5-petal cherry blossom applique that you can add on! This beginner-friendly project is fast to make. You can get the metal clip here: https://amzn.to/3XktKtk
Follow along with the free written pattern linked below, or grab the printable pattern!
Contents:
00:11 Intro
01:11 Clip R1
06:40 Option for Lacy Edging (Clip R2)
09:27 Option for Neat Edging (Clip R2)
11:46 Flower Applique
———— Pattern Links ————
• Free written pattern: https://www.sweetsofties.com/2022/11/l...
• Printable PDF pattern download at: https://payhip.com/b/179Kj
• Save it on Ravelry: https://www.ravelry.com/patterns/libra...
• Save this project on Pinterest: https://www.pinterest.com/pin/create/b...=
———— About the Pattern ————
The Lola Hair Clip is a sweet accessory that works up in minutes! The pattern features two different oval clip styles: a lacy edging and a neat edging. Also included are two floral appliques (5-petal cherry blossom and 6-petal puff stitch flower). It is a no-sew project if you attach the flower using hot glue. This fast and easy crochet project is beginner friendly, as it also comes with photo references and a step-by-step video tutorial. All you need is a metal snap barrette clip.
The style and aesthetics include: Cottage, Cottagecore, Maidcore, Kawaii, Mori Kei, Victorian, Woodland, Pastel, Goth, Classic Lolita, and Sweet Lolita.
The Lola Clip is perfect to make as a last-minute birthday gift, holiday gift, party favor, cosplay, or even to stock up for craft fairs and markets. This trendy accessory is suitable for all ages of girls and women, such as: babies, toddlers, kids, children, teens, and adults.
LEVEL: ★☆☆☆☆ Beginner/Easy. Requires familiarity with stitches used (below).
STITCHES & ABBREVIATIONS (US TERMS):
FO = fasten off
YO = yarn over
ch = chain
sk = skip
sl st = slip stitch
sc = single crochet
MATERIALS:
• Recommended Yarn: https://hobbii.mvk.co/2ox0h
• Clover Amor Hook (2.25mm hook): https://amzn.to/3fXpjkD
• Metal oval snap hair clip: https://amzn.to/3XktKtk
———— Social media & contact ————
Website/blog: https://www.sweetsofties.com/
Online store: https://payhip.com/sweetsofties
Youtube Channel: https://www.youtube.com/SweetSofties
Facebook: https://www.facebook.com/sweetsofties
Instagram: https://www.instagram.com/sweetsofties...
TikTok: https://www.tiktok.com/@sweetsoftiescr...
Twitter: http://twitter.com/sweetsofties
Etsy: https://www.etsy.com/shop/sylemn
Ravelry: https://www.ravelry.com/designers/swee...
Pinterest: https://www.pinterest.com/sweetsofties...
(Music: https://www.bensound.com/royalty-free-...)
#freecrochetpattern #freeamigurumipatterns #freepattern #freepatternamigurumi #amigurumi #crochet #crochettutorial #crochetpattern #amigurumi #amigurumis #amigurumipattern
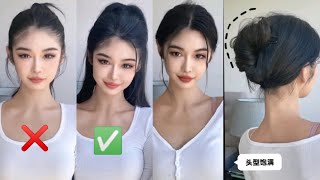
Thank you, hello, and welcome to my full video tutorial on how to crochet hair clips I'll be showing you two different styles of Clips, as well as an optional flower that you can attach and make your clip extra pretty. As a note, the written pattern is shared on my blog for free, so please check out the link to it in the description box below to follow along with this tutorial. If you would like to support me, I'd love if you can grab the printable ad free, pdf pattern, which includes lots of picture references and full written instructions for not only one flower, but two types of flowers in this video tutorial I'll only be sharing how to Crochet the five petal Blossom, but the pattern does include a bonus. Six petal puff stitch flower. Now. The two styles for the clips include a lacy edging which is shown here on the top, and it's really pretty and frilly. The second style has a neat, edging or trim for a tidy look, let's go ahead and get started foreign we're going to open the clip so that the opening is facing to your right side and we're going to start by attaching yarn to the top left side Of the clip and basically single crocheting around, let me show you how that's done so. I'M going to insert my hook underneath here, pull through to attach the yarn holding on to the yarn end here, so that it doesn't come loose and then going to the first pull a chain through here. So I've got this Loop ready. Now that's the start and I'm gon na jump now to the other side of the hair clip and I'm going to begin single crocheting on this bottom Edge. So turning my hair clip around I'm going to hook my yarn over like this yarn over and go through the two Loops for a single crochet and uh, repeating that all the way around, as I'm doing so, I'm holding on to the yarn tail underneath so that I can naturally weave in this yarn tail without sewing it later you're welcome to weave it in. However, you want, I just find this to be an easy way to decrease the amount of weaving in the ends. So, as you can see, I'm going in through the hair clip pulling out and single crochet, and I feel that that's probably enough stitches to hold on to my yarn tail here. So I'm going to just drop this yarn tail now and keep single crocheting along. I will go ahead and cut off that yarn tail later, so that it doesn't Show oops and the hair clip is going to be a little fidgety to work with because you're having to go through the small opening. But just try your best and see which hand position is most comfortable for you now. The key to single crocheting around is that you want to make sure you have a multiple of three. If you're going to choose to do the Lacy trim around your hair clip so we're going to work on having a multiple of three stitches, so here um, I find it easier to count when I'm getting close to the end here. So I'm going to count how many I have that's one, two, three, four: five: six: seven, eight, nine ten, eleven twelve thirteen fourteen fifteen, sixteen seventeen, and so let me do one more for 18.. The Stitch count will vary depending on how thick your yarn is and how big your hook is, but I find that 18 stitches kind of wraps this side up pretty well. So now I'm going to go ahead and crochet through to the other side. Now with 18. On one side, I want to match the other side too. However, many single crochets you have, you want to make sure you um also have the same number on the other side, so I've got now 18 on the top edge here as well, and I'm just going to space out my stitches a little bit so that it Looks like it's more even here and, as you can see, you've come all the way. Um, almost all the way around you have a little bit of this end showing which is okay, because we're gon na go ahead and put a flower on it later. What you'll do now is join with a slip stitch to the very first uh single crochet you made, which is going to be on the side down here. So I'm just going to join with a slip stitch like so and now um. You are finished with part one of your hair clip. You can opt to choose either the neat edging or the Lacy edging to go around your hair clip. Now that's going to be worked, um uh without fasting off for this section, but let me show you this is the neat edging and this is the Lacy edging all right. So let me go ahead and demonstrate the two types of edgings enough: here's: how to do the lace, edging for the lace edging remember we tried to do a multiple of three stitches, all the way around for the lace, edging you're going to start by chaining. Three skipping the next Stitch slip stitching in the one after slip, stitching in the next Stitch and that's one repetition. So let's do that again we're going to chain three skip the next Stitch slip stitch in the following Stitch and slip stitch in the next Stitch. Let'S do that again we're gon na chain three skip a stitch slip. Stitch in the next Stitch slip stitch in the following Stitch and that's the repetition you're going to work this all the way around until you reach the very end. At the end, you will simply fasten off and weave in your ends. Here I have just finished going all the way around the entire edge of the hair clip and, as you can see, you've got this nice Lacy texture, going on what you'll do when you reach the end is simply fasten off with a tail that you'll use to Weave in um and not together, you can also go ahead and trim your yarn tail for that starting yarn tail. If you um crocheted it into your work like I did here, and if you find that your Frills may be a little scrunched up in certain areas. You can also kind of squeeze your work and pinch it around to make sure it looks the way you want it to be so, for instance, I find that the top here doesn't have as much um like the Frills a little too spaced out. So I'm going to squeeze some of the Frills closer over all right and that's that for doing the Lacy edging. Now we're going to go ahead and learn how to do the neat edging so you're gon na first start off with round one of the hair clip and when you're finished with that we're going to start on round two by doing the following you're going to slip. Stitch in every Stitch around so, if you um start, if you want to start off going to the first single crochet here and pull through with a slip, stitch go into the next Stitch and pull through for a slip. Stitch you're going to repeat this all the way around fastening off when you get to the very end of the round. As you work through you're going to create this um raised texture on your hair clip and it's going to really provide a nice refined. Look for the edges when you get to the end of the round, You're simply going to fasten off here like so, and you can weave in the ends you might want to um. If you see the bottom edge here, it's a little bit frumpy. What you can do is use your fingers to just straighten out your stitches a bit. That'S usually a necessary step to do after this part because of your attention. Um, that you use, or at least mine mine, is not perfect. So I just need to straighten out my clip a little bit foreign and that's that for crocheting, the neat edging around your hair clip we're going to go ahead and crochet a pretty five petal cherry blossom to put onto your hair clip you're going to start off With the magic ring in the magic ring, you're going to insert 10 Single crochets, so here I'm going to hold on to my ring and I'm going to put my hook in pull out, make a single crochet. Do this nine more times for 10 total after you get 10 Single crochets in your magic ring, you're going to go ahead and pull the tail a yarn tail tight that will cinch up your magic ring. Then you're going to insert a slip stitch into the first single crochet to join your round, so I'm gon na find where I did my first single crochet here and then I'm gon na yarn over pull through directly into a slip stitch now to begin our round. We'Re going to chain three or excuse me chain, two, not chain three chain, two and then we're gon na. Do the petal Stitch. So here's the petal yarn over insert your hook into the same Stitch yarn over pull through a loop yarn over pull through two loops and we're going to repeat that three times for the whole petal, so yarn over insert hook into the same Stitch yarn over pull Through yarn, over pull through two loops, one more time, yarn over insert hook into the same Stitch yarn over pull through yarn over pull through the first two loops. So once you repeat that three times, total you're gon na have four loops on your hook. You'Re going to yarn over pull through all four loops chain, two slip stitch in the next Stitch and then slip stitch in the following Stitch. Now we're going to repeat this sequence, so, let's chain two insert your petal remember to yarn over insert your hook: pull through! Go through two Loops repeat two more times yarn over, you can start staying Place yarn over pull through go through two loops yarn over insert into the same place yarn over pull through yarn over go through two loops. That gives you four stitches. Excuse me, four loops on your hook: yarn over go through all four loops chain. Two slip stitch in the next Stitch then slip stitch in the next Stitch and repeat again so chain. Two. Do your petal Stitch one repetition, two repetitions, three repetitions yarn over pull through all four loops chain; two slip stitch in the next Stitch slip stitch in the following Stitch: I'm just going to go through the last two petals here, relatively quick and easy little petal to Do I like this um style, because it gives you a lot of volume for um what feels like minimal work at the very end, once you have finished your um going all around and doing five petals you're going to fasten off with a long yarn tail, and This is what you're going to do to sew use to sew your flower onto your hair clip so just pull the yarn in tight um, especially that starting yarn tail, which will cinch up the little magic ring hole. Sure so that my yarn ends go to the back of the flower and they don't stick in the front, hang out in the back where they're advancable there you have it. That'S um the five petal cherry blossom and it's ready to go onto your hair clip. So you can go ahead and sew it on um to the edge of your hair, clip where the um end is where your yarn end is. Basically, when you open up your hair clip it's going to be at the closed end like so so you can go ahead and sew that on. This is what it would look like with the um neat edging and if you want to put it on a clip with a lacy edging, you can do that too, and it will also look lovely like so, and these will be really fun to embellish by putting Um extra accessories like maybe if you want to attach a little pretty little bead to the center here um, you can definitely be creative with this project, all right thanks so much for watching and hope you have a fun time, crocheting bye now. Thank you.


Comments
josi: Super awesome tutorial, thanks! And they are soo cute! I made one ❤
Danielle Cordova: Omg what an adorable pattern! I just love it. My granddaughters are 12 and 7 but I'm sure they will still love these. I'm 56 and I want some for myself! Lol
Stitches by Sharon H: These are so precious!! Thank you for sharing!
Lyssy: Where can I buy these type of clips or what are they called