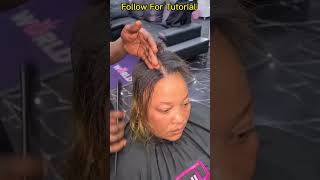
Easy Natural Hairstyle Tutorial For Beginners | Simply Cam
- Posted on 21 March, 2023
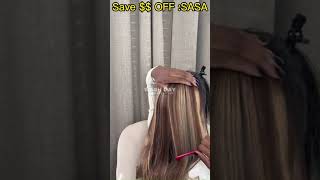
- Clip-in Hair Extensions
- By Anonymous
in this video, i show you how to do super CUTE and EASY claw clip hairstyle on type 4 natural hair using curls queen clip-ins! this is a great and easy hairstyle for natural hair/curly hair (especially for any season). i show you my hair tips for a quick & easy installation!
☆ curls queen info ☆
Use Code YTSM to save $$$ OFF
I am wearing a 18 inches clip in hair extensions in water jerry curly texture from CURLSQUEEN .
https://www.curlsqueen.shop/94B1b993
√ 100% High Grade Brazilian Virgin Human Hair
√ Upgrade 10 Pcs Set for A Full Head
√ Double Wefted and Double Dawn
√ True To Length
√ Thick & Full From Top To End
Connect with Curlsqueen :
Instagram : https://www.instagram.com/curlsqueenof...
Tiktok : https://www.tiktok.com/@curlsqueen.com...
☆ email ☆ (for business inquiries only)
☆ tags ☆
#SimplyCam #naturalhair #type4hair #naturalhairstyles #camrynelyse
Shop the same #waterjerrycurly #clipinhairextensions for #naturalhair
☆ connect with me ☆
MAIN CHANNEL:
Camryn Elyse (https://www.youtube.com/channel/UC-Zh7...)
instagram:
@camrynelyse_ (https://www.instagram.com/camrynelyse_...)
@xoxo.camely (https://www.instagram.com/trashcamxspa...)
tik tok:
@camrynelyse_ (https://www.tiktok.com/@camrynelyse_?)
☆ music ☆
https://www.youtube.com/watch?v=AaWmPk...
https://www.youtube.com/watch?v=GF6XFA...
https://www.youtube.com/watch?v=WHrwE6...
https://www.youtube.com/watch?v=Xp-WXO...
sc: 1,009
comment ‘’ if you’re reading this
love, cam ☆
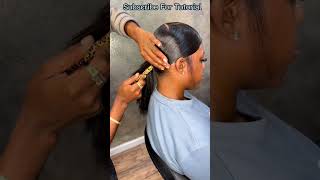
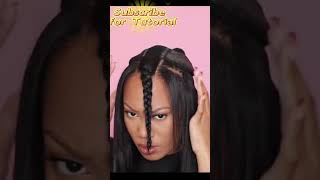
Take me hey guys what is up it is Cam, welcome or welcome back to my channel yeah in today's video I'm going to be doing a natural hair tutorial, showing you guys how to take your hair from this to this. This is a cute slick back claw clip half up half down hairstyle from a twister. I did this entire freaking hairstyle from a twist out, so I really do want to post a twist out tutorial here on this channel, because that's pretty much the basis that I use for all of my hairstyles, if not most, of my hairstyles, especially because they are So easy to style and manipulate, and it's a great way to make sure you're keeping your hair, nice and elongated stretch. So it is not prone to Tangled and single strand knots and other things like that. So eventually I will post the twist out tutorial, because that is literally my go-to, but for now all you need to know is that I did this based off of a twist out. I went ahead and added in these clip bins from curls Queen. Thank you. So much to curls Queen for sponsoring this video and sending me these clip-ins to try out and share with my viewers. It is much much much appreciated. They sent me these clip-ins and I was able to put these in in addition to my own natural hair. In order to achieve this style for more information on how you can get your hands on some of these clip-ins as well, so you can achieve this exact same style as me. Make sure you go ahead and check the description box as well as the screen. It'Ll have everything you need also don't forget to subscribe to this channel click the notification Bell, so you never miss any more of my natural hair videos and if you want to keep me outside of YouTube, you can follow me on all of my social media. I have everything on the screen and down below and without further Ado, let's get to styling. So let's go ahead and get started installing these clip-ins. Let me just tell you the quality of them, as far as I can tell right now is really good. The hair is super duper soft, as you can see like the curls, are really nice in comparison to My Curls. Does it look like a really good match, where I don't even have to do too much with my hair in order to make it blend with this hair? These are 18 inch clip-ins. So I'm wondering how much stretch I can get out of them, because you guys know I personally love to stretch my hair to give myself just a little bit of extra added volume and length, but length for me is going to be the key factor with these, Because, as you can tell, if I put these right up next to my hair, my hair is longer than these. The stretching is going to play a large large role in the outcome of this overall hairstyle. So, just a little bit of information on what you get when you receive your package, of course you're going to get all of your bundles depending on what length you order for me. Personally, I got the 18 inch bundles, just the natural 1B color, and that just comes with four two clip weft two three clip wet two four clip weft and two five clip wefts. These are the ones that are going to be going around the largest part of my head. Probably, of course, they sent it in that satin bag that you guys just saw. They were also kind enough to send this extra goodie bag as well and inside of it. It'S a like 10 angle, teaser hair brush, and then they also send some extra clips just in case those break, and you need to sew them back and then also a cute little Bonnet, don't play with the Bonnet with the gold Bonnet, don't play with the Bonnet. This Bonnet is a drawstring Bonnet, so it is adjustable which is really freaking nice. Oh my gosh look at this. It'S so cute and that's pretty much all that you get in the package and so let's just go ahead and get right into styling everything. So, as you can see, my hair is fresh out of a twist out. I literally just took these twists down and I don't think I'm going to separate them at all, especially considering the texture of this hair. I think it might end up looking better. If I don't separate them and if I do end up separating them, it will be after I've already installed all of the clip-ins and gotten it stretched to my liking. I'M trying to achieve a really cute half up half down claw clip sort of hairstyle. I want this to be cute, so I'm trying to think like strategically about how I should go about doing this. This is going to be the claw clip that I use today and I'm thinking that I just need to start start off by installing the first set of clips that are going to be in the lower half of the hairstyle. I'M going to tie up the top half of my hair because we're not going to be working with that right now and then I'm going to start applying the clip-ins in to the back section. I need another hair tie, but I'm just going to use this clock Loop because it's the only thing that is in here. What I'm thinking is that I'm going to go ahead and use one of the three clip wefts in the very back, because I have a pretty small head like I have a pea head, my nape is a little bit smaller and I think this is going to Be like the perfect size for back there. Oh all right! So that's one clip down and we're just gon na move on to the next. I really really have been having like a lot of fun, adding clip-ins into my like natural hair, regimen and routine, because I feel like they're a perfect way to get like extra length and volume and just add a little bit of pizzazz Razzle Dazzle without having to Like sacrifice the Integrity of your hair, especially if you're getting them in a curly texture, which is what I'm doing I just really really have been enjoying having them and just using them. In my just everyday natural hair, routine and also in some of my natural hair. Look it's just it's so cute, it's so amazing and when you want just a little bit of extra Razzle Dazzle a little bit of a sass, you don't want to stretch your hair. You don't want to be doing. All of that. Clip-Ins are the way to go in my personal opinion, so for this next clip, I'm thinking the four clip one is going to be what I need. Oh yeah yeah. That'S gon na fit perfect all right, so, as you can tell, I have so much volume already like girl, that's crazy! I have this last section, but this is the section like right before the half up half down. So I'm thinking I need to leave this empty for blending purposes. Do you know what I mean so now? What we're going to do go in, I think, with the two clip wefts in order to make our little ponytail and I'm thinking I'm going to use all four of these. So we can have this a nice thick ponytail don't play with it before we start adding in the wefts for the ponytail. What I'm going to do is take this moment to separate out the hair. That'S going to be in the slick down part in the front, and I'm thinking it's going to be all of this and I'm Gon na Leave Out tendrils to frame the face, and I think I'm gon na leave out this much. Should I do that much different in the face, or should I do? I think it's gon na be this one foreign, so I'm going to tie this off just to separate it out and then I'm going to take the hair in the front. I am not one to use like gels and stuff in my hair, so I'm not going to do that for this style as well, because I also want to show you guys that you can achieve like slick Styles like this, without having to like slather a bunch Of gel and edge control in your hair anyway, because I never do that and I'm able to get pretty slick Styles without doing that. So what I'm going to do is just pull this down really taut. As you can see, it's not like super slick, but it's flat enough to where you're still achieving the same Vibe without having to put all that product in your hair, and so I'm going to do the same thing on the other side. I actually need to put this up as well, so that it can be out of my way. Take this little tight on one side same thing on the other side hold tight and I usually use my hand just to sort of flatten everything out make sure things are flat like how I want them to be flat flat. You love to see and then I'm going to take a hair tie. This is just like a stocking sort of texture, hair tie. I don't like to use regular hair ties in my hair because I find that they snag. I will link these in the description box. If you guys are interested in using these ones, but I'm just going to take that and tie up this ponytail on the back of my head, the front part is secure, and then you have your little tendrils in the front to frame the face. Now we can let this down, y'all don't play with it, and this is already looking so good. Now we have this part to deal with the ponytail and what I'm thinking for the ponytail is. If I apply things how I would apply them if they were normal clip-ins, just with the expectation that I'm going to end up putting a ponytail in, I think that is going to be what makes this easy to do. I'M going to tie this so that I don't get confused. I'M gon na take this bottom section part it off, and the goal here is to just make a super full ponytail. So when we put the claw clip in is like super full and like Curly and cute parted out a little bit of a section back here and now. What I'm going to do is add in this clip right here and then I'm going to add this in right. Next to it and like you, can use a three clip or one wet, but the reason why I'm using two is because it's splitting this right here down the middle so that I can have a little bit more pliability and flexibility in the ponytail itself. Oh yeah! That'S gon na be cute and then I'm gon na take down a second part. Oh yeah, and it's super comfortable too. The Clips in these clip-ins are small enough to wear like they're, really really comfortable, and I feel like with the idea of putting the two clips here instead of like a three clip. It makes it super pliable and really really easy to just manipulate and maneuver, so that you can actually get that plush flat ponytail situation, and so now I'm just going to actually take this ponytail that I have and flip it upwards like this and what I'm going To do is turn these around and reverse clip them in on the base of the ponytails. So I know I look crazy, but just trust the process, trust the process and I'm gon na take this down. Oh gosh, it's Tangled a little bit and now we should have a ponytail situation. That'S just super thick and curly, and what I'm gon na do is take this scrunchie and I'm going to make a ponytail and just try to make it as flat as I can. Let me make I'm gon na just tie it twice so now we have our half up half down situation and what I'm going to do is go ahead and stretch my hair just so I can get some elongation and I'm not going to disrupt the curls like The curly ends I want to give a little bit of a stretch to the overall length, the mid shaft of the hair, not only just my hair, but also the wefts from the clip in so that I can really get that elongated look. So I'm going to stretch my hair and I'll be right back where I get into the stretching of it all. I just want to show you guys what everything is. Looking like, pre-stretched, here's the front two tassels. I don't think I'm gon na touch these. I think I'm gon na just leave them how they are, because I think they're cute at this length. This is what we are looking like from the side. Oh, this is what we are looking like from the fat, and this is what we are looking like from the other side. I am back from stretching my hair, I'm just going to show you guys what it is looking like now, this is a front view. I have been separating little pieces here and there as I've gone along just wherever I see fit or pieces need to be separated. This is her from the side. This is her from the back, and this is her from the other side, so she is looking incredibly cute and honestly, if you wanted to, you, could stop here, but I'm going to take it a step further by adding a clock clip so like I said before This is the claw clip I'm going to be using. It'S like this cute clear with like gold trimming, and my hair is already in the ponytail. So basically, what I'm going to do is split the ponytail in half lengthwise just like this, because the ponytail itself is going to be way too thick for that claw clip to handle, put it top to bottom in half, I'm going to take the bottom half I'm Going to twirl it and then I'm going to do it up like this, then I'm going to take a clip and attach it near the base. Just like that. This way we can also retain some of that length from the clock lid. My hair tends to stretch out lengthwise instead of getting bigger when I go to stretch it, so this is just going to be a little bit more flattering on my head in particular, this is what it's looking like and then you can flip the second half of The ponytail down this is so freaking cute, it's giving like 90s early 2000s Vibes I'm here, for it don't sleep on the clock clip tomorrow, and this is the final look. I know it probably doesn't look that much different than when I stretched it, but the added accessories sitting there chilling is absolutely adorable. In my opinion and low-key, I wish I had a claw clip that was like a loud color like a neon pink or something like that, because I feel like the peekaboo from it would just be so freaking cute or even if I had like a gold one Or a silver one, I think that would be so freaking cute. This is what we have it's giving hello. Are you kidding? This is the final result. I hope you guys enjoy it as much as I do, because I think this is absolutely so cute and I'm really trying to start getting into just doing more Styles and just more unique, creative things with my natural hair, because I feel like I used to do That a while ago, but then once I got to college, I stopped doing it because I just didn't have time. So this was very, very fun for me and I think the ending result is so freaking cute. Like hello, hello, hello, are you kidding? This is incredible. I love it, I love it all right, you guys, so that is the end of this video. Thank you. Thank you. Thank you. So much for watching, if you enjoyed it and want to see me, do more natural hairstyles make sure you go ahead and give this video a big thumbs up as well as subscribing to this Channel and clicking the notification Bell. So you never ever miss another one of my uploads and if you want to follow my commentary content, you can subscribe to my main channel. That is where I post all of my commentary, and if you want to keep up with me outside of YouTube, you can follow me on all of my social media off everything on the screen and down below, and I just want to give another shout out another. Thank you to curls Queen for sponsoring this video, sending me the hair to try out and show you guys this incredibly cute style width. If you want to get more information on how you can get your own clip-ins from curls Queen make sure you check out the description box down below, as well as the screen for all of the information that you need in order to get your hands on. Some of these clip bands, because they're literally so freaking good, so yeah. Thank you. Thank you. Thank you so much for watching. I really really appreciate it. Don'T forget to leave a like, and I will see you in my next one bye foreign
Comments
Myesha: Cute
King hill: Early ☀️
L'Nya Williamsmoorell: Messianic King Jesus and the heavenly kingdom coming at anytime Now! (Matt 24:3,14,42,44;Rev 22:20)