Beach Wave Hair Tutorial + Clip-In Extensions [Best Way To Use A 3 Barrel Waver]
- Posted on 24 June, 2021
- Clip-in Hair Extensions
- By Anonymous
In this tutorial, I'm going to show you how to properly use a 3 barrel waver to create beach waves. I'm also adding in some clip-in extensions for added volume and texture for this style.
Using @donnabellahair 18inch Clip-in Extensions in color #60 and Donna Bella Hair Waver: https://donnabellahair.com/products/do...
Hair clips: https://framar.com/?rfsn=5729303.eb090...
Comb by YS Park
Texture Spray: https://www.rebelfemmeshop.com/product...
Learn how to upstyle in 7 days course: https://mirella-manelli.mykajabi.com
For more education visit http://mirellamanelli.com
Instagram: https://www.instagram.com/mirellamanel...
Facebook: https://www.facebook.com/MirellaManell...
TIKTOK: https://www.tiktok.com/@mirellamanelli...?
Pinterest: https://www.pinterest.com/mirellamanel...
HairB&B IG https://instagram.com/hairbnb_podcast
Learn how to upstyle in 7 days course: https://mirella-manelli.mykajabi.com
Rebel Femme Shop https://rebelfemmeshop.com
Model Call https://mirella-manelli.mykajabi.com/p...
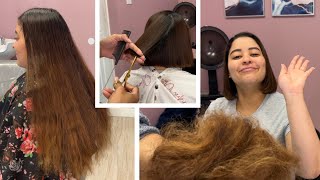
Hey it's mirella minnelli and welcome back to my youtube channel today, i'm going to show you how to create some effortless deep beachy waves on my gorgeous model using donabella's hair waver and i'm even going to show you how i add in some clip and extensions for Some added volume and length and even a little added texture, but before we get started, make sure you hit that subscribe button and turn on all notifications. So you don't miss a tutorial. Now, let's go ahead and get started, so my gorgeous model normally parts her hair right down the center. So i'm just going to go in and define that just a little bit and then before we get started. I wanted to show you the ready to wear clip and extensions from donna bella, so this is what i'm going to be using on her hair to add a little bit more fullness and slightly more length to her hair. So this is color 60. In an 18 inch clip in extensions - and this is what the box looks like when it arrives - there are a total of 10 different pieces that come in different widths, so this makes it really customizable for you when you put them in yourself, but this is also A great add-on service for a client as well, especially if they're going to be going to a special event. I'M also going to be using this three barrel waiver from donabella hair to get my style started, i'm going to start from the bottom and work my way up, and generally i start with about three to four fingers from the nape area, and this is just going To give me enough wiggle room to add in those extensions and allow for a little bit of added density towards the bottom, so i'm taking that first, one measuring it to make sure that it fits properly. And then i'm going to use a rat tail comb to tease. Usually i like using a texture product for a little bit of added grit before i go in and tease, and this is just going to make sure that the clip in stays in nice and snug and all day long. I'M then going to open up the clips and simply attach them and snap them into place, and this is where i'm going to start using that barrel waver. So what i'm going to show you in these first two strands is what not to do so. You can see i entered in this barrel waiver and it actually created a crease, and this is because i'm sticking the iron in directly horizontal to the section without turning it and then another thing that i'm doing here completely wrong is i'm holding too much tension on The strand elongating these waves, so i'm going to show you in the remaining portion of this video what you should do when using a three barrel waiver to do styles. So two tips make sure you're not holding too much tension and you're turning the waiver towards you, which i'll show you in a little bit to avoid any creasing. So i'm going to continue on taking a two inch wide sections. Now the size of the sections is completely up to you, but i find that a lot of the times when putting in these clip-in extensions two inches is kind of the magic number. So i'm going in with more texture spray in that section and feel free to spray the entire section, because when you do the barrel waves, texture spray actually adds to the texture, which is great and i'm still teasing the interior and the surface of this section. So again, this is going to give me a nice all-day hold and make sure that those clip-ins are not going anywhere now. This is the part where i'm going to show you how to properly use your barrel iron, so you're going to enter the barrel horizontal to the hair and then you're going to turn it before closing it and make it parallel to the head and then you're going To continue to move on down and insert the first barrel on the last wave that you created and simply hold down for three seconds when you close your iron, this is going to ensure that you get a nice deep wave and then also last tip is to Make sure you don't have any tension so notice, i'm not pulling down on a strand, as i'm working my way down, i'm being very light-handed with my tool. So let me show you again you're going to insert it and then turn it close your iron. So it's parallel to the head, hold it down for just three seconds and then continue to move on down with zero tension on the hair, so notice i'm almost kind of pushing up on those waves. As i continue to move on down again, you want to make sure that you're cooling those waves into place, and you do that when the hair is still warm. So if you were to pull on this hair, it's actually going to elongate these waves and we don't want to do that. So a couple tips when inserting the clip ends is it's really kind of up to you, where you want to place them and how many you want to the donabella clip-ins allow for 10 different pieces to be put in, but you don't have to use all 10 Of them, so you can really strategically place these exactly where you want them to be so for this area, where i'm working at, which is very close to the parietal ridge, i'm actually going to be installing the longest one in this section and then i'm going to Start to incorporate those little minis throughout the sides, but you can always go in and measure before you install, so maybe you might want to use a smaller one or a wider one in a particular area. There'S really no right or wrong way to put them in. So long as you don't see them and the way you do, that is to make sure that you're at least a couple inches from the hairline when installing so now, i'm going to get ready to put in my fourth row of extensions. So you can see i'm going in about two inches above the ear and just bringing that section all the way around. So i just keep them nice and rounded, as i work throughout generally when i'm installing the clip-ins. I start with the center-most clip-in first and then work my way around through the sides. So this just gives me a better, secure, fit and again you're going to want to measure the head before putting in your clip in and then you can go in in detail on those side sections with those little minis that you have. So you have a total of four of those where you can really have a lot of fun and strategically place them a little tip when styling throughout the sides is to leave the front hairline separately, and this is just going to give you a little bit more Control and really strategically place the waves exactly where you want them placed around that front hairline, especially since that's the area where your client is going to see first now. Finally, i'm on my final row and i pulled all of her hair down just to see where it naturally wants to live, and i try to get a really good visual of exactly where i want to put in my final set of clip-ins right here. So now that i'm working a lot closer towards the top and truly on this parietal ridge, i'm actually going to use one of the medium-sized clip-ins throughout the back center and then finish off with the little minis on the sides. Don'T forget to keep the hairline in mind, so you see that i always use my fingers to measure and it's just a nice little reminder and then tease the section for a nice secure fit for an all-day hold. I'M just going to finish up all of the styling, so again, couple tips make sure that your iron is parallel to the head and you're holding very little tension and once you're done or you feel like you're done with the clip-ins. I just let the rest of the hair down and start to style the rest of her hair, but when i am working towards the top, i don't take the iron all the way to the root, i'm actually a little lazy with the top and a lot of Times i'll take a flat iron just to smooth out that root area, just a few inches. So that way i don't have too much bend going on again right onto that base area, because typically people don't want to see that a lot of times. People ask me: what can i do with the ends, or what can i do with the roots and the truth? Is it's really up to you? What you want to create a lot of times with these three barrel wavers. What'S great, is you can leave out those ends and just use a flat iron to detail and create some really beachy dipped in the water looking waves, and sometimes i take the iron all the way down. So it's really up to you - and here you can see i'm just detailing with just a few pieces onto the top area and really detailing and bringing those waves slightly up. So again, this is all about the detail and what you want to create for the remainder of the front and the sides i'm still taking my flat iron and just tapping it in just a few inches at the base and then working with the barrel iron. For the rest of the hair - and this is really kind of all up to you exactly how you want it to look - i typically will still use my texture spray and use my flat iron and just pull the hair slightly down. I kind of like it a little flatter towards the roots and nice and voluminous throughout the sides. Sometimes you'll even catch me, use a one inch wand to add a little bit more texture and different curl pattern to this look, but ultimately it's completely up to you. The final result that you want to create once i'm all done, curling with my three barrel, hair waver from donna bella. I go in with a little bit more texture spray. So this spray that i'm using is from kenra professional volumizing spray clay, and this is gon na give me a lot more texture and grit and volume to these effortless looking waves. I finished her off with this super cute hair accessory that i got off amazon and just clipped it in right throughout the sides, and i just love how this turned out and here's. The final result of my beach wave style using donabella's hair waver, complete with some clip in extensions for some added volume and length. So i really hope you enjoyed this hair tutorial and if you did, please give this video a thumbs up and make sure to subscribe. You can even comment down below what your favorite part of this hair tutorial was and i'll be sure to respond. You can also find me on my other social channels, like instagram ticktalk, facebook, all under marilla manelli, and you can even sign up for my newsletter at mariellaminelli.com. So you can get a free education right to your inbox and if you love podcasts, make sure to check out my podcast called hairbnb, where i talk all about your hair beauty and business. If you're interested in becoming a model for any of my youtube videos, you can sign up for my model application right there on my website and, if you're interested in learning, how to up style. There'S a wait list for my course learn how to upstyle. In seven days, where i teach you everything, i know in small digestible videos where you can learn at your own pace, the course is launching soon. So you don't want to miss out and finally make sure to check out my other hair tutorials right here on this channel, and i will see you in the next video

Comments
Moazzama Karim: Amazing . Please show us also how to do beachy waves using flat iron. Thanks.
Shruffle: You're so relaxing to watch!!!
Muhammad Haseeb: You give always informative videos, I like that ❤️
Tony Bhosle: You are my favorite stylist love from india.
Honey Beary: Waaaay to time consuming for me.....