Hair Transformations With Lauryn: Rooted Dark Vibrant Purple Hair Ep. 108
- Posted on 15 August, 2022
- Sew-In Hair Extensions
- By Anonymous
Instagram: @locksbylauryn
Butterfly Loft Salon
Encino, CA
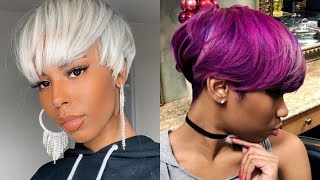
Is hey guys welcome back to my channel, so this week's episode i'm going to do a color transformation, we're going to be doing a creative color and this client she has never actually colored her hair. This is pretty much all of her virgin hair. She said she's. Never colored her hair in her life, which i was so shocked because it's so rare when you come across a client that has virgin hair yet alone, never colored their hair before so. I was super excited for her, but since we're going to be doing something on the brighter side, she did want to have it more on the rooty side um, as opposed to going all the way to the root like i normally do. So i'm going to show you a technique that is going to soften the grow out and start a lot lower for something a little bit more lower maintenance. So i am using the blonde me schwarzkopf lightener for this application and this first bowl that i mixed up is a bowl of 6 and 20 and then every bowl after that, i'm just gon na be using 20 volume, and i do mix that one to two With the developer so for this technique, i'm going to be starting in the nape here and my first few weaves right at the nape of the neck. I do a very chunky weave and i first weave the hair and then tease, and i find that when you weave the hair before teasing it, it gives less negative space or like a less of a natural low light. So it's leaving less of her natural hair. Color, because less of it is getting teased into the part that gets teased up and my sections for this is pretty much doing like a quarter inch in between and i'm trying to make sure that i'm really saturating these ends here, because i want them to be Nice and bright, and even and then just kind of feathering up towards the top there and i'm using the long framar foils, because i don't want to bend the hair at all. I feel like whenever i bend the hair a lot of times. It leaves like warm spots, so i just like to lay the foil right on top of each other, and you can see that again. I did a weave and then now going in and had teased it um, i'm doing about like one or two teases, depending on how dense the section is and then just kind of painting up. So in our consultation we talked about placement and where she wanted the color to start and we decided to have the color kind of start towards, like the chin and the bottom of her face and then kind of get bolder towards the bottom. So this is going to create a really nice blend and when this grows out too, it's going to blend super seamlessly super soft because we are weaving and teasing at the same time. So essentially, the tease is going to diffuse the line as well as the weave is going to diffuse a line as well. So i pretty much continue this sectioning all the way up to the top of her ears and then, after that, i'm going to go and take the back section all together and just kind of do that center parting and continue basically doing the same pattern. As i get towards the top, though i do start to tease the section first and then weave it, so if i tease the section first and then weave it, what that's going to do is i typically tease from the bottom of the section of hair all the Way to the top and it's going to create a lot more dimension and pick up a lot more hair, as i'm teasing into it, opposed to where i'm doing right now. I am weaving first and then teasing, and this is going to leave less dimension, and so the underneath here is going to feel a little bit. Bolder have a little bit more color and i wanted the illusion that the ends were a little bit brighter than the top. So i like the fact that we are doing the bottom half a lot more colored and then, as we get towards the top of the head, the color starts to get a little bit more diffused. And this really works for clients who have layered hair, because the short layers are going to be above these sections, and these sections are going to be what you see on the very end. And so what that creates? Is that kind of ombre effect to where the bottom has more color as you gradually get towards the bottom? So once i reach the top section of that back now, i'm going into the sides, so i am continuing the same pattern since this is going to be my first few sections, everything that is below the occipital. I did a weave and then teased, but specifically on these ones. I am weaving and then i'm essentially teasing behind that first weave. That kind of is part of the face frame because i don't want that part to be fully diffused. So, as i'm painting the sides here, i am bringing up the lightener a little bit higher up towards the face and kind of slanting it down towards like a diagonal back and again. So since we want the color to kind of start closer um towards the bottom of her face, so i'm trying to be a little bit more mindful. I let the back sections kind of um start and begin towards the bottom portion of her head, and so, as i'm painting the front sides and being a little bit more conscious and painting a little bit higher than that, so that the color around her face is A little bit brought up higher than whatever's in the back that i have already painted so now that we're reaching closer to above the ear those sections. I now am starting to tease my section first before weaving and i am trying to tease behind the hairline and then weaving that part, and this is going to create a little bit more dimension on the top and create a really soft blend that lays on top Of the rest of the hair, also, since we're only bringing up the color towards the bottom half of her head, i decided i'm not going to take any type of money piece sectioning, so i'm going to continue doing these patterns on the sides of her head. All the way towards the top until each side meets these meets each other and as i go through it, i do check balance and make sure that everything is evenly distributed and evenly painted. So again, these very first few sections right above the ear i just weaved and then teased, because i want these parts to be a little bit bolder, and i did about two to three sections of these before i started to do the teases first before the weaves. So that everything above these sections are diffused a little bit more, another thing i want to mention is that i'm, as i'm painting these front sections with each section that i bring up, i am kind of over directing towards the front of her face and you'll see Later, as i get closer towards the top, i over direct even closer towards the front of her face, and what that's going to do is it's going to diffuse the line even more, but also create a blend to where the color gets gradually gets a little bit Higher as it comes closer towards her hairline, so now, i'm not only using teasing and weaving to help create a beautiful blend. I am now using over direction with the position of how i position my foils and how i paint onto the foils to help as well blend the color together. So since each section has pretty thick weaves and they're, pretty bold, it's going to be really easy. For me, next time when she comes in, if she wants to retouch and do the same thing to retouch it or if she does want to switch it up and maybe even go all the way to the root next time doing thicker weaves like this, it makes It very visually easy for me to see what needs to be picked up if i need to retouch it or what needs to be highlighted that i had already left out this appointment so now you can see, as i get closer towards the top of the head. My sections are a little bit thicker because i'm teasing them first and now i'm going in and then weaving that teased section and definitely over directing even closer towards the front of her face and lifting up that foil as well and painting at a higher elevation. The other thing that really helped with balance on this technique was, i did a section on one side and then painted it and put it in a foil and then moved on to do the next side, and i just kept going back and forth until i reached The full top so that i could make sure that everything was pretty much lightened at the same level, because if i were to bring up one side a little bit higher, it would definitely be a lot noticeable if she parted her hair in the middle. So i like to do one side at a time and just keep turning her until i reach the top to ensure that everything is really even and placed perfectly. Another thing i wanted to mention was that whenever i did the weaves and then the t's, i had to take a little bit of a smaller section, but as i get towards the top here, you can see that i'm teasing before weaving and i'm able to take A little bit of a thicker section because we are leaving out a little bit more hair in that weave and so also as i'm teasing it i'm trying not to tease the money p section, i'm just teasing everything behind that. So for my client, we let her foils pretty much reach a level nine and ten before rinsing them out and the way that i like to take out my teases is: we do rinse out the lightener fully and then we get some detangler and just kind of Separate the tangles with our fingers first before brushing it out, because since these t teases are pretty fluffy they're, pretty big, i didn't go too hard or tease too much. I pretty much only did like two to three teases, so we're able to kind of separate the teases very easily with just some detangler. So this is what my client's hair looked like after i blow-dried it about 80 and she was really ready for the pulp right. Semis that we were about to put on her um for her semi formulation, i went ahead and mixed up some velvet blue muse and clear. She really wanted, like an electric purple, and i felt like blue muse, would be super perfect in creating such a bright, beautiful purple, and now that i have figured out how to create a really bright purple. I'M going to be using this formulation in pretty much all of my neons because i feel like it creates such a beautiful electric purple that you guys will see at the very end so for the color application. I just went in and started taking horizontal sections throughout her head and just making sure that i was fully saturating. This application was fairly easy and um. When i apply the pulp right semis. I do like to be very generous with the amount that i put on. Sometimes because these colors are conditioner based, if you overwork them, they can lose its pigment, so i always like to just add a bit more extra color and then, after i'm fully done applying all of the semi permanent on the hair. I do go back in and check it and make sure that everything is pretty much covered and once that's pretty much all done, i just let her sit at like room temperature for about like 30 35 minutes, and then we like to rinse her with ice cold Water, we don't shampoo this color out. I typically will tell my clients to wait about like four to five days before washing their hair out just to let the color kind of settle in and prevent it from fading any quicker than it should alrighty guys. So here is the finish like you can see her beautiful electric purple and this purple is more on the blue base side. So, as this starts to fade out, it will fade kind of like a silvery, um purplish tone i feel like, and she will see some hints of blue in it as well. So some aftercare on this color is it's recommended to wash your hair, maybe like once or twice a week with some cold water and then some good shampoo. I sent her home with some amica shampoo and conditioner. We gave her the signature since she needed something: moisturizing um for her hair, and then we gave her some leave-in products. She took home the it's a 10 and ghost oil and i typically like to cocktail those two in my hand and just apply it on wet hair on the mids and ends and then in between washes on day like two or three of not washing your hair. Sometimes the ends do feel tend to get a little bit dry, so i told her she could put little drops of some ghost oil in that, but yeah guys. That is pretty much it um, as always. Thank you guys so much for watching and tuning in, and i will talk to you guys next week, so you


Comments
robert björnesjö: Oh i love this purple tone and such beautiful hair She have ✌
megan: perfection!!