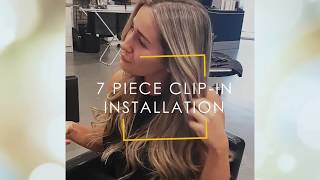
How To: Installing Clip In Extensions Like A Pro! | Amazon Edition ! #Clipinhairextensions
- Posted on 11 February, 2023
- Sew-In Hair Extensions
- By Anonymous
In this video, I’ll show you all the tips and tricks you need to know in order to achieve a professional-looking installation of clip-in hair extensions. Learn how to determine the correct length and color for your hair, properly attach and blend the extensions, and style them for a polished look that will last all day. With these simple steps, you can easily give yourself stunning tresses that are perfect for any special occasion!
#naturalhair #clipinhairextensions #hairextensions #extensioninstallation
Follow me on socials
Instagram: ItsAnthonisha
Facebook: Anthonisha Gates
TikTok: ItsAnthonisha
Clip-in LINK: https://www.amazon.com/shop/anthonisha...
Foreign, if you're new, here, welcome if you're returning welcome back. If you want to know how I achieved this, look with clip-ins just keep on watching all right. So this is what the clip-ins came in. I got an 18 inch and a 16 inch. The pack that I'm showing you here is the 18 inch. It came with seven Clips. Both packs came with seven Clips, so here is this 18 inch. I didn't show you the 16 inch on camera, but you'll see it as I install it. So so I know normally, when someone sees clip dance, they see the girl using all of their leaving all of their hair out um, and that's just not the case. For my hair uh, she just don't do right, so I went ahead and braided down. Um excuse the busted exhibit braids. I know trust me, but um I'm actually a girl that can actually really braid her hair down. But I was being lazy at this point. So um you want to braid it down and then I'm just going to pin that here just to give a super super flat base and make sure the install is flat. So here I am just going in with the four clip piece here and you just want to make sure that you put the comb in the braids and clip it. That'S literally it like you're, literally combing, the hair you're gon na comb. It stop and clip, and that's exactly what you do you want to make sure that you are finding the right spot for the clip in you want to make sure that it's extra extra secure make sure that it doesn't move like these are these clip-ins are very, Very secure, I will say that so as long as you are putting them on right and securing it, it should not move at all. So here I am going with the 16 inch. That'S the 16 inch four clip and I'm going to add that in the back here just want to let you know that each pack that I got comes with seven Clips, I'm sure you can get more, I'm sure you can get less, but the packs that I Got come with seven Clips, so I think one four four piece clip two three piece clips two two piece clips and two one piece clips so seven in each pack, fourteen all together and I use all fourteen. So I put two both of the four piece clips in and now I'm going in with the 18 inch three piece clip here, I'm just going to add that to the back of my hair as well, I think I'll add that to the side nope it went In the back, so I add that to the back as well foreign, I know I know it looks crazy right now, but trust the process trust the process all right. So I'm going to turn around and I'm going to add a three-piece 16 inch clip to the front of my head just to get the side part that I'm looking for I'm going to start adding in the front now totally off topic. I know, but I know someone will ask or just think and yes on my arm there is a birthmark. So all right. So here I am I'm going to go in with the three piece clip that is the 18 inch there. I'M going to add that to the side just fill that in there I will say that it was really hard trying to do this with just one mirror and just filling around the back of my head and you'll see later on the video foreign piece that I'm Adding there in the back of my head and as you can see it's literally it's filling up um and I'm not even all the way done. It looks good literally ignore my concentration concentration face. I don't know what was going on with that, but yeah. So here I am adding the last clip in to the side um. It will be my right side, probably your left side, I'm adding that to the side of my hair and that'll, be the last piece that I add over there and then you'll see me kind of fill in the back just to make sure that that is all Covered up and then what I'll do is go back in with another piece at the top just to fill that in um. I know this is literally all over the place, but this was a quick process. It took less than 10 minutes to do this um it just maybe took longer, because I was trying to record and I kept stopping, but this is literally so easy. I'M obsessed like just keep watching so here. I am now going to attempt to do to fill in the back without a mirror. So I'll probably get one more piece in before I have to jump off camera to fill it with the rest in because it was super hard, I'm not gon na lie. I can't yeah, I can lay tracks without looking, but with the Clips in you can you only work with so much so I wanted to make sure that everything was covered and nothing was showing. So there is almost done here period girl all right. So I attempted to do that, so I put, I think that was a three piece there to fill in the side, and only the only thing that I would have to do now is the side. So once I filled that in that's pretty much it yeah get into it, because it's definitely filling up the way that I wanted it to, and it's definitely gon na give sew in, but it's clip-ins foreign. So I told you I had to jump off camera and fill that in, but this is the finished look here. Well, not the finished look. This is me with every clip in literally, every piece of clip is in my head um, so I think I'll order. Another pack as well, because I like super, super full look, but it still looks good. So what I'm about to do now is get ready to straighten my leave out and through this whole process, um. Well after I didn't style the hair at all. I literally flat ironed my leave out, and that was it. I didn't style it no type of way um, because I just wanted to wear it straight for a minute, but I didn't flat iron, the actual clip-ins. I didn't do that um, which is really good because you'll see like I didn't need to, and I also should have rinsed my hair black. I didn't think it'll look bad, which it Blended pretty good, but I should have just rinsed it black to give it the you know the seamless the bone straight that just yes, everything Blends. All of that - and here I am playing with my hair as I do this voiceover, because it's really super super soft and I'll link everything in the description box. I got them from Amazon, and here she is like so cute. This is 14 pieces of clip-ins. I know I probably said that wrong, but look at the blend so cute and I'm going to start feeling myself real soon. So you'll see that um but yeah. I like this. Look, let me know if y'all try it, because I'm not going back to wigs to sew-ins to quick weaves, none of that I'm going to use clip-ins and clip-ins only so yeah. Here I am about to start feeling myself, but if y'all made it to the end of this video, I thank you for watching make sure you like comment, subscribe and I'll see y'all in the next video bye.


Comments
Sequavia: I never knew you can braid your hair and add clips ins I might try this method
Brianna Johnson: Holdd upp Umum just put me in yo something Bestii!!!!! I just happy af cuteeee