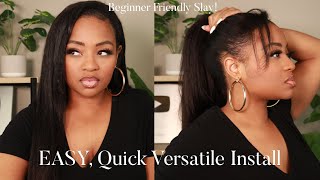
Versatile Sew-In Tutorial | Very Detailed!!
- Posted on 17 January, 2019
- Sew-In Hair Extensions
- By Anonymous
Welcome or WELCOME BACK, Kings & Queens!
Versatile sew-in tutorial that's VERY DETAILED. Braid patterns, lock stitch, weft placement and fold over method explained!
Please like and share if this video helped you!
NEW VIDEOS WEEKLY!
*Subscribe if you vibe w/ me & keep up w/uploads by hitting the bell*
VIDEOS YOU SHOULD WATCH:
MY 8 YEAR OLD GETS A SEW IN - https://youtu.be/eTy3Nj2Air8
AFTER THE SEW IN - https://youtu.be/0opoe1IYaMA
HOW TO SEW IN WEAVE - https://youtu.be/dFXtX9U1lOI
LACE CLOSURE|GHOST BOND SEW IN - https://youtu.be/7ceTfVcIMTU
BOX BRAIDS FOR BEGINNERS - https://youtu.be/-E62KX-46cs
COLLABORATIONS & BUSINESS INQUIRIES ONLY-
CONNECT WITH ME:
https://Instagram.com/ImanixxImani
https://Twitter.com/ImanixxImani
https://Facebook.com/OkThatsImani
Snap me. @OkThatsImani
IF YOU'RE CURIOUS:
CAMERAS-
CANON 80D https://amzn.to/2MCK6t3
CANON G7X MARK II https://amzn.to/2ypWGIQ
EDITING - FINAL CUT PRO + IMOVIE
I RESIDE IN DALLAS + YES, I DO HAIR!
THANKS FOR BEING HERE, YOUR SUPPORT IS APPRECIATED! :)
Hey, what's up what it do welcome back to my channel. If this is your first time here, my name is Imani and if you have been here before, welcome back. Thank you so much for tuning into my channel. I hope that you are able to take something away from this video. We are doing a versatile, so iam using the BB hi meant that two beehives and I am connecting them at the bottom - to attach my web tool. As you can see here, she's getting a side part install I'm using about three finger width leave out around the part and to install the first weft. I am going through the web to make sure that it's solid and it's secured. We can go through like one or two times and then we're going to proceed to install the web's. I am, as you can see so on the web, underneath of the braid and I'm starting on the side where there will be more or less a bang. I'M starting kind of at the temple around the area and I'm going around and I will be stopping on the other side around the ear, and that would be how I start the shape of how I install my whisk. As you can see here, I am making sure that the actual width part is pushed underneath of the braid so that it is not exposed. This makes it more versatile. This makes it versatile period so that when she does lift her hair up like into a high ponytail, it does not reveal the width it lays flat as possible and that's what we want. We won't select black instance right. We wanted to look at you and that's what we're going for here. I am using the photo ver method in the beginning so far and I will use the photo / method throughout the install until I am at the top and we won't fold over. We will cut a few so that, once again, it's flat in it's secure at the back most of the time are usually so under the webs. It'S just out of habit, I'm sorry under the braid just out of a habit, and it just feels better. I am using the lock stitch method in which I insert the needle most of the time under the braid, and I am wrapping the thread around the needle a couple times and I'm pulling it through to make a stitch. This method right here does allow my client to have a long, lasting install and we don't have problems with tracks coming to loose or anything like that. It'S very secure and I do lock stitch on every single stitch as you can see, and it works, it works. It works the shape that I'm using is not so much a u-shape, it's kind of like a C shape, but it's turned so that we have the bank part on the right side and the other side. It'S not because we want the hair on the right side to fall more towards the face on the face and we want the opposite on the left side. So the further we go along the the better. You understand what I'm saying, but please please make sure that all of your whips, I'm sorry all of your braids - have whips attached. You don't want to have empty braids. Underneath of your install, you want to make sure that you have around a finger with space between your whips unless you are doubling your whips and for my child and team installs, I don't double my whips because we want it to be as natural as possible when I get to the end again. I am drawing a boat over method right here. As you can see, I'm going through the weft, I'm locking stitch. Then I will fold it over and bring it all the way around. That'S where you can see the the kind of the C shape, but it's kind of turned so make sure that secure poke your needle through the weft a couple times make sure it's flat as possible and continue to go around go around. And so all of the braids you don't have to necessarily go over the whole entire brain. Sometimes I don't sometimes I do depending on where I am in the install. Sometimes my needle will go through the braid from the bottom and come out through the middle of the braid, depending on where I am and how I want that track to lay on this on it on the head, let's be clear about something so in installs are Not supposed to be painful, you are not supposed to go home with the headache or not being able to sleep and take medication. If that is the case, please reevaluate the tension that you are placing on your clients head with your braids. This process right here is not painful and all my client was very comfortable the whole time and it's what was when she got home. I had to make that clear because of and a couple of my videos, you guys seem to think that there's some pain involved in. Please please believe me when I say no, it's not painful at all. Once the hair is actually installed, you won't feel any type of humps or anything like that. It definitely lays back flat and it it sometimes has to do with the thread. I'Ve used nylon thread. Cotton thread is it's thick: it catches, it stinks if you wash it. There are numerous of reasons why you should invest in nylon thread if you are sewing in there extension. So please do your research and gives you some nylon thread off the Amazon. If you catch the fire, where everything in up your so lien game, because nylon thread is, is it okay? This is what I mean when I'm saying that I go further on this side, as you can see, I'm taking it all the way, simply because we want that hair to be in her face for the bang area on her install. So I'm doing the same thing since I'm folding over I'm putting my needle through the weft so hold it secure a couple times make sure that it's flat and I'm just proceeding to go to the other side. If you keep up with your shade, then you won't have a problem with it being them even or having to unnecessarily cut tracks to just put a piece in so the more you do it, the more comfortable you are, you will be able to know and set Your shape from from the beginning and just follow that shape, follow that shape, and that's exactly what I'm doing you see. What I'm talking about is about when I say being able to follow the shape so as of right now, I'm still able to follow the shape. I'M going all the way over on the right side to the base brain and I'm continuing to just sew, sew, sew, sew, sew, lock, stitch, sew, lock stitch. I will have a detailed video again. I know I said it already, but it'll be on the actual stitching and creating a lot like right here. When you put the needle in you wrap it two times, you bring it back the opposite direction and then pull it right here, bring it back, pull it forward, locked again, wrap it around bring it back, pull it forward, MA boki right there, and if I fold It when she lays her hair over that you can see that boat and that's what we don't want to see. I'M still put my needle through the weft only on the first few stitches just to hold it in, and I'm going through. This braid not sewing on the entire braid, because I don't want to create any type of gaps. So if I were to just throw it over the braid right here, it would be a small gap in between and I don't want that the same way here, I'm going through this braid, because there will be enough for me to lay another track. On top of the braid after this one is installed, so I'm going underneath of this braid right here, as you can see, and I'm pushing it just like I did at the back - I'm pushing it under the braid so that it would sit under the brain which Will again allow me to install a whip, their last wealth, on top of that brain and you'll see right here see how flat it is. It'S flexing it's like it's pancake flat. Not not. We only know waffles. Okay, we are not doing it. Just follow the shape around until you you close it off and at the end you should see that it's very flat, it's very secure, you're doing your lock stitches so that you don't have to worry about any loose whips or thread coming out or anything of that Nature once you get done, you make sure that the last web does meet up and make it as far as possible. In me, voila now you have a versatile, install. Please stay tuned for part two, where I'll show you how to blend out style and show you how versatile this install actually is. Thank you so much for being here and from watching. If you learn something, please like the video you can comment share and if you're bobbing with me, I wouldn't mind if you subscribe, it's free


Comments
Samantha Coulibaly: Fantastic sew-in omg