Tape In Extensions W/ Sew In Install | Game Changer
- Posted on 13 November, 2022
- Tape-In Hair Extensions
- By Anonymous
Hey y'all this has been my favorite style with tape-ins so far! Lmk what y'all think and if y'all would do anything differently.
Tape ins : https://www.masteredminks.com/product/...
Bundles : https://www.masteredminks.com/product/...
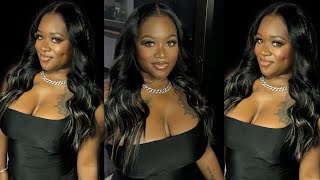
Thank you, hey y'all, welcome back to my channel, so diving right in, as you can see from the title, this is going to be a sewing, install partially with tapins install as well. So, for the sake of time, I went ahead and already did my braid down and sewed in the first bundle of hair. So now I'm just continuing to sew in the second bundle of hair. I did two 20 inch bundles and I did one pack of 18 inch tape ends. I usually like to sew my hair in with a net, but I just didn't have any netting and my nails are like so OD long in this video like I could barely braid my hair down good, so excuse how my braids is looking and definitely got the Job done, but whenever I do this style again, I'm for sure gon na do like probably some smaller braids and also use a net foreign was just doubling the tracks. So for the two bundles I did double them. Um I didn't do single webs. I just folded. It in half and sewed it like that, because I wanted it to be really really full on the back. So that's one thing: y'all can keep in mind just so you can fit more hair in and keep it more full depending on, like the size of your head or maybe the size of the bundles you use, and then I'm also sewing it in so that I Could wear a half up half down without having to leave any hair around my perimeter in the back out, so I'm just making sure that the tracks cover the tracks below, as I put them on top of each other, so that when my hair is pulled up, I can literally just pull the front part up with the tape ends and then the back would just all be sewn in no leave out, but it'll still be nice and yeah. These are body weight, bundles and body weight tapings. So I did put a black dye on the bundles and the tapings just because I want to make sure that they're the same color. So this is just kind of how the hair looked after. I watched it and blew it out, but it is naturally more of like a really pretty body wave. Thank you all right y'all. So I'm all done sewing in the bundles. In the back, I just added a little serum and I'm just going ahead and soaking the hair out, as you can see, it came out, super duper bomb. I really love wearing this hair straight. I just feel like it looks so natural and like not too silky but like not too coarse. So now that I have the bag soaked out, I'm gon na go ahead and get started with my tapings in the front and, like I said I did use body wave tapings. So these are how the tape in this look in their natural state after I just washed them and blow dry them after I rinse the dye off. So I'm just going to go ahead and install these, like. I do normally with my tapings and make sure that they're falling away that I can still wear them up, but I can also have them down or wear them in a side part, and I do like to use the technique where I just press the tape in Up against my real hair and then any of my real hair, that's stuck in between is the hair that I keep between the two tape ends and I link a video on this screen somewhere. I have a couple really good detail: taping videos for y'all, if you need a little bit more details on how to install the tape in thank you, foreign and so I'm just repeating the same process, y'all just continuing to place the tape and zoom using that tapping Method and I'm just going to put it up as high as I need them to go on that side so, like I said these are body wave taping, so I was flat ironing them. As I went, I wasn't putting any heat on the adhesive of the tape, but I just wanted to straighten it out as I go, so I could just be done with my hair. When I was done, I will say I feel, like the body wave definitely had like more of a natural straight to it, like it wasn't like super bone and silky. I usually wear bone straight tape in so I think in the future. I would probably do bone straight tape ends with this like body wave hair that I straightened just because I feel like it like was a little bit more silky, but it is really cute when I wash it and just let it air dry, and here I just Wanted to show y'all like I'm, not laying it to the side, I'm laying it so that it'll fall forward into my face. I know I'm mostly going to be wearing it in a middle part, so I just want to make sure when I do part that middle part, it falls really cute and really like natural. So I'm just laying the tape in staggered not on top of each other, but I'm just staggering them and I'm placing them so that they fall forward into my face on an angle, and I definitely want to make sure you're checking your hair as you go, you Don'T want to get too far along and you have Titans that are like poking out or aren't covering each other so definitely make sure as y'all go. You do check to make sure that nothing is showing, because it's a lot easier to correct and, like I said I am going to tag a video in here for y'all that'll. Give you a really detailed tape and install, but do make sure that y'all are leaving a decent amount of hair in between your tapings, but like not too much where it won't stick. Um one side I did feel like. I didn't leave enough hair and I like brushed a whole taping on my head. Y'All like from the root, so definitely make sure in this technique. You are putting enough hair that, even with a little bit of tension is not going to like allow your hair to rip out and then with this install too, I didn't put tape ends throughout my entire front portion of my hair I left out, so I did Have like a tape in a chunk of my real hair, a tape in like a space with just my real hair, because, like I said, I wanted to be able to to do a side, part, a middle part and then also a half up half down. So that's what you'll see me flat iron in between the tape ends just to make sure that is nice and flat and soaked out as well. So I'm just about done with the right side, but I do like to go in and start putting tape guns in at the top like where my part will be just in case. I run out of hair, so this is something I always do. I work on like the perimeter and then once I get like halfway through my pack of tape ins I like to just go in and install the tapings in the top, because that way I know I'll have the tapings there for the fullness, but it'll also help Me gauge, where to place my remaining tape in just to make sure that it looks as even and balanced as possible, if I'm just trying to do a natural install or, if I'm just doing it with one foreign s installed in the top. Where I wanted to add them, I'm just flat ironing my real hair and just seeing how it looks, making sure everything Blends nicely and just making sure I don't need to add any other pieces. So you can see like here just with my real hair, blended with the tape in like that needed to get straightened out a little bit more and I needed to add an extension for fullness. So that's kind of what I was just saying earlier in the video. I will go through my hair and just see where do I need more fullness? Where does it look like you can just see my real hair and just try to make it look as natural as possible? Thank you, okay y'all. So it's looking real bomb now that I have that one side done. I just want to make sure that it covered the tracks in the back and I did need to add in some other tape pins just so that they faced forward and will go completely over the track, because the last thing I want is my track show and My tapings, so that's what I was doing here, just making sure that I could brush the hair back over the part where the bundles were and make making sure that everything still is going to look nice and flat. Thank you. Thank you, okay, so it looks really good to me. Y'All. I was able to place in the tapings on the other side, so to be nice, and even so I have the other pack for my tapings I'm going to install on this other side and, like I was seeing the hair was body wave, but look here. It looked kind of cute in the natural stick foreign now that I have the perimeter done, I'm going to move to the top of my hair and go ahead and install those tapings that are going to be right along my natural hair for the middle part style And just make sure that everything looks even everything looks full and that I've evenly distributed the tapings on both sides. Thank you, Okay and, like I said I just wanted to make sure that it was even there weren't any areas where it was just big chunks of my hair that I needed to add tapings and when you look you'll find little spots like I said, just try To make it look as natural as possible and make sure there's not any areas where your real hair is just kind of showing outside of the tapings, but like not as long as the bundles and then also. I wanted to make sure that the tracks were going to be covered from the sew in so like. I said I sewed in the hair in the back, in a way where I only have to cover the very top, because all the other rows cover the tracks below. So after I did that it looked really bomb to me, y'all, like just very, very natural. You can kind of see my real hair kind of sticking out right where I'm grabbing it right there and so yeah like, for example, that's just a spot where I'm going to add another tape in foreign and the reason that my real hair kind of was sticking Out or thicker than the tapings in certain areas, it's just what the technique got that I was using. So since I started with the perimeter and then went straight to the top. Obviously my real hair in between is going to be thicker and need to get flat. Iron or either have me at the tapings in in that area, so just continuing the same process filling in the tape ends wherever they're needed and y'all was so happy to be done. That was my last one. It'S such a time-consuming task, but it's so worth it, but that was the very last one I put in. I found another spot where it just needs to be a little bit more full and you guys will see shortly. The end result. Okay, you all so this was the finished look. This was after I had both bundles of the 20 inches installed. I had one pack of 18 inch tape in to install on the top, and this was the finished. Look that I had. I really like how it came out. I can definitely say this is a style that I would do again. I really like having the tapings just in the top, because it still gives you the versatility, but the sew-in just gives you the fullness, and you don't have to worry about sweating out your hair as much so I did want to try to add, like some layers. Y'All and I don't know how to cut layers, I probably should have watched the video to see how the girls be cutting layers, but I added a little bit of layer in the front just to try to make it look a little bit more like shape. To my face, but yeah this was a finished look. I wanted to wrap it and get in the shower and then after I wrap it and took it down. This is what it was giving y'all. I think it looks super duper natural and definitely let me know what y'all think below if you're not already subscribed, make sure y'all hit that subscribe button and I'll see y'all on the next video

Comments
Dwandra Williams: So pretty! Do you feel like the combination of sew in with tape ins is easier to maintain? You probably answered this question in the video (I’m only about halfway through). I like the background music too!
Stacy .A: Love this very smart I might try this for my birthday next month. Can you put the hair you used in the video down below please
KeeksLove: Ouuu idk if I'll ever be a tape in girl! This is kewt!
Malia Armstrong: me next!!! flawlesss !!!