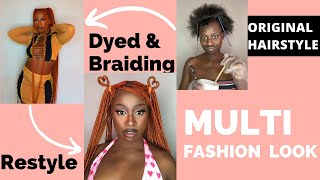
Top Knot Bun With Bangs Tutorial Using Braiding Hair | Tatisbeautyy
- Posted on 08 August, 2022
- Bangs
- By Anonymous
This is for all the babes that need a quick hairstyle to go out in. I got you! Comment anymore tutorials you would like for me to do. #beauty #topknot #baddie #collegegirls #buns #cute
Hey babies, welcome back to my channel if you want a body. Look like this keep watching. Thank you. So here is the things that you will need. You will need a brush and a wide tool, comb or a comb and a toothbrush or whatever you use on your edges, and also this is the curling iron that i use. I got off at amazon. It was probably like 20 30, i'm not sure, but it gets really hot and it's a really good curling iron. Let'S get right into the video, i am using edge effect. It doesn't have to be edge effect. You can use any edge, control, um or even jam works. I just use it around my edges around my hair and then um. I have a brush any. I prefer a hard brush, but if a soft brush works for you, you can do that. Also, like i said before, i just go around my perimeter of my hair and i apply the edge control, make sure y'all get the back of your head. That is one of the keys to making your hair look really slick. Make sure you get the front back sides, everything is so i know some people break it up in sections and put the edge control in the middle of their hair. You can do that, but personally i didn't need to do that. I do have very very thick hair clearly, but if you have even thicker hair than me um you can and that curls up or something you can do the middle of your hair. But i have blow-dried my hair out, so it was totally fine, so y'all. This is the moment that i realized that i messed up. I'M gon na keep this clip in, because i just want y'all to see that i am not perfect and filming. This video was very interesting because of my phone kept stopping the recording. It was just a lot but yeah. What i meant to tell y'all to do is split your hair in the middle, we'll part it and then separate it into two pieces, but i didn't so. This is me finally doing the correct thing: parting, my hair down the middle and grabbing those two pieces in the front so that we can have two bangs. So i do want to state that it does not have to be perfect. I recommend the part to be a little straight, but as far as the two little pieces that is gon na be bangs, it doesn't have to be perfect because the parts won't show um. The bang is the only thing that's gon na really show and also make sure it's a little proportional like on your left and your right side, because it just gives the best results y'all. I was never struggling that hard. I never struggle that hard when it comes to parting, my hair, but hey. I think it was because i was looking into my phone camera, but whatever it is, what it is y'all see it y'all gon na see the final results. So if you have a clip um, you can put it there, but i just bantu knotted it that little piece it's all going to stay out. My way, i really didn't feel like grabbing a clip, because i was just doing a lot but hey for each of zone, whatever you need to get that little piece out your way, then just take it and do it. So this is me finally trying to put my hair into a ponytail. Make sure that your ponytail is a high ponytail, because we are trying to do a high top knot bun and make sure it is not lopsided y'all, because i have a tendency of making my buns lopsided so yeah. I'M warning y'all now close your eyes and imagine feel the magic vegas so y'all. This is me trying to do a trial ponytail and what i mean by trial ponytail, i mean by me trying to get the ponytail as slick as possible and it was pretty hard, but i ended up doing it um and then i ended up just doing a Trial bun because of it, was easier to slick down my hair that way so in this process, i grabbed another ponytail holder to make my hair even tighter than it was, and then i just grabbed the other ponytail holder out of my head, because it wasn't tight. Clearly and then i did it again made it as tight as possible y'all, and then i just flicked it up even more make just it's a lot of trial in this ponytail. If you have thick hair, you understand so this is me grabbing some braiding hair. I am using some used burning hair that i only used once on a braid, so i'm reusing it. It clearly was good enough, and then i put my hair into a regular bun, make sure your bun has a little bit of volume. It doesn't have to be huge; it doesn't no just make sure just give it a little bit of volume. So what you're going to do next is you're going to grab that ponytail holder that you have, that is on inside of the braiding hair and you're, going to put it directly on your bun and then you're going to sit it there and then the next thing. You'Re going to do is separate it into the two sections that is already separated into and then you're going to twist it counterclockwise. So this part is a little hard to explain, but i'm going to try my best. You also have visuals so you're going to wrap that hair around your butt and you're, also going to twist, at the same time, count counterclockwise and you're going to move that extra hair that you're not using out of the way and then you're just going to keep Twisting it until that hair runs out, doubling it and tripling it on top of each other and then once it gets to like the end of the twist, you are just going to keep go down into the twist. If that makes sense, you see, i hope you understand what i'm trying to say. So the next thing you're going to do after that part of the twist, runs out you're going to grab the other piece of the hair and you're going to still twist it counterclockwise. But you see how the last twist was: um turned clockwise you're, going to twist that piece counterclockwise and then that's what gives it a more volume and just fix it up like you like it, and then you are finished with your bun, so you guys can use Bobby pins to secure it, but i personally don't like bobby pins in my hair because of how it hurts in the middle of the center of my head, but for each his own once again. If you want to use it and use it, but mine usually stays okay, so this is me taking out the bantu knot and for my hair you would just take out your clip banter knot. Whatever you have in the front of your head to make the bangs and then we are going to repart the section and straight down the middle, so that the bangs can be even the one about me. Oh, i did forget to state that you do not need to use heat. If you do not want to use heat on this hairstyle honestly, you can put your hand to bantu knot. Buns and your hair would still be popping. Your curls will still be popping, but me personally, i wanted to do something a little different than i usually do, and i ended up using a curling iron. So what you would do next is grab whatever you are kind of your hair with like flexi rods or a curling iron, a flat iron. Whatever i used a curling iron, i'm just curling my hair and then i'm holding it for a good like 10 seconds, and then i release it um the best way to release it is release it upside down. In my opinion, i tried my best to release it upside down, but it was trial and error yo that little curl was popping. But next you would just go to the other parts, the other section of your hair, and then you are just going to curl it. Just like you did, the other one if you are using flexi rods, just keep them in for a good, probably 15 minutes 20 minutes to an hour doesn't matter depends on how defined you want your curls. I wanted mine pretty defined, so i just you used a certain type of curling iron, so i noticed that one side of my hair was more defined than the other, so i had we went in and re-curled that side, so i ended up fixing my edges up. A little bit um and in three two one here is my final product. My cousins are crazy. My cousins like boogie life, is amazing. It is what it should be.
Comments
Sunshyne Booth: Super cute and simple
ReCee F: Love it!
Sugar Johnson: This was so cute
India Mone’t: so cute
ItsFred: Slayedddddd!!!!
malikahi dudley:
SoChar: new sub here, hey babe!