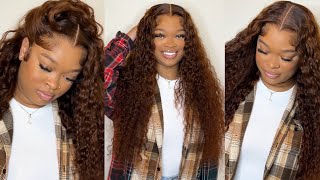
From Black To Reddish Brown Hair Tutorial~How To Bleach Bath Method In 10Mn ~ Watercolor Black Hair
- Posted on 16 October, 2022
- Bangs
- By Anonymous
Heyyyy Babes, welcome back to my channel
up this video if it was helpful and you enjoyed it
Subscribe to my channel @Daphnide
---------------------------------------------------------------------------------------------------------------------------------------------------------------
PRODUCT USED
Adore Semi Permanent Hair color
French cognac 52 ( 1/3 of a bottle )
Copper brown 76 ( HALF a bottle )
rich amber 78 (one drop)
Bleach : CLAIROL powder lightener - DEDUSTED EXTRA STRENGTH
Wella - Color charm clear developer 20 volume
HAIR INFO
HD Lace Body Wave 5x5 Lace Closure Wig
18 / 180% / Small
https://www.eayonhair.com/products/hd-...
--
Camera Canon Rebel SL2
Sigma 50mm lens
Business Email: [email protected]
Instagram @ Daphnide
Lien : https://www.instagram.com/_daphnide_/
#gingerhair #brownhair #gingerwigs #brownwigs
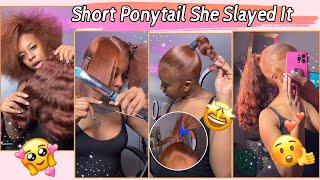
Hey babes, it's Daph and welcome back to my channel, I'm back with another video for you guys and in today's video I'm going to show you how I transform this black wig to this redish-brown color.. So this is the wig that we're starting with this wig is from Eayon hair, and this video is not sponsored and at first I was going to film a simple install and I even bleached and plucked this wig. And then I changed my mind and decided to color this wig because I already have so many black wigs. Ok, let's move on to the DIY you're going to need a huge plastic bowl and some bleach. I'm using this bleach from Clairol and a 20-volume developer. I will leave the links in the description box for you, guys. and I just mixed the bleached and the developer together until I got the right consistency for my liking., I'm lazy and have little to no patience. I just dipped the wig into the bleach and I just massaged the bleach into the hair.. If you're not used to bleaching wigs, don't do it that way, because you're going to need to work fast and to ensure that you separated the hair for the bleach to go everywhere.. I know this isn't the best angle, but that's the only angle I could give you without my camera getting in the way.. Remember when I said that you need to work fast, it's because bleaching, the wig like that took literally 10mn after 10mn. I could already see that the wig was changing color and it was ready for me to wash it because I didn't want to damage the hair.. I don't know if it was the bleached or the hair, but this was FAST anyway. I just washed the wig with regular conditioner After bleaching and washing the wig. I sprayed the lace with my Got2be spray, because I didn't want the lace to get tinted by the color. I sprayed A LOT of the Got2be spray into the lace.. We can move on to the coloring. I used the watercolor method because, in my opinion, that's the faster way to color hair.. I didn't even wait for the wig to dry. I just made sure that the lace was dry because of the spray. And I used hot water and 3 colors. For this I started by putting a drop, and I mean a tiny bit of the color rich amber and I mixed it in the water. Then I put half the bottle of the copper brown. I didn't have to use all the bottle, because I didn't put a lot of water in my bowl to concentrate the color and the hair. Isn'T that long to use all the bottle? And lastly, I added 1\3 of the french cognac color and I mixed all of them together. Now. The last thing is to put the wig in the water. I started by putting the end of the wig in the water. just dipping it in and out to see how the color looks and I was aslo making sure to open the hair for the color to not miss a spot. Lastly, I dipped the frontal part of the wig in the water, because I wanted the roots of the hair to be a little bit lighter than the rest.. Ok. Now the coloring part is over. I washed the hair with some conditioner, no shampoo. I sprayed this Tresemmé product thingy on the hair to make the hair dry faster, and I sprayed my heat protectant and some oils thingy to make the hair shine, and then I blow dried the hair and flat iron it. This color is giving me life and I'm here for it. I promise you guys that if my lazy self was able to do it, you can do it. It was easy anyway, make sure you, like this video and subscribe to my channel. If it's not already done and let's get started., I could have left it the wig air dry, but I had places to be yall and no time for all that, and this is how the color turned out. I love this color. I was fighting the urges to not go dye all my wigs, this color, so hopefully you like it too. Now move to the install before I install the wig, I applied my foundation and a setting powder to the lace, even though this is an HD lace, and I didn't have to do that. I just think it looks better that way. Anyway, I put the wig on and it was my first time seeing the color on me and I loved it. It was given what it needed to give. Now for the installation. I did nothing special guys. I wished that I made something to make this special, but honestly, this install was one of my most basic installs. Before I cut the lace I marked where I wanted to put the glue. This wig is a closure and, after I cut the lace with my razor, because I think that it makes the hairline looks more natural. And guys remember that at the beginning of this video I showed you me plucking that wig so now tell me why now it Looked like, I didn't do anything., But at this point I was too lazy and tired to do something about it, so I decided to glue it anyway nd to glue on this wig. I used 2 layers of this glue from Myfirstwig and, as you guys can see, I'm starting to run out of it and I'm probably gon na need to order some soon, Because I really like this glue, I don't use glue often, but whenever I use glue, I Use this glue by the way I know it sounds obvious, but make sure to apply the glue on your forehead and not your hair to not damage your hairline. There'S no need to rip your edges off for a wig. I applied the glue on like an inch of my forehead and after the 2 layers dried. I put the lace on top of where I put the glue. If it makes sense, you guys are seeing what I'm doing on the screen.. After that, I used my comb to lay the lace on and I'm not gon na lie. This was fast because the wig is a closure. It takes less time to install and I've fallen, ... falled ... does that makes sense anyway. I really like closure. Now. I wasn't a fan of them, but now I love them because of how fast you can put them on and still protect your hairline Anyway, after gluing the wig. I tie the front with this. I forgot the name, but this long, sheer sock, you guys know what I'm talking about it just does an amazing job to flatten the lace.. Usually, I would have to do way more to install my wig, but I decided to cut some layers and bangs into this wig because I felt like the wig wasn't thick enough to leave it like that. Honestly, this is a good wig, but all the time that I was bleaching and installing the wig, I thought it was 150 density, and I was happy about that because it takes less time to do style and color, but turns out the website says the wig is 180 density, which is a lie, this wig, doesn't feel like 180 density at all. Anyway, back to what I'm doing and guys, I do not recommend you guys to cut the layers and the bang the way I'm doing it don't get me wrong. It turned out really cute, but I'm just so used to cutting layers and stuff that just do it without thinking. So I completely forgot that I was filming and didn't really show you guys some real technics, so you may try to do it like me. But good luck, I'm not responsible for what can happen.. The only thing that I can say that I did right. Tho is cutting the bangs way lower than where I wanted it, because If your first cut is exactly the length you want it, I will pray for. You because 7/10, that first cut, is never it, and you need to remember that you'll need to not curl, not curl, but curve the bang a little to make it look cute., Which is going to make it look shorter. Anyway. This is just me trying my best to style this hair. I could have done a better job, but I was tired. I did all of this. In one day, this video was mostly for the color, so don't judge me, and I didn't really know how I wanted this wig, so I was just playing with it until I find exactly how I wanted it and I ended up cutting a little bit more of The bang and just curling the hair - and I did my makeup to give you guys a final look and that's it guys. I really hope that you've enjoyed this video, don't forget to like and subscribe. If you enjoyed my content, I will see you guys in my next one peace out.
Comments
Leana Mitchelle: I love how you’re basically like “I don’t know how to do EVERYTHING” but your wigs are always GORGEOUS
Adelcia: Thank you for posting! Literally have been searching for months to find someone who achieved the gingery red I’m looking for. Did red before but wanted it as natural as possible. Going to do this weekend!
Suelem: Now, why did you make me wanna try this on my wigs when I know it won't turn out like this?
Stevia: Watching you is how I know that some people just have natural talents because how did you learn to do this on your own. Never disappointed, the talent is always showing
Emma hougston: Shoutout to all the non-professionals who are about to try this at home. Daphnide isn't responsible for the burn wig that may follow this came out amazing
Yandji: You’re one of the few YouTubers whose videos I watch from beginning to end. Honestly love the content! The colour is everything!!!
Ingrid Rose Fabienne Larochelle: The angle wasn't bad, maybe too much light but every step was clear, you did a good job with this wig, bravo❤
Jess J.: the color is so perfect im in awe
Judy Plaisir: The color is EVERYTHING
Brad Pierre: Amazing, u did a good job
Johanah Destiné: I’ve been wanting to die my hair but I couldn’t choose a color . Now I know what color i want for this soon to be new chapter of my life
parnel mahautiere: Beautiful color
Kewiille: Not the same color as one of my next videos lovit
AdamadA: Giving poison ivy. Yaaas
Jess J.: omg DO MY HAIIIIIIRRRRRRRRRRR