Going Blonder - Bleaching Blonde Hair Safely - No Breakage Balayage Highlight Tutorial With Formulas
- Posted on 22 January, 2023
- Bob Hairstyles
- By Anonymous
Hey Everyone! Today's video is a fun one. I'm trying out a method that I've never done before. I know I've likely scrolled past people doing their foils like this before, but I can't remember who it would have been. I'm not saying this is "my original method" by any means! just something I thought up of on the spot and decided to give a try. I am happy I tried it out and Ill be using this method in the future. If you try this out, please let me know how it went. I always appreciate feedback.
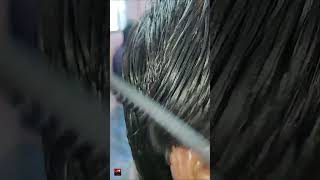
Today I tried a new method and I think I'm going to use it in the future and it's to get rid of this three tone color. So I have the roots which I'm going to handle and then there's this bright patch in the middle and then really kind of dark ends which we don't want to see. So let's get started so my client today came in for a Balayage and she basically wants to brighten up the whole thing and make it more. Even so, we have several months of her natural root, which is, I would say, like a level eight, maybe even an eight and a half. And then we have this band of her recent bright Balayage. She got done by another stylist and then some kind of older darker ends and those can happen for many reasons. It can be porosity, it can be overtoning and it could just be that her previous Balayage is before this one. That'S in the middle were a little bit too dark and the middle one wasn't properly connected now that can happen, but basically, what we're seeing is a really obvious distinction between the three colors and our main goal today is to keep the hair healthy, while also evening Out the hair, so that's the challenge and I'm going to try a new method which I've never done before, I'm a little nervous. But I can't wait to show you I'm going to start by sectioning off the hair, so I basically got her parting and either side down to the ear and then the back is going to be one big parting. But what I'm doing to save myself pain in the neck and a bit of time is to section the back into several sections. So I don't have to keep putting up one giant ponytail at a time and my pieces that I'm going to be taking. My sections are going to be quite thick and I'm going to be doing quite a large weave, and I'm recommending this for anybody who does have a level seven to eight natural client, because she needs to see some contrast. Basically, when you try to go as Blonde as possible, but your natural hair is already light. What you're going to end up seeing is, if you have little tiny, highlights, everything's just going to blend together and make the blonde look darker, and it's going to make your natural look lighter and then everything's going to look like it's all the same shade. But if you have really big PC sections - and it's a quite obvious distinction between that natural color in the root and the Highlight, then the blonde is going to look blonder in comparison. So that's why I'm doing such a chunky weave here also what I'm doing is. I am doing a little bit of a back comb and I am trying to brush up as softly as possible with my big Power painter brush to get these really soft Balayage techniques, also, with the way that I'm doing a bricklay is whenever I have to split The piece into two sides I make that a slightly thinner section so that the only thing that's getting dropped out is what's being dropped out of the weave. But when I do a piece, that's one big long middle piece. You'Ll notice that there's quite a significant drop in between and that so that I still have some dimension in the back so that she can grow out her hair for another year and not have to worry about getting a super Rudy. Look! It'S going to look very soft and very dimensional versus the front is going to be less dimensional and more blonde, because we want more of that soft flow from the front to the back being more to less blonde. Now you might be wondering why I'm taking the foils and holding them horizontally instead of vertically - and I actively chose to do this today, which is the new method by the way that I was going to get to. I chose to do this because I want to leave all of those ends out for a technique that I'm going to do later. This will save me time, and this, even though, is kind of a little bit weird to get used to like with my hands and whatever. I feel that this actually did save me a lot of time, because when you want to get rid of those dark ends, you would have to either lighten them in the foil which can be dangerous or you can do a wet Balayage in the sink afterwards, which Takes a long time, it sometimes doesn't work all that. Well, so I'm leaving out these ends so that I can paint onto them with a Balayage method, with my clay lightener later that will be covered in this video so that, while these roots are processing with a higher developer, I'm using a 20 and a seven together Mixed with blondie, by the way that later I can put on the clay developer on the open air ends so that they can process safely and slowly and catch up to the roots, all while the roots process. All together, I didn't want to put the ends in with a separate developer in the foils, just because I was concerned for the health of the hair. If we needed to wash her out sooner because of those ends, then at least they're all left out. So I could bring her to the sink while still leaving the roots in the foils. If I needed to now that I've moved on to the front something that's a little different from the front than is from the back is yes, we are still doing the horizontal partings, but we are not leaving out any drops other than what's being weaved out of The foils, so this is how I create a money piece without having to do a separate section of foiling. I weave into my foil, a giant piece up at the front. However, big, I need my money piece to be keep in mind that the blonder the client is going, the bigger the money piece needs to be for them to see it, and I'm continuing on with this pattern. Doing some pretty chunky foiling all the way up to close to The Parting, but Along The Parting, I'm going to leave an inch on either side, and this is so that I know where to stop doing my standard foiling and so that I can do a special Type of foiling just along the parting in case my clients, parting changes a little bit. I do want it symmetrical on either side. So I'm going to just do my standard chunky, weave all the way up to that inch parting. On the other side, I'm going to show you how I did that parting, so my first piece is again quite chunky. Quite bold, I'm doing about three foils here in that inch parting, and I go from right to left to right to left. I do one side than the other immediately, so I have the same effect on either side so that I maintain symmetry as well as a dimensional look. Now. The second highest up piece is going to be kind of a skinnier weave and a lot more left out of the foil than you. Imagine, because I want to have some depth right below that top piece so right here, there's not that much blonde going in. But I am maintaining my money piece. As always, money piece goes into the foil, especially right up at the top front, and then my final piece on either side of The Parting is going to be a slightly skinnier weave and much more of the hair being put into the foil. But there is no money piece here because I do want to have that softness, because softness allows for a great grow out. Now comes the fun part, so we're putting on a frame our back Bib. And this is going to protect my cape and my chair, and if the cape actually opens up on her clothes, then none of the hair will open up to the clothes and you know bleach them. So definitely get yourself some back bibs. If you don't have any already, because they are super helpful, so let's get on to the hand painting I'm going to take my paddle put a little bit of lightener on it, so the hair sticks to it and I'm going to very much saturate these ends and And really work the product into them and then sweep the product up backwards with the other side of my brush, so that it creates this very soft blend. These are very large sections, so it is fast in application, but it is pretty practical because you're leaving these ends out to process in the open air, and that makes sure that they're not getting too hot or too insulated. So, if you're scared to put in foils that have already been lightened all the way into the foil, even with separate lightener formulas, this is a really great way to do this, because at any point I can just take her to the sink and rinse out just Her ends and leave her roots in to keep processing. This also allows me to save time at the sink by not doing a wet Balayage over there, with her hair being diluted with the water and taking a long time sometimes wet Balayage doesn't lift as much as you need it to another way, to get some good Lift out of a clay lightener is to mix in a little bit of your regular powder, blue lightener into there. It adds a little extra power, but you maintain the consistency of the clay, which is what I did here. So I mixed a little bit of Blondie. I mixed a little bit a little bit of play and I put in a seven volume developer here and so these ends didn't feel super fragile. They just were kind of dark and she hasn't gotten her hair cut in a long time. So we will be doing a little bit of a haircut as well, but this way we get to saturate them and brighten them up, while the roots still process and for this process. I believe I left it in for about 30 to 40 minutes, because clay processes super slowly. Definitely don't do a clay, Balayage appointment if you're hoping for something, that's really fast. It is low and slow and it takes its time. But it's also very gentle on the hair, which is why I love clay lightener. I'M definitely going to be doing this service a lot in the future for any of my clients, who also have naturally light hair and they need their ends to be brightened up safely. So if you've never tried your hand at hand painted Balayage before, if you get a client in your chair and you want to learn how to do it, this is probably the easiest and best way to learn how to do it before you start with a full Balayage on new hair, so now we're going to check on her foils her foils had lifted to a beautiful level. Nine like inside of the banana they've, got a little bit of warmth to them, but we still want to match what she's actually lifted to everywhere else. So we don't want to be like a level 10 white blonde, because then we're going to get a different toner porosity in these roots than we are everywhere else. So this is a perfect match to what everything else has lifted to which means that it's time to wash her out in the sink. So, let's check on those ends and see how they're doing they formed a bit of a cast, but not too much. They are lifting quite nicely still feeling quite healthy, but I can see that they've definitely brightened up, maybe not all the way to a level 10, but that's okay, as long as everything's still a beautiful color and it's all more uniform and it's still maintaining its Health. That'S all we can ask for of the hair, so it's still feeling pretty good wiping off that clay to check we're ready to wash her out. So I always like to give the hair a couple of washes and then to do a purple, shampoo and then to seal over the hair with a conditioner. So the porosity is more even so now that I'm going to tone here is her hair before toning, the hair is more even and I'm quite happy with it now comes time to do my root Shadow and again, as I've told you guys in a few other Videos whenever I have a naturally light base, I like to apply the root Shadow first, because we're not going to run into the potential of getting a too dark root shadow that ends up looking patchy. I always want to put in the root Shadow first on light hair, because I really want it to absorb and give a lot of blend to these blonde pieces. So as for my formula, it is a 9-0 plus a 9-1 and it's equal parts. Maybe there's a little more nine one in there, but that's just to balance out a little bit of that warm tone that the zero zero can give, because a zero zero is a natural natural and a 9-1 is a ash sondre color. So it's a good balancer and it keeps her light and it just adds a little bit of blend to her hair and it's going to be on the same level as her blonde color. But the blonde color doesn't have any of those like brownie blonde tones, which you usually get a brownie blonde from something with a natural or a beige in it. So this is why my root Shadow isn't technically darker than my highlight formula. It'S because I just want to add in a little bit of that soft transition from her roots to her ends. So my blonde toner formula is a 9-1 and 9 and a half dash one nine and a bit of 955, because you guys know me. I always always mix in a little bit of warmth, with my cool tones for a perfect balance. Now that I'm saturating through the hair, you can see that it's starting to process it is looking gorgeous. The hair is looking even from top to bottom and we're just going to let this process all the way until the roots have this beautiful blend. Just like this, this is what you want to see. So as a reminder, this is her before, and here is her. After so, we gave her a little trim and we gave her a couple little layers and she is feeling refreshed. She is blonded up. She is so much more evened out. Her roots are so soft. It'S going to give her a Perfect Blend to grow for a long long time because she likes to come in once or twice a year, and she just has such healthy, shiny hair and I'm just really happy that we were able to get her to this level. We would have loved to get her like, maybe to a level 10, get her a little more icy, but we take what we can take and we're happy for it. Nevertheless, because she end up with healthy, beautiful hair, and that's all that counts all right. So I want to hear from you guys what do you think of this transformation? What do you think of that new method that I tried out uh sound off Below in the comments and make sure to like And subscribe if you haven't already, thank you guys. So much for all the love. I really appreciate it and I hope to create some more awesome content for you guys soon.


Comments
Chrissy: Love your videos!!!!! I’m deathly allergic to bleach (as of a few years ago), can’t go to salon’s anymore either…. so I just adore sitting back and watching you work ❤ your techniques for toning/color corrections are just incredible ❤
Kate D: That finished hair is STUNNING!!
ASMR Amour ✨: Fab job as always! I’ve done something similar before but I just cut the foils as long as the regrowth and sandwiched them instead of folding a foil sideways. Your toning always gets me so excited! You teach me so much ❤
Diego Macias: wow, amazing, normally im anxious about seeing two different techniques on the same hair like “teasing and hand painting, or babylighting and lowlight” because i find it complicated and my brain can’t handle it,but make it look so easy, never stop sharing your formulas and techniques, i love them
Daniel X: You are so good at what you do! Thank you for teaching and inspiring us ❤️
Brandy Griffiss: I mean.....what else can I add to perfection?!?!??? I love getting my education with you Katie, you never let me down♥️
21hairgirl- Amber: Her hair was so pretty to begin with and SO gorgeous at the end!!! Great job! My one question is that do you not get skin issues on your hands? I noticed you don’t wear gloves. Also did you mix any bond builders such as Olaplex 1 into the bleach? I’m a licensed cosmetologist too.
Samantha Pandolph: I've been trying to move my blonde up from my old balayage and I'm having the hardest time getting rid of the gold brassy color. So I'm scared to even attempt go up more.
robert björnesjö: Really Nice technics and the endresult looks so healthy and natural blond
Tammy Hoffman: I couldn’t wait for this I have a client that we need to do this on!! Thanks I love your videos you teach well!!!
Susan Mendola: Absolutely love the finished product! Just out of curiosity how much time do you think you saved by doing this method vs the “typical “ technique??
rockpaperskizzers: The end result is beautiful. So bright and clean. And the trim added that little extra bit of polish ❤
eliwaffles88: I love it!!! Blond doesnt suits me, but it really look good. Btw, I love the brushes, just like an unicorn!
Braids by Fauve (Francine): Gorgeous! Love the method u used xx
Ghostiiie kun: Thank you so so so much !!!! Omg I never thought of doing it this way with the foils !!!
MARCIALS BLENDS FRAGRANCE: I ABSOLUTELY LOVE THE NEW METHOD. BEAUTIFUL WORK
Ratified: Incredibly talented amazing technique and beautiful outcome, please come to Australia
Milk Andhoney: My dream hair! It’s gorgeous!
Michael Shifflett: Absolutely Gorgeous and I learned a new tech THANKS
Julie Sekeres: I look forward to your videos and thank you. Where do you get those foils and the swatch books for all the sckwarf colors.
Ziv Benigoyev: wow !!! so i'm trying to understand how you are not left with a dark line at the middle part. and i'm guessing it only worked thanks to the teasing. and it also worked because her overall color was blond before.. woul'd that method work on a client with natural level 6-7 that want's "mouse grey" highlights? let's say the client has some yellowish ends from older balayage that need more lifting. i'm worried that the middle lines woul'd be much more noticeable in such case if i used your method from this video.
Valla Sherie Mayhew: I love watching your work so question, where do you get those foils??
Cathy Mcevoy: Interesting video. I'm always looking for a way to brighten my ends but afraid to overlap....
stan sunoo: i hope you you respond to this, but what shades of blonde do you recommend for neutral skin tones
Екатерина Петренко: Very beautiful result
Lloydell Miller: Perfect!!!
hanna kosonen: Great method i feel sorry for your hands though... Touching stuff bare handed and all the washing of them in between
ca ac: How the unbleached mid part blended so well? Unbelievable
Marilyn Doll: Excelent work
Kenzie S.: The blendddd
Tracy D: Stunning!
Ingrid Bennett: Beautiful
Beatrix Kiddo: You are an artist
James Zaharik: ❤
Ĺ alabaster:
victoria orsson: Outstanding.
Art by Emma Kate: I have to ask “money piece” i know the look isn’t new but is the term? I’m surrounded by hairdressers and never heard someone say money piece ever lol suddenly every hair video mentions it.
ca ac: Sorcery !!
brittanyalbright: Where are you located?