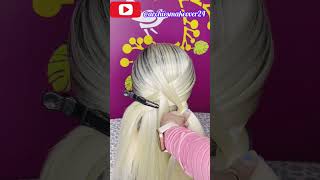
How To Do Large Knotless Braids | Ombre Braids | Hip Length Braids | Khadijahwithah
- Posted on 26 February, 2023
- Braids Hairstyles
- By Anonymous
It’s a Large knotless Long Ombre braids Kind of day! The weather is getting a bit warmer here and I just couldn’t wait to get my braids done! This was so straight forward to do and it took me 6 hours from start to finish!
I hope you can learn a few tips and hacks while watching this video that you can use on your own when you’re braiding your hair! If you have any questions please ask me in the comments and I’ll gladly answer!
Please like my video, subscribe to my channel, leave a comment and share my video with anyone and everyone!
_____________________________________________________
TIME STAMPS
00:17 Intro
00:50 Hair Products & Tools Used
01:21 Parting & Braiding Hair
05:36 Parting Hair Tips
06:52: Braiding Hack
10:50: Dip Hair In Hot Water & Apply Mousse
11:45 Finished Look
_____________________________________________________
HAIR PRODUCTS USED
Mielle Organics: Pomegranate & Honey Leave-In Conditioner https://www.amazon.com/dp/B075PTHVKN/?...
Design Essentials: Herbal Complex 4 Hair & Scalp Treatment https://www.amazon.com/dp/B0037YL2L2/?...
Earth’s Nectar: Monoï Hair Milk Moisturizer https://www.earthsnectar.com/products/...
Mielle organics: Rosemary Mint Scalp & Hair Strengthening Oil https://www.amazon.com/dp/B07N7PK9QK/?...
Shine n Jam: Magic Fingers For Braiders Setting Mousse https://www.amazon.com/dp/B08MBD47TX?l...
Shine n Jam: Conditioning Gel (Extra Hold) https://www.amazon.com/dp/B071L1SJLP?l...
_____________________________________________________
HAIR TOOLS
Black Tail Comb https://www.amazon.com/dp/B07PGRX7M5/?...
Black Seamless hair ties https://www.amazon.com/dp/B07D7D9JCD/?...
Outre Synthetic Hair Braids Xpression Kanekalon 3X Pre-Stretched Braid hair (52 Inches) https://www.amazon.com/dp/B092FRXXWW?l...
____________________________________________________
WORK WITH ME
_____________________________________________________
CONNECT WITH ME
Instagram: @khadajeeee
Tiktok: @khadajeee
_____________________________________________________
SHOP WITH ME
Amazon Storefront: www.Amazon.com/shop/khadajeeee
Foreign as usual, thank you so much for tuning in and thank you so much for always coming back to view my videos. I appreciate it and if today is the first time you're joining in I'm so glad you're here, today's video is all about installing large knotless long box. Braids that happen to be ombre. I'M starting my braids on freshly washed hair, and I stretched it without heat. Here are the things I need for today's hairstyle shine and jump for my roots, Shannon Jam mousse for the braids, the expression pre-stretched, hair, Ultra braid in color 2t1b, slash blue, because it's an ombre braid and I'm using 52 inches. Because I want length baby, I'm also going to be using a braiding hair rack. It makes it so easy to pre-select and pre-divid the hair, because you don't have any ready to be passing the hair for you, I'm starting from the back as usual, because this starts the foundation for the whole hairstyle. My aim is to have two rows at the back and three rows in front once I do a line and it's not as straight. I always go back and redo the line, that's where my patience comes in and I just keep going. I put a little bit of shine and jam on the roots just to make it a bit Sleek, not too much and I brush it out and I get it ready for my braid. So I start my braids by dividing them into three parts. The part on the left is the vertical divide, and the two parts on the right are horizontal divides are divided in the middle. This technique has worked for me because the braid stays in the middle when I start them. So I start to braid with my own half burst before I add the first feed in braids, because this is a knotless braids. It'S a feeding technique. So you don't start the braid with all the hair that you need. You start the braid with as little hair as possible and you keep feeding it till you get your exact thickness of braid that you want. This part is a bit slow because I'm trying to make sure my own hair is tucked in as well. So it doesn't really show, and I'm also trying to make sure that the hair I'm feeding in is installed properly. I insert the feeding hair underneath the braid, so you don't see any joining once the braid has been done. This technique has been so seamless and it works perfectly because I don't stretch my hair with heat. My hair isn't always bone straight, but I rather this. The fear of heat damage is the beginning of wisdom for me, once I've added all the feeding hair that I want to add to the braid and I get to the middle of my own natural hair. I usually add a bit of shine and jam as well. Just to make it a bit sleek and straight-ish to match the braiding hair that I'm using and then I continue braiding. This method makes it easier for me to tuck my own hair underneath the braiding hair. So you don't really see it as much, and the braids would last longer again because my hair does not match the braiding hair. Once I am braiding and I pass the point of my own natural hair, I braid like a champ. Just keep braiding just keep braiding. Just get ready once I get to the part where the hair is a bit too long for me to braid. I do not insert the hair in my mouth, but I use a hair clip. Instead, I clip half of the hair at the top and then it's easier for me to braid the rest. Please remember that when you're cutting your hair, it's not going to be perfect. The very first time sometimes you'd have to part twice. Sometimes you have to literally do the line three times four times five times I just keep going to like get a straight line because yeah perfectionist foreign once I'm braiding the pot that has my hair. I braid super slow just to make sure none of my own hair is left out. Remember this is the protective style I have to tuck all my hair, all my ends into this braiding hair, because I don't want to see it out. I wanted to also add, when you're parting, your hair, don't forget to use your fingers as a guide. Your thumb and your index finger are a good guide to point out where you want your potting to start or when you want your pattern to end. So remember: to use your fingers use your mirror, look, be patient, repeat the lines as many times as possible till it gets to the straightness that you want. Honestly. The goal is to just have your hair potted. It doesn't have to be super straight when I first started learning how to pop my hair. As long as I had a pot in my hair, I was good but of course now I've practiced and I want straight lines. But what I'm trying to say is just keep going. Keep practicing. Consistency is key. This hair is so beautiful. I love the color, I love the Ombre. I just love everything about it. It'S soft, it doesn't itch it's just beautiful. Did I say beautiful. Let me show you a little trick that I learned you know when you're braiding and the braid just keeps bunching up. All you have to do is find the hair in the middle and just pull it out and everything unravels. I bet you, it's like magic. Try it and see at this point we're just repeating all the steps that we've learned patch your hair. Look it in the mirror to make sure your pots are straight, apply a little bit of shine and jam to the roots of your hair brush your hair. So it's tangle free divide, your own hair into three and start. Your braid then start feeding in the braiding, hair and repeat, remember to fit in the hair slowly so that you can properly install the hair and you can tuck your hair improperly as well. Foreign look at that braid. At this point I needed a snack. This is a workout okay, I needed a break come on. I literally have two rows left, I'm so happy almost done. I always have to put in that happy dance because Finish Line. I can see you just another reminder when you're braiding the front of your hair, remember to always protect your edges. This means don't braid your hair, too. Tight, don't pull on your edges. Your braids doesn't have to be super tight for it to be nice. You don't need to be taking painkill assist after you. Have your braids done? No, that's a no! No! No! No! No! We have to protect our edges by all costs. Yep, it's definitely an arm workout, but it's not that bad. At this point I was contemplating like who sent me why why why but Mama didn't raise no punk, so we got ta go foreign celebrations as I go, because that keeps me going especially now that I'm almost done foreign, that my people is the face of relief. I have done oh, my God. The next step is for me to dip the hair in hot water. Please be gentle at this point. You don't want to burn yourself, use a big towel, so you can use one end to hold the container on the other end. To hold the hair once you get it out of the water, try to do a dip in motion, so the hair stays straight. If you just dip the whole hair in the water, it becomes a bit Tangled and wavy. If that's what you want? That'S fine! If not just try to keep dipping to make it straight, I also put an end of the towel in the hot water and I use it to rub the top bit of the braid that doesn't get to go into the water and, of course, my favorite part. The mousse this always gives me joy, and we put it the most to finish it up and Sleek in all the flyaways. I don't cut any flyaways from my braids because I feel like I might be cutting my hair and I don't want to do that. So most always works and voila we're done if you made it to this end, you're the real MVP. Thank you so much for watching my video as usual. You took out time to watch it and I appreciate it tons. Thank you so much. Please like this video, because you like it, you know you like it, don't forget to press the Bell, so you can get a notification for every time. I post, please don't forget to subscribe. If you've watched this video and you like it, please subscribe and support me. I appreciate it so much enjoy the rest of your day, bye and I do hope. You'Ve learned a thing or two on how to part your hair and how to braid your hair and how to create knotless braids. For yourself,


Comments
Nthatisi Mphale: I love how the entire look turned out It's like you're from a hair salon I think this is a sign to start taking care of my hair Last touched it at the beginning of the month None of my style attempt Always work out.
Camilia Abdou-Raouf: Love the results ! Could you share how do you moisturize your natural hair with the knowtless ? And how often ? Many thanks ❤
Thembani Shiburi: Momma didn't raise no punk, the braids are soo bomb your videos are so inspiring
@d@m@: How do you keep this braids for ? I like the size , since I don't like doing smaller braids
Nthatisi Mphale: Otherwise I love your consistency queen❤
Nthatisi Mphale: I wish you showed the part where yoh prepped the fibre As in pre-fluffing it before the install
Rebeccam leprince: from Instagram to Here Glad to be here
Nthatisi Mphale: Notification gang