Diy Hair Curler! Easy Tutorial For Heatless Curls With A T Shirt
- Posted on 19 August, 2022
- Long Hair
- By Anonymous
Hello everyone! today we're making a DIY hair curling device out of an old tshirt!
Materials: xl shirt, sharp scissors, something to mark your clothing, a ruler, large hair clip, a brush, and some elastics
How to braid: https://youtu.be/S9L6kQn3f-Q
Thankyou so much for watching!
My channel: https://www.youtube.com/c/Unorthodoll
Instagram: https://www.instagram.com/unorthodoll/...
TikTok: https://www.tiktok.com/@unorthodoll
intro: 00:00
DIY hair curler: 00:12
using hair curler: 02:42
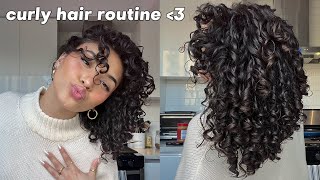
results: 05:10
#heatlesscurls #DIYhaircurler #tshirtcutting
00:00 Introduction
00:12 materials
00:27 Making the curler
02:42 using the curler
05:13 results
Music: YouTube Audio Library
#diyhaircurler #heatlesscurls #overnighthairstyle
Hello: everyone today we're making a heatless hair curling device out of an old t-shirt for this tutorial. You will need an extra large shirt, sharp scissors, something to mark your clothing and a ruler for your hair. You will need a brush, a large clip and some elastics to start lay your shirt down flat and cut off the hem at the bottom. Keep it for later now grab your ruler and draw a line across the shirt right under the armholes. Now, from that line, going down to the bottom measure and mark five dots evenly spaced going down the shirt draw lines going across the shirt at these dots, dividing it into six equal sections now grab your scissors and cut along all of the lines making six bands Of fabric stretch each band of fabric and then cut them at the seams to make 12 long strips line up and lay out your 12 strips of fabric and then cut a small piece of the hem from earlier use. The hem to tie the strips together tight in the center then trim the ends split each side into two sections, making four sections of six strands each in an x shape now, starting with one section, split the strands into three sections of two and then braid them And use one strand to tie around at the bottom braid the other three sections the same way and you should have a braided, x-shaped, hair curler now to use the curler. I started with clean dry hair, but if you want the curls to last longer, you can dampen it a little bit brush your hair and split it down. The middle then clip the curler to the top of your head in the center. So there are two braids hanging on each side. Now there are a few ways you can wrap your hair, but i'm going to show you the easiest way, starting with one side, split your hair into a front and back section and we're going to work with the back section. First, grab a small piece of hair from the back section and wrap it around the back. Braid at the top then grab another small piece of hair and add it to the first piece then wrap it around. The braid again continue adding hair and wrapping it around. The braid, until all of the hair is wrapped, do and then secure the end with an elastic then do the same thing with the front section: grab a small piece, wrap it around then add another small piece and wrap it around continue, adding hair and wrapping. Until you get to the end and tie it with an elastic repeat on the other side, now leave the curler in your hair at least a few hours, but ideally overnight. So this is the next day and it was comfortable to sleep in, and removal is really simple. You just remove the elastics and carefully unravel your hair finger comb, the curls a little bit, and that's it also here's what the curls looked like later on in the day after they fell a little. I really hope you enjoyed this video if you did or if you have any questions, be sure to let me know, and if you're looking for more content check out my other social media, all at an orthodol. You can subscribe to this channel by clicking here or watch another video right over here, thanks for watching


Comments
The Checkered Eye Project: I got a bit of a chuckle when you deployed the old fashioned "mouth clamp" to hold a section of your hair while you wrapped the other! And my hat is off to you for not making faces throughout the process! Did that take training or are you a natural deadpan?!?