How To Make Baby Hair Bonnet |How To Make Hair Bonnet| Two Different Types Of Hair Bonnet Tutorial
- Posted on 13 June, 2021
- Long Hair
- By Anonymous
Hey guys, thanks for watching.Don’t forget to like and share
Track: Zack Merci & Arcana - Love Potion [NCS Release]
Music provided by Nocopyrightsounds.
Free Download/Stream: https://ncs.io/LovePotion
Subscribe To My Channel:https://www.youtube.com/channel/UCr6pV...
LET’S BE FRIENDS ON FACEBOOK: https://www.facebook.com/nwanegbo.ezy
FOLLOW ME ON INSTAGRAM: https://www.instagram.com/ezyndokwu/
CONTACT ME: [email protected]
#babyheadwears
#hairbonnet
#babybonnet
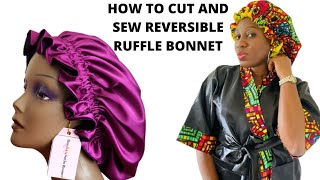
Real nice hi guys and welcome back to my channel in today's video i'll, be showing you two ways to make a hair bunnette i'll, be showing you two different ways you can make hair bonnet. So what i have here is an anka ankara fabric that i'm using to make the first hair bonnet. I have ankara fabric and a matching satin color to line it so i'll start by measuring it now. So this fabric i have here is 21 inches by 21. Inches, so actually, what i need is 20 inches, but i made sure to have 21 inches so i'll fold it into two and then fold the second time, just what i did right here. So after doing that i'll start placing the measurement and i'll make sure to place the measurement starting from the folded edge, that is very important, so i'll measure from that folded edge to 10 inches all the way around to get a perfect circle. So that's what i'll do now and after that i'll cut it out. So, if you're, making this bonnet for an adult, the measurement you'll be needing, is 14 inches and not 10 inches, i'm using 10 inches, because this is for a child. So i measure this 10 inches out and cut it. So i'll do the same thing to the satin fabric i'll fold into two then fold, the second time and start measuring from the folded edge measure the same 10 inches until i get a perfect circle i'll do that and also cut out so foreign. So now i've cut both the ankara fabric and the satin fabric. What i'll do now is to place them on each other with the front side facing each other. That is very important. The front side is the shiny part of the satin facing the front side of the ankara fabric, i'll place that and then make sure to spin and pin them together before taking to the machine to sew. This is very important. Make sure is the front side that is facing each other, so now that i've pinned them together. What i'll do next is: stick it to the machine and join the both of them together at the sides using just half an inch but i'll make sure to leave one and a half inch that i'll use to turn it out after sewing so i'll notch. It all around i'll make sure i notch it all around then after notching it i'll turn it out and give it a very good press, our iron, it's properly me, so this bonnet will have elastic. So what i'll do next is is to create a casing for that elastic i'll start by measuring one inch from the one inch from the edge around so i'll measure one inch and connect and connect. Until i get a perfect second so measure one inch connect and take it all around now. I'Ve finished measuring that and i've gotten a circle. What i'll do next is to measure half inch from that one inch line. Another half inch all round because the elastic i'll be using is just a tiny elastic. That is like half an inch, so i want to make it a room for that elastic and what i need is just half an inch measure. This half an inch around and connect it also, so i've measured the half inch and connected it. What i'll do next is take it to the machine and sew, but i'll make sure that i'll leave a space for the first line, the first line, which is the one inch line from the edge. I will not be sewing that one completely, but the second line i will sew completely, so i'm leaving a space of like one inch or two inches. That is where i will pass the elastic from so i will sew the second line completely for the first line. I will leave like two inches and i'll mark i'll mark my chalk there, so i don't forget when i'm sewing it so i'll pass this elastic using a safety pin, so the measurement for the elastic. What i did i subtracted two inches from my baby's head, circumference, that is around her head. I measured around her head and the measurement i got. I subtracted two inches from that, so that was the measurement i cut out for the elastic. So whoever you're sewing this bonnet for you need to subtract some inches from the elastic depending on how tight or loose you want the bonnet to be so after passing the elastic. I will tie it like two times, because the elastic is too tiny for me to start sewing. So what i will do next is just tuck that hole. I will use a hand needle and try to tack this hole that i pass the elastic through and after that the bonnet is ready, i'll make sure to insert a picture of my baby wearing this bonnet. It is so beautiful make sure you try it. So, let's move over to the next bonnet, so the second bonnet is a satin bonnet. So what i have here is 14 inches by 14 inches of fabric and unfold. It is 20 inches. So what i will do now is fold it the second time and after following second time i'll fold. It again, just like we folded the the first time, just like you folded, the first bonnet i'll fold it again and start placing my measurement on the folded edge, which is very, very important, so i'll start placing my measurement from that edge i'll measure out my 10 Inches until i get a perfect circle and after doing that, i'll cut it out foreign so after cutting it out i'll have two pieces of a circle so after that, what i'll do next is to place them on each other with the front side facing each other. The front side is always the shiny part, the shiny part of the of the satin fabric, so our places on each other and then pin it all around. Just like we did the first time i'll, pin it around, take it to the machine and sew that edge leaving one and a half inch for turning out the fabric after sewing me so i'll knock it all around and after that i'll turn it out and give It a very good press so because i'm using an elastic of one inch i'll be making a casing of one and a half inch for that elastic and i'll mark it all through and make sure to connect as i'm marking. Until i get a circle, i don't know why my one inch line is not showing properly, but i will take this to the machine and sew it and after sewing that i will insert the elastic. So after that. I will take this to the machine and sew and also make sure to close up that hole that i passed the elastic through and after that the bonnet is ready. Can you see how beautiful it looks? I will insert a picture of my baby wearing this. It is so beautiful, so you can see how cute she looks. So thank you so much for watching make sure you subscribe if you've not done that. Already like this, video drop a comment, if you have any question, thank you so much for watching and i'll see you in my next one bye,
Comments
OMO VEE: The Bonnets looks absolutely beautiful
Patience Sango: Thanks for sharing sis, I will come back to the video again soon when I buy my satin cloth, this video came just in time. I need a hair bonnet and you just said it all step by step. I appreciate it so much- lifewithpatie
Lady G's Channel: I really love the hair bonnet it looks so beautiful
Lady Queen: Great job , the bonnet looks so beautiful on your baby
Living with Evelyn: Very beautiful and detailed craft. The bonnets look so beautiful on your baby. Great job.
Olivia Awokoh: The hair bonnet looks so beautiful thank you for sharing
mama danile: Beautiful sharing sister l love the way you take your time explaining step by step guide thanks and baby bonnet is really beautiful and lovely thanks
Patrick Joseph: This is very easy to sew, I have learnt this one, thank you so much
Mamatripleppp Blessed: The bonnet looks beautiful Thanks for sharing.
Gabriel Isoh: This is really beautiful thank you for sharing
Kate Noba: You did a beautiful job it look so beautiful
Thelady P: You are a genius sis, thanks for sharing
Amaka Ndokwu: Good job,the hair bonnets are very beautiful
Lovelove Lovelove: This is really beautiful
Alma's Abode: This is lovely..... I will make it for my daughters right away....
odun ola: This is so beautiful
Ami TV: The outcome is extremely beautiful
Precious Tv: Great job, thanks for sharing
Sansha Bill: This is really beautiful and thank you for sharing
Lydia Annan: So beautiful ❤️
mayowa oye: beautiful bonnet, thanks for sharing
Time with Lydia The Pharmacist: Thanks for this detailed tutorial.
Shashi Bins: Awww very adorable
Ruth: Awesome sharing thanks so much l enjoyed watching this is well explaining step by step guide thanks
True Talk Margret Tv: The baby bonnet look beautiful ❤️
Don Queen: This looks so beautiful on her
money monk: Very detailed totorial i learn so much from you
bernice gift: Wow,beautiful bonnet
JOSEPH MORRIS: Thanks for sharing this with us, this is really beautiful and amazing my dear
mama davide: Amazing sharing this baby bonnet is really beautiful and lovely thanks for sharing ❤
Your favourite Nurse: This is really nice
joy monday: So beautiful sis keep it up
Mama Emmanuelle: Excellent job
Chinny Dee: This is so beautiful.Your baby will enjoy o
Mercy Vivian: This is really wonderful
beautiful becky tv: Waoo fantastic sharing this is really beautiful tutorial ❤ me to grow fast in sewing my clothes thanks
Health Corner with Lily: Wow it looks very nice on her
Hang With Omaa: I have cut an old satin scarf using this tutorial, will sew with needle and thread hopefully sometime during next week
peter Soul: You make it so easy
evana kwei: Thanks for the tutorial.
Grace God: I love those styles
Tobest Studio: Great job Thanks so much
Janice Pinder: It's beautiful..thanks for sharing
VALEX KITCHEN: This is so beautiful
Lesley: Wow this is so beautiful
Queen Lovely: This is so beautiful
Kqnixpaknd: Beautiful
Marasinach Tv: Great great job Thanks so much for sharing
Ruth Ade: So beautiful
Demirose Touch: She's so cute ❤
Glory Daniels: Good job sis, keep it up
JGT Head Wrap Studio.: Very beautiful thanks for sharing
MadamAproko TV: Thanks
Mandyfrizz: Your baby girl is a cutie
Peoin Olon: Wow this so beautiful
BLESSED REGINA: Great job dear the bonnet is beautiful
Jessica Trnovec: I need to make one for my daughter , to protect her silky hair
Chata: Wao this is beautiful, thanks for sharing
Fuke gelamua: Beautiful
Mama v: Beautiful
Tessy one of Paris: Great job thank for sharing
Familie lang Tv talk show Lang: Thanks sharing,the baby hair bonnet look good
Pretty gold Tv: The is really amazing
Wiao: So beautiful
Suzy Farms: So nice on them. Well made
Ada's Haven: Both bonnets looks good on her
Beryl talk show Japan: lovely thanks for sharing
Omo Dena: I love it
Blessing Dozie: Very creative
Bami Semia: Nice one and your baby so cute
DGMS family tv: Wow so cute
Blessing Inegbenose Tv: I like this bonnet for kids
Adesu: Nice one
Bisola Devi: Lovely
taye ola: Very nice one
Mama Eki: Nice one
Saint music v x o p: Great
Pelumi Oyeleke: make some and send to me pls