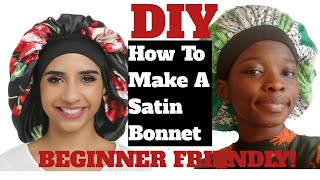
How To Make A Satin Hair Bonnet Without Elastic | No Elastic Satin Bonnet Diy.
- Posted on 16 February, 2022
- Long Hair
- By Anonymous
In this video, I show you an easy step-by-step DIY tutorial of making a no elastic satin bonnet. This is great at preventing frizzing and helping your natural hair retain it’s moisture.
Enjoy
Music used in this video:
––––––––––––––––––––––––––––––
Track: Sunset With You — Nico Anuch [Audio Library Release]
Music provided by Audio Library Plus
Watch: https://youtu.be/6IoVNQ1R3Bc
Free Download / Stream: https://alplus.io/sunset-you
––––––––––––––––––––––––––––––
––––––––––––––––––––––––––––––
Fiji by MusicbyAden https://soundcloud.com/musicbyaden
Creative Commons — Attribution-ShareAlike 3.0 Unported — CC BY-SA 3.0
Free Download / Stream: https://bit.ly/-fiji
Music promoted by Audio Library https://youtu.be/e6EbHVb70Qk
––––––––––––––––––––––––––––––
In today's video i will be demonstrating how i make a satin hair bonnet. I start off by laying and cutting out two different satin fabrics in this case. One is black and the other is a gorgeous leopard print, because my black satin is so much and i didn't really want to trim it into smaller pieces. I just folded it a little bit along one edge and i measured a width of about 11 inches. This 11 inches will be the measurement of my circle, radius, which you will see a bit later for the lengthwise measurement. I use 22 inches so that when i fold it in half later, it will work out to 11 inches right around the circle. Once the measurements are done, i then cut out the piece. I know it looks like a rectangle now, but that's because it's folded in half, but when i open it up trust me it will be a perfect square using that black square that i just cut out. I lay it over the leopard print and then i cut out another square. The next step is to fold each of those squares into well fold. It twice so that i end up with even smaller squares. Once again, using my measuring tape, i mark out an arc of 11 inches, which i will then proceed to cut out, so that i have a perfect circle. With both circles pinned together right sides facing, i go up and i mark from the edge about four inches inward toward the middle in order to later create a slit at this point. This will just allow for a bit of flexibility in terms of sizing of the bonnet, since this one will not have elastic and then about maybe half a centimeter to a full centimeter around that four inch line i trace out - or i just draw in a guideline Of where i will be sewing or will be stitching, please note i will not be stitching on the four inch line just around it. I will cut open the four inch line after joining the two circles and cutting open the slit. I go ahead and press the seams flat so that they look nice and neat. So at this stage, i'm just pinning at a few points just to keep the two pieces steady for when i start to pleat. Do i like to start with a box pleat or inverted pleat, depending on which side you're looking at at the center front of the bonnet, which is really directly opposite the slit? And then i proceed to pleat in opposite directions on either side of that middle plate. Until i reach the slit, this is probably the most tedious step of the process, which requires a lot of patience i like to just then go over the pleats or the pinned pleats with needle and thread and tack, so that when i sew, i don't have to Have the pins in there, i suppose one could just go right ahead and tack the pleats without using pins, but i feel that if i pin first then my piece will be more accurate. I also cut out a black band, which is about 120 centimeters by 12. Centimeters i folded it along the middle lengthwise pressed it, and then i joined its middle to the middle of the bonnet. I did this while it was open and then stitched across do do once. That'S done. I then fold over and close off the band by top stitching it from one end to the other end, and that's it we're all done. This is what the bonnet looks like. I hope you like it.


Comments
renee thomas: I love your tutorial. This is the first time I've seen someone do pleats for their bonnet and it's exactly what I've been looking for. How big do you make your pleats?
Melissa M: Awesome, easy to follow tutorial!!
Esta Gimo: that fabric is gorg. Thank you for the tutorial ❤
Rina Wallace: Beautiful bonnet, along with easy and detailed instructions. Would you increase the measurements for a 23.5 inch head? If so, would the measurements be 11.75 by 23.5? Thanks much!
Esta Gimo: the best and cleares tutorial so far ❤❤
pat lee: Hi ...loved this idea. Easy to follow tutorial. Great Christmas gift idea for family
Annie Chioma: Beautiful. Kudos.
Gifty Appiah: Good job ❤️
Zeenab Modibbo: Hlo,please wat type of satin are you using????.is it bridal satin