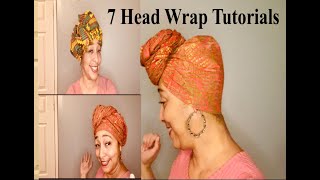
Diy Satin Bonnet Head Wrap|Diy Satin Bonnet For Natural Hair | Ankara Satin Bonnet
- Posted on 12 June, 2020
- Long Hair
- By Anonymous
Learn to make a Reversible Bonnet that also is a Head Wrap. The satin bonnet tutorial explains the process of making it step by step that even a on absolute beginner can understand. The satin inner layer makes it great for natural hair. It entails how to tie the head wrap too.
The tie detail turns the bonnet into an Ankara head wrap for an everyday look. You can now wear your bonnet in public and not be embarrassed! lol
Bonnet Head Wrap (2 in 1) + How to tie Bonnet Head Wrap
CONNECT WITH ME:
Blog: https://www.pelumzsecretz.com
Instagram: https://www.instagram.com/pelumz.secre...
EMAIL: [email protected]
Music Credits||
Filming Equipments
Camera: Canon M10 https://amzn.to/2ST9Jvf
Tripod Stand: https://amzn.to/2QtbUny
Key Words
African print fabric, african print headwrap, gele, autogele, african attire, african wax print, enwax, pagnifique, kente fabric, kalamkari fabric
Doesn'T look like a bonnet, but you know that bonnet look. This takes it. I would just add some like edginess to it. Nice hi guys welcome back to my channel. My name is: forgive me if it's your first time tune in to my channel you're welcome. Please subscribe: the subscribe button is right below okay, it's the red, rectangular button. Okay, please subscribe! It just supports my channel and helps this channel grow. So today's video is a tutorial in this head, wrap bun it I really like it. It takes away the bonnet look. It just makes it look a bit more classy like a head wrap, but it still protects your hair because it has the satin lining inside and it's still reversible. So it's all good. I really like it. So I do have a tutorial on how to make a bun at my channel I'll link that below. But in this video I also go through all the steps, but maybe in a bit more detail and how to achieve the bonnet look and how to change that into a head wrap. Okay. So it's very simple beginner-friendly and if you want to see how I made this, keep on watching and like the video and share the video. So I made a second skirt recently and I got these two half circles from the top of the skirt. And this is what I'll be using to make the lining part for the bonnet. So I'm going to show you how to fold the fabric to get this full circle. Instead, it's initially how to fold up the fabric to get a full circle. But if you don't have to half circles like I do here, you only gon na do is you're gon na cut your satin fabric and your main fabric, the same exact way. Okay, so you wouldn't have a joining in the middle, like I will on my, but in here, okay, so I cut out just a small piece of my fabric out and this is it so I'm gon na fold it right sides together once this way, lengthwise and Then width, wise, okay, all right, so I decided to just make it 12 inches so 12 inches this way, and then I'm gon na measure 12 inches this way as well. Okay, so now to make the circle you're gon na place your tape measure at the edge here at the tip here and you just peopled around the fabric, making 12 inches so 12 inches. There straighten 8 2 inches awesome, and then we just cut that and it will build the circle yep. Here'S my full circle, okay, so this is the remaining fabric I have left and the length of the fabric should be the circumference of your head times three, so that you can have enough fabric to go around your head around at least twice and also have a Small piece to you know make any design that you want with your head, wrap right, so my second friend is 22 inches and times 3. That is 66. Ok, so I have my four strips. I'M gon na use up the head, tie and I've joined to this wave right sides together and I'm going to join it at the top here and I'm gon na do the same with this one as well. So taking this the same machine, I have this one and then I have my half circle to join, to make a full circle. Okay, so I have joined my circle and press the single button. So just turn this right side up and then take the humane fabric and then place it right side up as well. Okay, Simpson, it's not equal, so I'm gon na have to do some trimming. Okay, so take this to my sewing machine and sew around weed happening to stimulants and then leaving about three inch gap so that I can flip it over to the right side. I'M actually just gon na mark the distance so that I don't forget and so everything closed. Okay, so don't sell me is I'm just going to not turn around to make sure that these right, when we turn it, because it's a circle and it has like okay, it's been notched all around, so I'm gon na just turn it to the right side. So what I would say that we should press this to make sure everything is neat, so I have pressed everything now and it's time to create a channel for the elastic. So my elastic is about three-quarter inch, so I am going to show exactly that. All around you could maybe do is take your elastic place it at the edge and then just mark the point, okay, so to determine how much fab elastic you need just wrap. The elastic around your head, like this, just pull it a little bit not too not too tight at about half an inch to that. So you can join in half an inch or one inch, so you could join the elastic together. Okay, so get a safety pin and attach it to the elastic band and then opening that you left and just insert the elastic band make sure that it's straight and as you wind it across okay, then I'm gon na take this to the sewing machine and close Off the elastic band, so now I'm going to close off the open you just going to fold it and fold the seam allowance in and then just so now in a straight stitch. Okay, so the bonnet itself is ready. You could leave it like this, but we're gon na attach the head wrap baby strap. Okay, so I have sewn my lungs trick together and I left the gap in the middle to turn it to the right side. So that's what I'm going to do much! This is a ruler and things we want to turn it, I'm just going to close up the opening and press it, so it lays flat okay, so it's time to attach the tie and the bunny to the bonnet. So you know before the back, which is where I kill: stop opening and then just place that together and I am going to take another machine and sew with a straight stitch down the middle. So here's my finished bonnet, I didn't sew on the elastic at the back. I just did a small stitch here to attach the rope to the bonnet and that's it. It'S done very easy. Okay, my bun, it is done. I think I'm gon na have to cut my hip-hop to use it. Okay, let's try the bun it out tie goes in the back nice. I like it. What do you guys think it doesn't look like a bonnet, but I you know damp on it. Look. This takes it, I will just add some like edginess to it. It makes it look nice yeah, I like it lets you break a tie it another way. Okay, it could work. This works with a bow nice, okay, so this is it guys. This is my one: eyed head wrap head, wrap on it, but I like it

Comments
Saadiyah Benyamin: Thank you so much for sharing this!!! So easy to follow, will make mine now❤️
Princess_Bella24: You deserve a million likes, views, etc. You inspired me to go to a local store and buy my own supplies and make it myself instead of paying $30-40 to buy it online. THANK YOU!!! NEW SUBSCRIBER!!! I ENJOYED IT!!
Imisi: Love it. The colour pops on you. So many things waiting for me
Fezeka Mokwala: You are extremely talented. Thank you. The nice part is that one can go to the shops wearing this coz nobody will know what it is...☺☺☺
DrPhylCunningham: Very nice and practical!
vanessa shaw: This is definitely more my style…thank you.
Ada-uju: It look good! Well done!
Mwaji Kay: This is nice Pelulu. Love it
JinJin Wins: What was the first measurement? And how much yardage did you buy?
Karen Williams: Blessings from Brooklyn Ny love your lovely bonnet was very easy to understand love your accent god bless you
TanishaLinCreates TLC: ❤️❤️❤️❤️❤️❤️❤️❤️❤️❤️❤️❤️❤️❤️. You did a really great job of explaining how to make it however you didn’t get the measurements for the fabrics. Could you send that to me please ❤️❤️❤️❤️❤️❤️❤️❤️❤️❤️❤️.
Lauren H: What is the width of the straps? You mentioned the length(3xhead circumference) at 3:47. We see you measuring & cutting strips at 4:18 but the strap width is not given.
Jesuistygrr: The wrap portion is 66 inched in length by what width?
Livingi Poolay (God's Own 🥰): wow
graciela ambriz: Lovely
Sandra Garcia: Measure please wonderful
profgeorge2004: I love you.