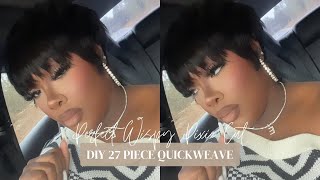
Diy Pixie Haircut | Colour And Mold | Short Hair Transformation
- Posted on 17 January, 2023
- Pixie
- By Anonymous
SUBSCRIBE: https://goo.gl/nYhZbg
DIY Pixie Haircut | Colour and Mold | Short Hair Transformation
PRODUCTS USED:
Calvil Ebony Black
ORS Wrap Set Mousse
AfrtTrue Heat Protection Serum
FILMING TOOLS:
Ringlight - Neewer
Camera - Canon T6i/750D
Lens - Canon 50mm f/1.8 STM, ‘Nifty Fifty’
Editing - Adobe Primere pro cc
I want to also say that I’m happy to have you apart of my family, you guys make me so happy! You encourage me everyday to do me and keep doing what I love,
Thank you
B U I S N E S S E N Q U I R I E S
Hi guys welcome back to my channel I'm back with another video and on today's video I am going to cut my hair again um. So if you watched my previous video, you know I was so against pixie cut and I've had to think about this again. It took me a few days as you can see the condition of my hair. It'S been three days now since I relaxed my hair, so I feel like the only thing that can make this hair look the way I want you to do a pixie cut. I tried the short bob, but when I style it doesn't look like how I pictured, because my hair is still damaged like I still have some areas that are short. So it's not really like full enough. I'M gon na try and keep the top long or maybe like the same length, but the rest needs to go so for me, I find it easy to use Clippers uh when doing a pixie cut, especially if you're doing it on yourself. So the Clippers are back and these ones are by whoa. So I've done my first section and I'm just gon na turn around and show you guys. So this is going to be my first section to cut so I'm going to start with the biggest guide that I have and this one is a 22 millimeter. Okay, it's seventh of an inch foreign! Thank you, so I'm done with the bag. I I am actually loving this length. I didn't want it to be like shaved and I feel like this is actually like balancing with all the short pieces that I had yeah. I think I'm gon na trim some of the longer pieces. I'M just gon na create, like a one inch part or more, and I'm just gon na use my scissors for this, just so that when I like mold it, it doesn't have like the gap between the longer and the short pieces. We want it to have like that sort of like graduation and the bag. It'S it's short, so I don't really need to cut anything here. What I can do is cut it in an angle, not like a blunt cut. So, as you can see, it's like angled in a way, so it kind of make that um angled cut and then now the longer pieces can join together and make a nice haircut. So that's what I'm gon na do also on this side and I'm also trimming off some of this side bangs, because I don't like when they're like super long so yeah, that's it for the haircut next. I am going to add some color and the dye that I'm going to be using is this one by calville and it's in ebony black, because for me personally, I find that the black color makes my hair look fuller. So I like to use a black color, especially when I have short hair and I'm gon na, be wearing them like this. Black color is the best thing to do if you have like setting hair. So it will kind of just like give the illusion of Fuller hair in a way, and this one is the same light permanent. So it's not permanent. It will eventually fade, and I really really love this brand um this one, especially because you can actually dye your hair the same day as you relax. So you don't really have to wait long. I just wasn't sure about the cut. It comes in a little uh. Squeezy bottle already mixed, you don't have to mix anything, but then you also gets um construction manual, um and shampoo and conditioner yeah so and some gloves which we need so before I go ahead and apply the color I'm gon na take some Vaseline. I want this to just stay on my hair. I don't want it to go on to, like my skin and my face and my ears so applying Vaseline eggs like as a barrier, especially if you're going out after this yeah. You don't want to go out with like dye on your ears and your neck, so I'm just gon na shake this a little bit and then use my scissors to cut the top and I'm just gon na go ahead and start applying the color foreign, the color. I'M gon na put a shower cap on and leave this on for about 30 minutes and then, after that I will go ahead and rinse and shampoo and condition and then I'll come back and hold my hair foreign. So I am back now from rinsing the color, and this is how it's looking I'm kind of liking, this um curliness up here, it's so cute. So this is how my hair is looking so far, I'm going to go ahead and apply some mousse and the one I have is the RS rip set mousse and you need to apply like a generous amount of this to mold and I'm just gon na. Take a red tail comb and start molding, my hair down. So today, I'm just gon na mold and see if I need to do some more trimming and the top here, I'm just molding it towards the front foreign strips. But I do have these um velcro mesh. Thingy, it works, really really well kind of works like the strips, but it just doesn't cover the whole thing, but it works really really well, if you're still struggling to find strips, you can use this kind of things or you can just use a Drury egg wax. Well, it's just this one makes it easy because of this velcro thingy and I'm just gon na leave it like this it it's very, very secure, like your hair, won't move. I also use this thing at night when I go to sleep. If I want my hairstyle to last longer, so I am back now and my hair is dry, I'm just gon na take this off, so I'm just gon na take some serum. This one is by a fruit. True is the heat protective one, so I definitely need need to cut behind my ears here and I'm just gon na use my scissors foreign. So I have the number three here, which is the 10 millimeter one and I'm gon na try and balance the bag, because it's not looking that good. So it's still not balancing and I I'm starting to get a little bit nervous now that I'm gon na have to create, like a shave back there. So now we're going down a size, I'm using the number two, which is a six millimeter, two see if it will work so I've. I'Ve went in a sectioned this part of the bag here. So this is where I'm gon na use the number two. If it doesn't work, I'm gon na have to go down to the number one, and I really don't want to so. I feel like it's actually waking the fade, but now I'm gon na go even like the size smaller. This is the number one which is three millimeters, the smallest one I have so I did section um the portion in half so about. I have about an inch there of my hair, where I'm gon na use the number one to just create like the fade foreign. So I'm just gon na leave it like this, so today's was mostly about cutting and the color um, I'm not even going anyway, so cool style next time. So this is the final result. So this is how the bag is looking, I hope it's laying down. I don't really like the um blunt cut around here. I just like it to be like messy in a way. So this is how it's looking so yeah. This is the final results. I hope you guys enjoyed this video and if you did don't forget the thumbs up subscribe to my channel, if you haven't already and I'll see you guys on the next one bye


Comments
Cherelle Fairbairn: So happy you went for the pixie cut. Your hair looks super !
Nangamso Magula: Definitely giving this hairstyle a try!
Diane Henry: Love it!
Nancy Purter: Very pretty
Isao Obo: Perfect
Isao Obo: Soooooo pretty!
Anesi T: Love love your channel sis..happy to be here
Lebogang L: The hairstyle looks good on you.