Bald Cap Method For "360 Frontal Ponytail" #, Tutorial ( Part 1 Of A Two Part Video).
- Posted on 30 June, 2022
- Ponytail Hairstyles
- By Anonymous
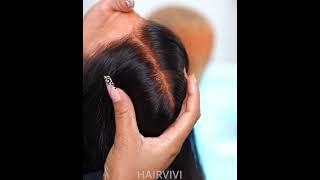
Hey everyone welcome back to another episode of mistake, vibes if you're new to my channel. Welcome now, don't forget to subscribe and click on the notification bell, so you can be notified when a new video is dropped. Okay, so for today's video i will be doing a full tutorial on how i do this ponytail. It'S a two frontal, ponytail and i'll be doing an updo ponytail style. So this is a two-part video because the video was so long. I decided to split it into and do a ball cap method for how i do the style. So this video, i will be showing you how i do the ball cap method and in the other, video that will be uploaded after this one is post. I will show you guys how i install the two frontal and make a ponytail for the birthday girl, so her hair is natural and in this situation i would have done so many different techniques working with natural hair, especially when it comes to frontal ponytail. It is difficult she have very low density. Her hair is very thin so because of that, it was very easy for me to give her a ponytail without even using gel, which i do add a little gel to it. But it's mostly the freezing spray use just to get it sleek in and neat and, as you can see out the window, it's nice. So i was not planning on using any gel and the gel was not going to dry in time for me to move fast enough to go home, so i use the freezing spray to cut her hair up. So what i did first, i got her hair blown out as thin as possible, and then i use a hot comb to comb through it, not through the scalp, but just to thin out the hair. A little bit more and, as i said, hair density was perfect for this quick video, so guys after i use the freezing spray to catch right here in one i actually go ahead and add a little gel to it then brush it in with my toothbrush comb Thing yes and i was actually showing her her how to do a tic-tac video, because i wanted her to do a tick-tock video for myself, because she's not a tic-tock person, so i was teaching her how to do the snatch. You know to snatch his soul. I was showing her how to do that and it turned out. Well, you will see that in the other video as well, because i'm afraid, if you post this natural soul song and then the copyright thing will come upon an ice cream, video mina wanda. So man about a play of that anyways, her hair at the back of her head, came all the way down to her neck. So you know that is not going to be okay for me, so i have to shave some of the hair from the back of her neck, just to get the back of her hair to be in line because she's installing blonde she's going full blonde, and i Don'T want to put the frontal too close to on her neck. You know what the frontal is blonde. I don't want to put the frontal on and then the black hairs at the back will be showing and, as i said, you have a lot of hair on the back. It came all the way down to her neck, especially on the two sides of her neck. So i have to get rid of it. We now say that'll grow back, it's going to grow back, but for the style we had to take the risk we had to get rid of it. So i put a hole in the middle of the cap because in this video i will be using the entire cap blonde hair. As i said before, it's a blonde hair if it was a black hair. No, you know i would not mind her hair blending in with the frontal, so i would have done this just the same, but with a black hair, you don't want the cap to be showing through the black hair too much but which are blonde hair. No! It'S! Okay for the cap to be showing, because you want everything to melt in your - i don't want to see her here showing after i brush the frontal in one. So i decided to use all of the cap for this process just to prevent and avoid the black hair as much as possible. So after i cut off the top of the hole, i went ahead and slipped the sides of it just to pull her hair through. So the cap can be secured in place where i want it, because if i just catch it on top of her ears, i am going to be using parts of the cap that i don't want. So i want the thin part of the cap, not the rim of the cap. If i wanted the rim of the cap, then i could just put it all the way up, but because i don't want the rim of the cap, i have to cut her ears. Cut the cap and put her ears through the cap, so it comes all the way down to her eyebrow that i could get the softer part of the cap to use. So after i do that, i go ahead. I went ahead and then i had the guts to be spray, the freezing spray and put on the cap just to melt it. The freezing spray would be enough to do that, but because i want something more secure, i decided to use the glue to secure the cap more so, as you can see once i add the freezing spray to the cap, you can basically see through the cap. So i'm going ahead and just adding the glue around her hairline, i'm not letting the glue touch her hairline, i'm just adding the glue around her hairline in the shape of her forehead. So when i'm cutting off the cap now it is going to be easier. For me to just cut where the glue is so, i won't have to go all the way up, and sometimes when we use the guts to be glued just alone, there has to be glue only to secure the cap whenever we're cutting off the cap. A lot of times whenever i am cutting off the caps some of the times it keeps moving out of place so because i don't want the cap to be moving out of place and then i have to be secure in the cap again, i ready to use The glue to secure it so, yes, i will do this in an everyday work. I will do this in everyday stuff unless the client asks me specifically not to secure the week too much, because maybe they're just going for an event, and they cannot wear the week to work then that way, i would just do the cap and do a one Glue coat - and you know it come off like two or three days after, but because it's her birthday and she's gon na go out on a boat. So you know people wan na have fun planning birthday the weekend come off after the birthday, but i have to secure it for the day or for whatever, wherever she's going right. So after the cap is dry, i use the fit me. I'M not remembered minimum body. Color will that try showing the color, but it never show up on the camera, but that's the shade that i was using. It is actually the lightest shade that i had in hand and it matches her skin, so it works for me. It works for me. Okay, so i am coloring all of the cap, so just in case, because you know me not gon na use my bundles with the front arm. It just looks the two frontal by itself and then i am going to add the bundles in the middle. So for the purpose, now you know, study cap is going to be necessary to cover all the black hair. So, yes, i am going to cover all of the cap with the foundation, so it's dry and now i'm just cutting off the excess part of the cap. That is not going to be used just to get it all clean and neat, i'm going around all the way to the back, because it's going to be a 360. so everywhere have to be secure and clean. So after i cut off the excess cap, i just go ahead and use the brush again just to run over the parts that is looking a little bit whiter than it's supposed to. So that is what it looks like and i use my alcohol to clean up the surface of the hair in which i am going to be applying the glue. So after i clean up the surface, you know that the next part is going to come in, where i'm going to add the glue to the hair. I am going to add on the glue and then when it's dry, i'm going to add another coat, and all of that is going to be happening in the other video that i tell you guys about in part two, so guys stay tuned. Thank you. So much for watching - and i will see you in the next video bye, oh and make sure to subscribe, subscribe, guys and share my videos. If you like my content, you can share it with your friends on all social media platform, so my channel can grow and my talent can show bye.

Comments
Jala Bowl: ❤️❤️❤️❤️
Ronaldo Lawrence: