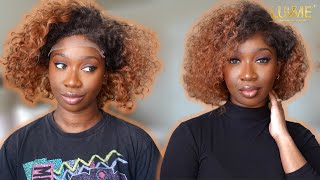
360 Lace Wig Install Is Not Easy | Affordable Highlighted Wig! Arabella Hair
- Posted on 08 February, 2023
- Ponytail Hairstyles
- By Anonymous
#curls #baisi #wiginstall #braids
●▬▬▬▬▬▬ #ARABELLAHAIR ▬▬▬▬▬▬●
❤ Buy Now, Pay Later, 4 interest-free payments
☛ Link to the Hair➤ http://bit.ly/3iDiE37
Hair Detail: Balayage Highlight Body wave 13*4 lace wig 26" 180% density
Exclusive discount 18% OFF Code: AYTB
Buy 1 Get 2 Sale➤http://bit.ly/3w8JPFX
100% Real Glueless Wigs➤ http://bit.ly/3INoSIh
Hot Selling Auburn wigs➤http://bit.ly/3Xhuxek
Popular Fashion Color Wigs➤http://bit.ly/3kdPacv
Invisible HD Lace wigs ➤http://bit.ly/3w5hW1Q
Arabella Hair Youtube➤ https://bit.ly/3SEjgSF
Arabella Hair Instagram➤https://bit.ly/3ecpZEC
Arabella Hair Tiktok ➤https://bit.ly/3SSFZKQ
WhatsApp:+86 18937456160
BUSINESS:
Follow me @_pjwest
Instagram link
https://instagram.com/_pjwest?utm_medi...
Pinterest link
Tiktok link
https://vm.tiktok.com/TTPdQHBjrA/
beats/music:
IG: gmoney youknowimadethabeat
Beatstars: https://www.beatstars.com/gmoneyimadet...
s/c: 3,398
0:00-0:16 intro
0:17-1:29 wig preview
1:30-1:47 cutting lace
1:48-1:55 bald cap
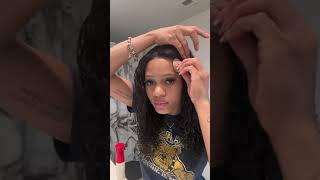
1:56-2:47 wig install
2:48-4:35 gluing down wig sides and back
4:36-6:51 styling wig
6:52-9:10 styling back of lace with baby hairs
9:11-11:19 styling ponytail
11:20-11:41 final look
Foreign, hey, you guys welcome back to my channel in today's video I'll, be showing you how I installed this 360 wig. This hair is from Arabella, so I already plucked and bleached it and right here, I'm showing you the strap. That comes in the back that I actually removed, because I wanted to have a more seamless look and to make the wig more secure. Instead, we're going to use this black strap that it comes with right. Here is just the hooks. That'S in secured on the side, and you just attach the black strap all right, so I already plucked it and bleached it, and this is what it's looking like. As you can see, I only removed the strap in the middle, but now I think I'm gon na go ahead and remove the ones on the side to make it look a little better and I didn't over pluck the back of the wig either, because I've never Installed a 360 wing - and I just want to make sure that I just don't do too much in the back, because I don't really you know. I don't really know what it's supposed to look like up close and I want to make sure that it looks natural. But not overly put so this unit does fit really really snug. I was happy about that. I did also make sure that I put the black stripe in there and I think I put it on like this. The second hook, the one that's in the middle, and this is what is looking like so yeah see. This is what I was talking about like on the side you see where it was showing with the strap and then I had took it out so yeah. That looks so much better, so now I'm just cutting off the ear tabs. Before I actually installed this, I attempted to try to cut the back of my uh lace off. While this was on my head. It did not work out so take it off your head and then just cut cut your ear Taps first and then cut the back. So I did go ahead and do a ball cap method um. I don't really think it's necessary to do this, but I did want to go ahead and give it a try to see. If I was able to. I didn't record that part because I don't know it was just a basic ball cap so right here, I'm installing the wig. I went ahead and cut off the lace in the frame as well. I'M kind of speeding through this part because I feel like everybody, can see you know seen a wig install you've seen the front being installed. This is just lace, tint spray that I'm spraying on there to help blend the lace, because, as you can see, it was showing real bad. I didn't even put no makeup on. I always forget to do that, so I just use lace, tip spray and then got to be glue spray and then I'm just laying it down. I let this dry for a good, like 20 minutes, 20 to 25. Actually, this wig install took a little minute. It took me all day to do this, but I let that dry for like 25 minutes and then that's when I'm going to the back. So I added about two layers to the bag. I just wanted to make sure that it was enough glue. We did not want it to lift because like when we get closer to the end you're gon na see like I still have to like put some more spray on the back, because the little tabs in the back kept lifting. So just make sure that if you try these add as much glue well, don't add too too much glue now but add enough to make sure that it does not lift so now we're just blow drying it making sure that it dries clear and then we're gon Na go ahead and lay it down now don't be alarmed. This is not going to be the final look, I am going to add, like some baby hairs on the back, but we just laying it all down, not gon na lie. This process was a little more difficult than I thought it was going to be, but we manage it so I went ahead and did the other side I had to you can't really see I had to turn around and use my other mirror. So this is the part that I was saying that um it kept lifting a little, so I had to go back and add a little spray after we had after I had took the wrap off of it. I did make sure when I uh was laying the wig down. I leaned my hair forward. Just so I could have some wiggle room with my neck because I feel I felt like if I had kept my head straight up. It just wouldn't work out. I wouldn't be able to like move my neck, because this glue that I'm using is really really strong. So now I'm just like tying up the back now and I allowed that to sit for another like 25 minutes. So now I'm just styling the wig. I only added baby hairs to the um near my ears, because I'm going for this updo that I've been seeing lately. I was so happy to be doing this part, because this was the easiest part out of everything all right, so I'm gon na shut up for a little while so y'all can watch me style this wig and then I'll come back when we get back to the Back of the neck, thank you, foreign foreign, so right here is where I'm adding a little more spray. This is my um ebbing spray. The lace Bond spray like this is really really good spray and I'm just allowing that to get a little tacky and pressing down the little flap that kept sticking up so I'm I am going to add like little baby hairs. This is part of the hairstyle that I've seen they had like baby hairs going all around the back of the neck. I guess that's how you do your 360 wig every picture. I'Ve seen had this, so I was like okay. Well, that's what we gon na do so that's what I did. I just added baby hairs and I'm glad I did not try to like over pluck the back of the neck because, as you can see, as I parted, it already looks really good. At least to me it does, I don't think I did. You know too bad, but I'm glad I didn't try to like over pluck the hairline part, so I'm just taking the I'm not trying to make it as flat as possible. They actually give you a lot of space in the bag. So if you wanted to like leave out more hair, you could and I'm not gon na lie y'all. The knots on this lace was like the tiniest knots I've received thus far the whole, like you know how sometimes they'll, like only make the knots around the hairline small and then, when you get to the middle section, where you do your part they're a little they're Like medium size, like no the entire lace from ear to ear and all the way around the back, all the knots were like really really small. So I was happy about that. That was different and the hair was really it's really soft. Oh foreign, olive oil, foreign foreign, so when I was doing my bun part, I don't know why this was kind of difficult for me, but I just kind of would just like trying to swirl some pieces. I probably should have went about this a different way because at the end it start kind of loosening up and - and I ran out of bobby pins. I think that was part of it too, but I did my best if you made it to the end of this video. I really love you um, because I thoroughly enjoy doing different stuff to my hair. As you can see, I get bored real fast, so this was fun. It was different. I hope you like this video. I hope you, like my hairstyle, tell me, which tell me how I did y'all be for real, be honest I'll. Make sure that I leave all the hair info Down Below in the description box and all the products that I use to do this. I hope you guys enjoyed this video. Like always. Thank you so much for supporting my channel by clicking on this video. Don'T forget to like comment and subscribe and I'll see you in my next one

Comments
ami coco: Absolutely flawless, what glue did you use please?
Stephanie C Davis: Love the color with your skin tone.