Straight Back Feeding Cornrow In My 4C Hair | How To Part Your Hair Tutorial | Beginners Friendly
- Posted on 03 March, 2023
- Ponytail Hairstyles
- By Anonymous
Hello everyone welcome back to a next video this video is showing you all how to part your hair and also feeding braid extension hope you enjoy watching my creative hands love you all
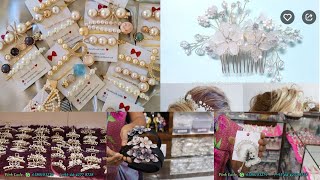
Things used:
- tail comb
- hair clips
- shine N jam for braiders by stacy Adams
- HAIR : XOSH PRE-STRETCHED EZ BRAID
WEBSITE : ShopBeautylicious.com
No One's Gon na get in your way No One's Gon na Leave You broken hearted. You don't need nobody else. Everyone knows you're doing well somewhere yeah, be restrained, hello, hello, hello, it's a girl, talisia and welcome back to my channel. So today I'm doing my hair. I'M cornrowing my hair to the box. I use a comb, a silent jump for breeders. My clip my stash braid are: you would call it um Serbia anyway, guys I, okay, um. This hair comes with six bundles. You have a pack of six bundles. You have ten! You have three and you also have two. So what I did. I take out a small piece and then I part my hair after after which I decided to um. Take out all so, you can see um the way how I did it anyway, guys I'm actually showing you how I also part my head hair straightened back so me parting. My hair straightening bag is very easy for me and it's just the easy step. Just make sure that you are not nervous or you're, not really thinking about anything else. You know once you're nervous. The hair is not going to power purple, but anyway guys. This is how I pull my hair apart to do my feeding, so I take from smallest to largest and most of it I use six to seven pieces depending you know the two side ones going to take less here, but um those bar I use like six Pieces, as I said it depending then, I use my Shannon jump for breeders and I started at the beginning of my hair because I do not like to use those thing on the entire part of my hair, because for me it's not going to fit in properly. It'S going to be all over the place, so that's what I did anyway guys. So you want to be very careful when start adding me here. So I start from the smallest piece and I put it from the beginning of the my hair and I try to make sure that I do a cornrow like I caramel like three three Dawn. I don't I don't understand, you know what I mean, but I kind of like three. Don'T let me say tree plot down to make sure that it is secure the bread is secure in my hair. Then I started to add in my hair with the finger that I'm comfortably using, so you might want to be careful when you're doing the cornrow cause most times the braid tends to be tangled up and then once it gets it tangled. It'S going to be harder for you to pull through and to um proceed with your platin, so each time you're, adding your bread and you started to place it down, make sure you pull it through just to ensure that the end is not Tangled. So I did this one completely. I did not eat it, this part, nor I did not speed it or anything. So I want you to see exactly what how I do my feeding and also how I also part my hair anyway, guys um. This braid is like something else I mean in terms of in terms of um when you hot water here is like um. When you buy a wig, a braided, wig yeah, you have the kind of fluffness after you hot water, it and guys it looks so beautiful, but in the end you're going to see exactly what I am talking about anyway, guys um eating bread is not hard, but It'S for you to know the technique of especially the the finger that you're most comfortable doing and also you have to know how to pull in the hair, because sometimes um the hair might overlap, and then it will look like a banana slider or some people call It a Ghana, bread or something like that, so you want to be really careful when you're, adding your hair, also right here, as you can see how I plot down my hair after plaiting it to the back, I twist it around to where I'm comfortable plaiting it Down because if I plot it down the direction that I can't really it's gon na be real, like not it's not difficult, but I move slower. So I turn it where I'm more comfortable, so I could Pat it down fast and also at the end. I add in a piece of bread and how I add it in I add it in like um so yeah I added in like in the middle and the end piece so and then after adding that I um borrow from the biggest piece just to make the Hair look more evening, then after plaiting it down, it was um. You know it's a 25 inch braid, so I use my lips to hold the hair and then I plot it straight down to the end and also guys this here when you hot water, it the only take the hot water to straighten the heat. Well, let me see it doesn't straighten the hair, because it's all it's us pre-stretch here, but um regardless of this here, the other hair do take hot water, but this specific hair do not take hot water to straighten it. So what happened now I use my curler and I curl the hair. It do take um curl very well, I must say, do take girls very well and I would not. I would recommend this here to anybody guys you can try out this year. This year is very nice. I'Ve been using it for a while now my first first time using this here. I never really understand it and um it in. I think it's my my third video that I post on YouTube. I did a box braid elastic, bunny, Rubber Band Method. I use this same braid and it was really nice, but I didn't really understand the full concept of this hair, so um, it seems of Blade. I started to bind it more regular because the hair is very light. It'S light, especially when you water, you do the hot water, the curling um, the water just runned fast easily, then the hair, like it just swell, and it looked really really nice. It'S really beautiful and guys um. Also what I did. I use my hair clips, even though I I catch up my hair, so it won't go over in what I'm cornrowing. I also use the hair clips to secure it more from going over in the hair, and then you know the part. The Parting might look messed up and also uh. As you see, my head is like because I have to be pulling the hair so to make sure that um, the hair is well secured and it is not um all over the place. So as I reach to the other side, I um what you see. I'M touching there I just try to make sure that I'm just making just making sure that all The Parting are even um partying you here to the back it you have a technique for you to get it um the right right way. Some people might do the middle first part the middle one. First I know once I get the middle one, you know all is clear, but I decided to do it from one side to the next and guys um. You have to make sure when you're parting, your hair after your party, to a point - maybe you can see, then you use your finger to um help you part down and um. Whenever you like, stop like keep on parts and stop part and stuff, that's where you're going to get the problem, you have to make one part and then go down with the next one. So doing it that way, it will eliminate um the problem of the hair. Getting like all over the place, if you understand what I mean right here, so as you can see, I apartment here and it was off and what I did. I used my finger to feel and then pull the comb come down. So I use my finger on the comb to come down with the hair to make sure that the parting is um. The part is in the right direction that I want so guys with the first piece of here, as you can see for the last one. What I did I take a small piece and then I pull it in half like in half and then in that half one of the half. I split it in two, so at the end of the day I come up with three pieces so that three pieces now I place it at the very beginning of my hair and also I take up three piece of my hair. I would say three part and I make sure that the front part is catching. The braid is holding properly and well secure. So I like Pat it down two or three times to make sure that my hair is secure in the braid and I started to add in with the the finger that I'm most um comfortable using and this hairstyle. It didn't take long. But I was like in and out with it so you know and as I said, the braiding was very easily. It was like it did not up not really. Until I read to the last part, like um, I wasn't, as I said, when you're braiding your hair, you have to once you add in the hair, you have to pull your finger choice, so the end will not up because the end always tend to not. So I didn't, I wasn't doing that, and it happens that the hair actually get tangled up. So you know I had to. It was a fight with me right there, but, as I said, the hair is a very, very, very nice easy, especially to do ponytail. Yes, this here is a very nice here to do. Ponytail guys you, I'm gon na put the link in the description box below. So if you are interested in doing this here, you can also follow the link and you will get what you needed and also guys they are having a whole catalog of here. No because normally it used to be just the one B, the number two, the number one and so on, but now they have a whole um. They have a whole selection of different here now they have ombre. They have burgundy, burgundy ombre. They have purple. It'S really really are really really nice. I also have a pack of the the burgundy ombre one, but um I'm gon na use it later down. Anyway, guys I went ahead and I did my edges and also I use the aqua um extra wax doing my edges. I also did my my hair and I read it and guys tell me what you think as I can, as I was telling you earlier down in the video look at the hair, the hair look more full, but here look like it's swelled here is so nice. I I just can't say anything wrong with this hair guys. This hair is very, very nice. I mean every here I have their own texture in their own way depend on who make it on WhatsApp, but this here is a very, very nice and it's also easy to handle so guys. I want you to watch like share and subscribe. Tell a friend to tell a friend was this video interesting to watch, please let me know I'll be in the comment section and and also let me know if you'd like to see more videos like this, and I will see you in my next video goodbye um Foreign

Comments
Nikki crochet designs: Nice job. It looks great