Detailed Wash And Style Routine For Naturally Wavy And Curly Hair
- Posted on 04 February, 2023
- Short Hair
- By Anonymous
I'm back and I'm bringing you a thorough, step by step washday tutorial for your naturally wavy or curly hair! I've missed you all so much and I will do my best not to take another extended period of time to upload more content. Life was just really "lifing" this past year.
Not sure if you have naturally wavy or curly hair? Give some of the techniques in this video a try and see how it works for you. This entire routine takes me a total of one hour. If you're just starting out, it may take a little bit longer as you find your rhythm with a routine that best suits you.
Following the steps and application technique are mainly what I wanted to highlight for this 2b/2c hair styling routine. This simple washday routine for wavy/curly hair can be as involved or relaxed as you choose. In this tutorial I show everything from how I apply products, how much I apply, how to plop and how to micro-plop. I also show the many diffusing techniques for wavy/curly hair and some tricks I use to help speed up the process. This wavy curly washday routine is my go-to and takes under an hour in total.
DISCLAIMER (again): You do NOT need to use the same products or same amount of product. I believe learning proper application technique should be your main focus if you’re just starting out.
___________________
PRODUCTS SHOWN:
*This List includes Amazon affiliate links and affiliate discount links. I do earn a commission on select items.
Shampoo: Bounce Curl Pure Silk Moisturizing Shampoo
(Code WAVYCURLY for $$ off)
https://www.bouncecurl.com/products/bo...
Conditioner: Bounce Curl Super Smooth Cream Conditioner
(Code WAVYCURLY for $$ off)
https://www.bouncecurl.com/products/su...
Curl Cream: Bounce Curl Clump & Define Cream
(Code WAVYCURLY for $$ off)
https://www.bouncecurl.com/products/av...
Gel: LUS Brands Irish Sea Moss Gel
(Code WAVYCURLY10 for $$ off)
https://lusbrands.com/products/irish-s...
Foam: Xmondo Wave Tech Foam
(Code WAVYCURLY for $$ off)
https://xmondohair.com/products/wavete...
Hairspray: Pantene Air Spray
https://www.amazon.com/dp/B0193G14OW?r...
Oil: Bounce Curl Light Oil
(Code WAVYCURLY for $$ off)
https://www.bouncecurl.com/products/bo...
Denman Styling Brush:
https://www.amazon.com/dp/B00197623M/?...
PLOPPING TOWELS:
LUS Brands Cotton Plopping Towel:
https://lusbrands.com/products/t-shirt...
TEE-Owels Cotting Plopping Towel:
DIFFUSER:
Laifen Swift Special:
(Code WAVYCURLY for $$ off)
https://www.laifentech.com/?sca_ref=31...
___
*This video is NOT sponsored by any brand. These items have solely been chosen by me and have not been requested to be featured by any of the brands mentioned.
Instagram: @wavycurly
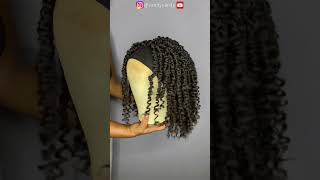
I'M back hello, everyone welcome back to my channel and if you are new here or maybe you've been here this whole time, you need a reintroduction. My name is Ali or wavy curly Ally, I'm a healthier Enthusiast, just sharing my tips and tricks on how to help you love your hair as it is. Naturally. I know I feel like I keep apologizing and I haven't posted a YouTube video in quite a bit of time, but I am still online. Just haven't been on as frequently as always life, kids, full-time job, all of those fun things. But I am back today because you've been asking for an updated wash day routine and up until the last couple months. Honestly not much has changed. However, I have done a few different things and experimented with a few different techniques. As you all know, I'm pretty tried and true with some of the products that I use. What can I say, I'm a creature of habit and, frankly I don't like to fix things that aren't broken so you're gon na see some familiar products. I do have a new product that I've been using since my last video, but I've been using it for a long time that I am going to introduce into my routine, along with some of those new techniques. But we don't like long interest here. So, let's get right into my wash day! These are my results for my wash day today, which I'm going to show you step by step detailed into what products I'm using, how much I'm using it when I'm using it, how I'm diffusing the different techniques, the temperature settings, all that fun stuff. So, let's hop in the shower sorry quick disclaimer. As always, you do not need to use the same products or the same amount of products or even the same amount of time that I used to style. My hair just do what suits you find the techniques that work best for your lifestyle and go with it all right now, let's get into it. Let'S start with a cooler water setting today, as you can see, I'm going to be doing this upside down and dressed instead of in swimwear as it's easier to film I'm going in with a bit of shampoo. If you feel like your shampoo, isn't saturating very well. Go in with a little bit of water to help spread it around and, as you can see, it definitely Suds up a lot better and I've been able to spread it around my scalp a little bit easier. I give my hair a nice good squeeze to get all the shampoo through my ends and then rinse it out. Now, I'm going to go in with this nice thick cream, conditioner work it into one big section. This makes it so much easier to detangle and then slowly break it up into smaller sections before eventually raking it in to help saturate. Your hair, of course, you'll want to lift this up and away from your scalp. This will help with preventing your hair. From sticking to your scalp and then lastly, I go through with all my products, and I brush them in this - helps with saturating all of the hair strands with product, not just for my conditioner, but also for my stylers. So you can see my hair is nice and coated, and nice and slippery now don't forget to do this rinse off your brush, we're going to be using this brush for our stylers and we don't want it covered in conditioner. That'S exactly why I showed you this now go through and fully rinse. All of this out, your hair should feel like seaweed. Now you know this gem. This is my bounce curl Club in the fine cream. I use this all the time. A little bit goes. A long way, as you can see, I'm going to rake this into my hair again up and away from my scalp once I get all of this into the lengths of my hair. One thing I forget to show you here is that I do brush this into my hair as well, but I kind of skipped that step now. This is where things get interesting. You guys I use a wide tooth comb and a claw clip to section my hair. I never section my hair, but I started doing it recently and I've been enjoying the results. I only do two sections I trace from the middle section of my ear up and around to create the top half and the bottom half now. This is where the new product comes in the Lost Brands. Irish CMOS shell - I thought you'd have to pry ecoslay orange marmalade, gel out of my hand. They get me to try anything new, I'm so happy. I did so. As you can see, the technique here is the same raking it in up and over from your scalp. Now. What I'm showing you here is that if you get wet frizz or stringy clumps, when you're styling you're going to end up with dry frizzy, stringy clumps when they're finished so make sure that you're smoothing down any of that wet frizz and forming those curl clumps. While they're still really wet so I do it when I'm applying my stylers as you can see, there's this technique here, just brushing it in giving it a little bit of a shake. But this is where the wide tooth comb comes in. If you want to create some smaller, more uniform, curl clumps, then you can go in with a wide tooth comb to create a little bit more uniformity in the the size. So I'm going to now go ahead and give my hair a good Squish and, as you can see, I'm pulsing near the top by my root just to really get this product pressed into my hair. Now I'm not touching my scalp, I'm getting very close, but I'm not touching it. I don't want this product to settle into my scalp. Now, let's work on the top half, I'm going to drape this over my arm to make it a little bit easier and brush it. I will also show you how you can just hold the bottom section so that the top layer just hangs freely but same technique. Here, I'm kind of brushing everything down, getting everything to where I'm able to reach it and make it easier to style. As you can see, that's what it looks like and another quarter size amount of gel. I used about a quarter. Size amount for the first section as well again do what suits you for your hair, but I'm going to just kind of work this through the top pressing it in raking it in brushing it in, as you can see now, I'm just holding the bottom half and Letting the top half hang and again going through with my wide tooth comb to help create any extra separation and uniformity in the clump size for my wavy hair now, my clumps in this section are generally pretty small to begin with, so I don't really need to Do it here, but in case there's any sections that are sticking together, that I'd like to separate it's nice to give it a try? Now I've released all of my hair and I'm working at all as one again reaching up pulsing and pressing this product into my hair. As you can see, I'm going to rotate my hair from side to side lifting some of my hair up and off of my scalp again. If you have issues with upside down styling, where your hair sticks to your scalp and you end up with a really weird wonky section in the back, make sure you're doing these things. This is how I release my hair from my scalp. Now doing it all the way back like this is not my favorite thing to do, but I'm showing it as an example. If your hair always sticks, you have a hard time getting it to lift from your scalp, but the reason I don't like to do that is because look how stringy my clumps tend to get once I shake them that much so a way to fix this easily Is just dribble a little bit of water into the lengths of your hair? I'M not trying to soak my hair by any means, but reintroducing water into your hair makes your clumps come back together and pro tip. This is why so many people love the bowl method. Now that we're finished in here, let's start the drying process. I start out by plopping my hair into a cotton plopping towel. This is by lust Brands, according in your hair, into the deepest section of the towel, bring it up behind your head and then then I secure everything by my forehead begin to twist the towel and tuck it in the back to secure it. This is a really easy way with this type of towel to plop your hair, as it is designed specifically for this. Let it sit for about 15 minutes. While I put on makeup in this case, I already had makeup on so just leave it on. For about 10 to 15 minutes now, this next step is one that I would recommend you do not skip. If you want to speed up your drying time, this has been the biggest Game Changer in getting my hair to dry quickly, and it is micro plopping. So taking a cotton towel or a microfiber towel and squishing the excess water out of your hair, I'm trying to get it to damp before I apply my foam or a mousse. I love the X amount of wavetech foam. I'Ve been using it forever. There'S about six pumps, I just glaze and scrunch this over my hair. Why do I use this last? It'S not usually recommended to use a foam or mousse last. You always want to end on your hardest hold Styler, but I love it because it adds this kind of wetness that helps my clumps stay together and reform, especially if they've gotten a little bit stringy during the micro plopping process. So you see I'm going to really press this in my hair, but I am going to go back through with some of the extra foam on my fingers and press them into my roots to help kind of create a little bit more lift and volume when it Dries foam and mousse is really the only product that I recommend applying directly to your roots. If you want that extra lift now go back in one more time, squeeze out any excess moisture that you might not want to help speed up the drying time showing you. My towels, you can see how much water I took out, and now I'm going to go through with a very quick hit of alcohol-free airspray. Just a very little bit amount helps speed up your drying time and helps with definition. This is my new life in diffuser. It is a Dyson dupe. It has multiple temperature settings, including an oscillating temperature, setting where it will naturally rotate between cool to heat, just to help prevent any heat damage. But I'm going to start on Hover diffusing on a medium heat setting or what is really their lower heat setting before they're cool setting. So I'm going through I'm lifting at the root, I'm just hovering over the root. I want to dry that first and then I'm going to hover over the lengths. The reason I hover over my roots first is: it is really good for your scalp Health, but also it helps a ton of volume to get the extra water out of your roots. That might be pulling your roots down. It might help to do this. Also, if you're trying to get a little bit more texture at the root. Now I'm going to go through and here's a couple of options. You can either pixie diffuse on the cool setting, which is recommended if you're going for a little bit of a more frizz free defined look, but it will take a little bit more extra time. I'M going to show you how I go back through with the warmer medium heat setting and how I'm going to pick C diffuse by turning it on and off and hitting it with a cold shot of air. So here you go. You see I'm pointing at the orange circle, that's the medium heat setting and then I'm going to finish it off on the cool setting. So a few seconds on the medium heat setting go down to the cool setting, shut it off and bring it out of your hair. The reason that you're using the cool setting is to help set the shape the same way that you would, if you were, to use a curling iron and then put it in a roller and let the curl set. You want to do this as well when you're diffusing that cool shot is really going to help set the curl I'm just going through, and I am pinching my hair to make sure it's 100 dry and as always going in with about three drops of oil emulsifying. It in my hands, smoothing it through my hair and scrunching to break any cast that might have formed on my hair. Now the Irish CMOS gel doesn't really create much of a cast on my hair, but I still like to scrunch it out to help create any separation and fluff my roots out. Now, if you want to add a little bit more volume or you like to break your cast a little bit earlier than 100 dry, this is a really great way to go through with your diffuser and to scrunch and fluff. I don't recommend doing that. If your hair is prone to frizz or you're still going through transition, it will create extra Fizz by breaking your cast before it's 100 dry. Now, this last step is always get your fingers into your roots. Give it a really good shape to help lift it off. Of your scalp and let it settle for a few minutes, all right, y'all, and this is the results. So, as you can see, some nice shine and bounce the diffusing time was really quick, and I want you to see what my hair looks like not completely pushed in front of my face, so this is it. This is how I wear it. I'M going to do a full 360 curl tour, so you can see the back as always there you have it. That'S my wash day. As always. If you have any questions, comments, suggestions for another video, please drop them below and, as always I'll continue bringing all the videos that you love the most. I promise I'll try not to take a year this time. All right. Thanks guys,


Comments
Michelle Simenson: Needed this today to get excited about my wash routine this am! Gorgeous results! ❤
Irene Reffo: Great video, thank you ❤️ Your hair is amazing!!! I'll try this way for my hair routine!!!
Sally Elphick: I absolutely loved your wash routine I really hope this works on my hair cause I'm definitely going to try it out and some of the products you use! Can you also share how you maintain such healthy thick hair do you take supplements or follow a certain diet? Your hair is truly amazing
Jessica Bulleri: Do you have an updated non wash day styling routine? Do you like the bounce curl oil or the LUS oil better?
surrendertoflow: I’m also a loyal Orange Marmalade user, haven’t even glanced at other products. Is there something you liked better about the LUS gel? Did it give as long-lasting hold as the Orange Marmalade? I wash my hair every 4th day and have wavy hair that I can get to 2c with effort but it does get stretched easily (wind,etc.) so I need all the help I can get to avoid refreshing every day!
Melissa Durham: How long did this process take from start to finish?
Lama Almulhim: wow!!!! beautiful hair, do you get used to the long process ? or you still get tired of it ? <3
entertainer106: LOVE your videos and your Instagram! Do you prefer LUS shampoo/conditioner over Bouncecurl or do you just like to rotate? I've seen you use both and I like both brands.
Julie: Good idea on the sectioning ! I absolutely cannot be bothered to section so this seems achievable lmao
Meagann__la: Do you have any tips for how to know if you have wavy/curly hair? My hair gets frizzy and wavy and doesn’t curl well, but I haven’t tried this technique before
Anita S: Thank you for showing an alternative to the Dyson, I was just contemplating throwing down $400+. Any reason why you switched or did you just want to show a cheaper option compared to the Dyson?
MissChriss: Eeeeeek!!!! I just found my curl twin! I’m so frickin excited! I have several I follow, but aren’t exactly like my hair.
A Turner: Gorgeous!
sacha’s sashay: Did you use hairspray as your final step before blow drying?
shalini upadhyay: Hey love to have you back. I was waiting eagerly.
Celeste Ortins: beautiful!
Susana Alonso: Por fabor pon suctitulos en español gracias
Sheena Beierman: I would love to know that perfume in the back and your lipstick! It looks beautiful!
Megan Nunn: I just wanted to check, are you immediately rinsing the conditioner out after brushing through? Vs. Previous routine where you clipped it up and let conditioner sit a few minutes. Thanks!
Heartwaves: I'm kinda new to this curly girl technique.... I never see any curly/wavy girl use a heat protectant as part of their product application... is it not needed? Won't the heat from the dryer be damaging to the hair after time.... and will it mess up the curl process if I add it? Also, how much gel do I need, as some say you need alot, others, like yourself, don't use so much. You have gorgeous hair btw!
Bethany that's me: Greetings from Oregon Could you please help me out with the blow dryer you used? I think you mentioned it's a Dyson dupe & I'm intrigued. Thank you & hope you're having a great day.
Jackie Forbes: You have the most beautiful head of hair
Melanie Sunshine: My hair never gets good slip or feels like seaweed. No matter which products I use.
beni ordoñez: Traducción en Español