Diy! How To Make Hair Padding, 3 Easy Method #Tutorial #Bridalhairstyle #Viral #Hair #Hairpadding
- Posted on 06 September, 2022
- Wedding
- By Anonymous
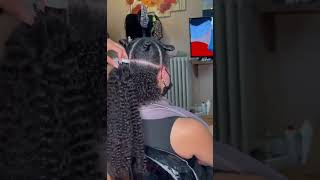
Learn easy ways to make bridal hair padding using only hair nets and kinky extensions.
I used:
Scissors
Needle and thread
Hair net
Kinky hair extension
Invisible hair net
.
Please follow for more tutorials.
PS: Watch all videos
#tutorial #viralshorts
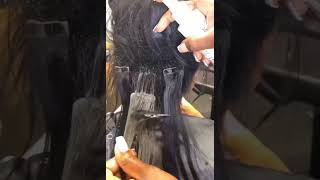
Hi everyone welcome back to my youtube channel. My name is holder and i'd like to say thank you so much to all those that have subscribed to my channel and if you have not done so, please kindly subscribe now. Today'S tutorial i'm going to be teaching you all how to make hair padding different types, and you can find the items that i'm going to use here in stores, hair stores near you. They are super duper affordable, so enjoy. So i'm going to be showing you three sizes of hair padding. I have seen in the markets. This is the biggest i have seen for now. This is quite big, then i'm going to show you the medium size. This is quite popular among radar. Hairstyle is that this is what we use most of the time. This is the medium size and we have the smaller one. You can find this as thousands. This is quite popular too majorly for kids, so i'm going to be showing you how to make the medium hair bone. So these are the three sizes i have divided one into two, this round one i have divided into two: that's why it's quite straight for hair styling already so you choose. You need a needle and thread. Then your scissors weave on cap i'll be listing the rest of the tools as you watch, the video you'll find out more than your kinky hair extension. So with this we are going to be making hair padding, don't skip all watch till the end. There are two other styles i'm going to be, showing you all so. First, we arrange the kinky head together and try to stretch it out so that it doesn't get bumpy inside the wi-fi nets or the weak cap, so try to stretch it more and it doesn't get lumpy. You know what i mean, then we're going to be inserting it inside this wig cap holding it from the tip. You control it with your hand and you try to tuck the kinky extension inside the wig cap very carefully and it should not be raw because when it gets rough you will be able to get that perfect, u-bond, so tuck it in gently. So it's very easy guys. You can actually do this within some minutes. Even a beginner can learn this, so we are going to be stitching the mouth up so as to protect the kinky extension from coming out of the wig cap, so carefully hold them together in place and stitch with your needle and thread, of course, so try to Stitch it well so that when styling doesn't pop, the kinky extension doesn't pop out, see guys, don't mind me my hand, i'm a left-handed person. So this is it's after stitching together, so you just try to adjust it and try to make it the length you want. It to be, you can make your extension bigger by adding more kinky extension, though, but depending on the size of hair padding you want to achieve now. You can actually use this to style, a wedding hair or a brighter hair, so it is super duper easy. I promise you guys, so we are moving on to the nest style like you can see. You can stretch it. The next style is we're going to be using invisible hair nets now, instead of the wig cap. I do this most times. If i can't get my hair padding for my supplier at the market, i just jump to this. This method has really helped me so much too. So please guys don't forget to subscribe, as you are watching this tutorial, and please comment in the comment section on how you're enjoying this video or, if you've learned something good. So i'm going to be making also the round donuts. So you also watch that is in the end part of the video, so don't skip watch the tutorials fully. So i'm using this invisible hairnet there are three pieces inside, so i'm taking two together. So that's going to hold the kinky extension. Well, i'm grabbing the extension. I'M talking it's inside the invisible hairnet. This one is very, very easy, like i jump to this all the time, especially if i don't have hair padding at hand. So when you tuck it together, you you stitch it with your needle and your thread just sew it in together, especially the tip the mouth arrange. Well, so that one side is not bigger than the other side. Then you stitch guys, take your time, be careful so that you don't your hair padding and then the styling of the hair does not look unprofessional. So take your time, while doing this now close the mouth or stitch the mouth together, so that you are protecting the kinky from coming out and so that doesn't spoil your your job so stitch it quite tightly together, tuck the kinky extension in well. So for me i guess it's easy and you will save a lot because there are sometimes you might not get the hair padding at the market, so this would work for you definitely so just use your knees on your tread run it through, and you are good To go, i promise you so this is it. You have gotten your u-bone already it's just like. You have cut the hair donut into two. It'S almost the same size guys you can achieve this, so this is a round doughnut that you i cut into two to achieve this one. Then you can make yours with this. It'S very easy guys, it's very, very easy and it's very very light weight. It'S not heavy at all, so you can basically see it. It is very neat, so make yours knit two, so we are moving on to the next one. Now that is the doughnuts. So, with this same one, you fold it together, like you, are making a donut and you sew it into themselves with the kinky extension, let the needle run through in and out so that it holds firmly in place. So it doesn't snap when styling or when trying to put it on your client's head so carefully sew it into themselves together to achieve the round doughnuts. Mostly the round doughnut is used to style, brighter, hair and evil brother hair. To be precise, you can also use it to style some civil hairstyles civil wedding hairstyles, so you can actually use this too if you're out of hair padding on the donut part. So after sewing it together strongly. Now it's not going to be: it's really not going to be equal in size, so you have to make yours equal by finding a middle part. Then using your scissors, you put it through the hair and it comes out. So you have gotten your middle part like that these sides have to be equal, so use your hand to make it spreading round, like you are doing donuts for eating the local donuts we use hands to create that round party need to make it real donuts. You get what i mean now you're using the hair extension, the invisible hair net. Sorry, now you are going to sew it together. Watch carefully. This one makes it very and look very, very professional, so sew it into themself carefully, and you are almost done with your. Do not hair padding, so this is what you achieve when you sew it into themself. So if you get this exactly what you need to do, just pull the nets together out and let them meet at the other end of the donuts. So with this, you have secured the part that you use scissors to make a hole out of it, so it doesn't give you stress or doesn't give you any issues. So this is it. It is very, very simple and easy. Please guys don't forget to subscribe to my channel, don't forget to like my videos and i'll be super grateful if you do that and voila your hair, donuts padding is ready, so you can see that it's really really easy guys. So yeah i'm going to be comparing it with the one i bought in the markets, the same size guys so remember, i'm using i used half of the kinky extension i bought, so you can use quarter depending on the size of hair padding you want. So this is it guys, thank you so much for watching. I'M super grateful. Please subscribe like and share this tutorial. Thank you. So much bye,
Comments
Chinaza Evarest: Nice one girl♥️♥️
WOW Yummyyy: WOW
queen blessingshow: Done