How To Make A Microtwist Braided Wig Using A 360 Lace Closure, #613. Diy Blonde Microtwist. |Ammie N
- Posted on 04 March, 2023
- 360 Lace Wig
- By Anonymous
FAQs
~How many packs of braiding hair did you use?
Ans: 2 packs
~How long does it take you to finish these micro or needle twist?
Ans: for 360 microtwist or needle twist, it can take 4-5 weeks depending on length as well
~Do you sell these wigs?
Ans: Yes I do. Kindly check my IG @ammie_nwigs, facebook - Ammie N.
or send an Email- [email protected] to make a purchase. Website is not available currently
~Is the wig heavy?
Ans: absolutely not, It's one of the most lightweight braided unit you can come across
~Can it be packed in a ponytail?
Ans: Yes, It's versatile and can be styled in any way
~Does it come with adjustable straps and wig combs for security?
Ans: Yes absolutely, just as shown in the video and if wig combs are needed, Client just needs to indicate.
~Do you deliver worldwide?
Ans: Yes, I do and via DHL
FEEL FREE TO ASK MORE QUESTIONS, IF THEY ARE NOT ALREADY ANSWERED, thank you
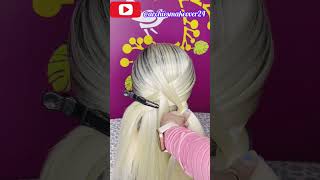
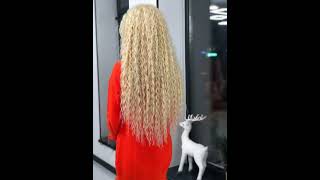
Foreign middle twist in color, 6 13 for my clients, so I'll, be showing you guys how I did it I'll use a matching thread and needle. I also use a full lace: net, a full lace, wig cap and also a 360 in human hair in color 613. I have already adjusted this one because my clients had circumferences a 21, and these 360 is usually come larger than that. The next thing I'm going to do is I'm going to attach to the cap and show you guys where I'm going to stitch it. I already prepped my braiding hair, as you can see, and I'm going to drop a video on how I did that one um next thing is: there are two stages to doing 360 needle twists. We have the crochet part and we have the part where you twist on the human hair. So I'm just going to separate it now to show you guys what I mean and for you guys to also understand me better. The parts in the bun is the crochet part and the other part is on the human hair. And then the white line you can see is my thread, foreign sizes of crochet pins, but I'm going to be using the smallest one because I'm going to pass it through in a net release net. And I don't want to use the big one. So it doesn't create holes. I also tease the braiding hair, so it's easier to grab, which is exactly what I'm doing right now and I'm going to do this. It doesn't matter the amount of hair I cut, because the hair is already small, so I can't cut too many hairs using this crochet pink and I'm going to do like three of it. The three is going to serve as an anchor for my twists. All right. Now the next part I'm going to start twisting um. I have a video on how I twist so maybe you can go through my old videos, but it's still the same thing, so I grabbed braiding hair. I make sure it's in the middle. I place it in the middle and making sure it's stable. With my right hand, I twist the left one and just keep wrapping it around, but before you wrap around always make sure that you twist each section of hair very well your twist, especially for these tiny one has to be strong or um tight enough. Not too tight, because if it's not tight enough you're going to have problems when you're trimming the hair one and secondly, your twists are going to lack definition. So it's very important that it twists as tightly as you can, but not too tight. If you get what I mean, if you make it too, tight you're also going to have very tight braids that might shrink when you dip it in hot water, so you want it to be at a good place now. The next part is on the human hair. If you got the crochet part, this part is just the same thing. The only difference is that we have to create the ankle braiding hair on the crochet part, while on the 360 there is already human hair, ventilated, so you're going to do basically the same thing foreign. So at this point, I'm like okay, I'm getting somewhere - and this is like 50 of the whole process, because I'm going to twist each strand of this and then I'm going to trim and dip in hot water, which can take me like another two weeks or three Depending on how busy I am so, I'm just going to show you guys how I twisted so I got to the tip always make sure that you pull tightly after whenever you're picking up a any strand of hair and just keep twisting the same thing. You know we keep repeating it's a repetitive process, keep doing the same thing when we get to the tip. That is something I'm going to do you twist as much as you can till it's very little and you can't twist, then what you do is that you grab two of them like so, and you just keep twisting two of them together. Oh, let's say rolling them together. You can also roll them between your palms. If that would get the job done for you, but just keep pulling them together till it's sealed and that's it. This is the final look. This is what inside looks like. I went ahead to add straps adjustable straps, and this is all my adjustable straps look like. They have like three points where you can make it tighter or make them loose uh. I also, I also fix the baby hair. I'Ve also trimmed the hair. I didn't add Wick combs for this person. This is what it looks like on a mannequin for my nail, just trying to be creative with my packing, but this is um. The final look um. Thank you guys for watching until next time stay safe, bye, foreign

Comments
inez pruitt: Ammie, how much does it cost for one of your micro twist wigs?
🦋Sandra Kay🦋: Wow! How long did it take to make it?