Real Scalp | Pre-Plucked Full Lace Glueless Wig | Bangs & Style
- Posted on 23 November, 2022
- Bob Wig
- By Anonymous
#lacewig #rpgshow #install
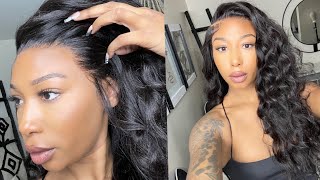
This unit was so much fun to play with. I absolutely love fringe curtain bangs. I'm so happy that I was able to share this with you. RPG Show has new and improved full lace wigs that look like scalp. The knots on the unit are invisible and the hairline is pre-plucked. Be sure to comment any questions you have and read the full description box.
Link to the Same wig:
https://www.rpgshow.com/long-layered-y...
Coupon code : BF2022 (up to $90 off)
※ Glueless Wig
※ NEW Invisible Knots & Real scalp
※ Upgraded Pre-plucked hairline
※ Free Parting
Wig Details
buki004
Hair Texture -Silky
Cap Construction - cap-A Full lace wig
More affordable wigs
RPGSHOW Clearance Sales: https://www.rpgshow.com/clearance-sale...
RPGSHOW Glueless wig : https://www.rpgshow.com/glueless-wig/?...
RPGSHOW Social Media
Follow RPGSHOW on Social Media:
YouTube: https://www.youtube.com/c/Rpgshowwigs/...
Instagram: https://www.instagram.com/rpgshowwig/
#lacefrontwig #glueless #wiginstall #rpgshowblonde #rpgshowwig #protectivestyles
▬▬▬▬ ForeverCryssy's Social Media ▬▬▬▬
@ForeverCryssy
INSTAGRAM: https://www.instagram.com/forevercryss...
TWITTER: https://twitter.com/forevercryssy?lang...
TIKTOK: https://www.tiktok.com/@forevercryssy?...
TRILLER: https://triller.co/@forevercryssy
▬▬▬▬ Shop HERE ▬▬▬▬
♥ Business Inquires: [email protected]
♥Website: https://www.forevercryssy.com
♥Amazon Store: https://www.amazon.com/shop/forevercry...
▬▬▬▬ MUST WATCH ▬▬▬▬
1. PLUCK LIKE A PRO: https://youtu.be/ouFJOAfWqWE
2. BLEACH KNOTS: https://youtu.be/nHxDaQWG9Tk
3. DETAILED INSTALL: https://youtu.be/583UXwGE4Hs
4. WAVY BOB: https://youtu.be/NRrgdRvpXTQ
5. SIDE PART BOB: https://youtu.be/XI_ZDURLc5o
▬▬▬▬ PROTECTIVE STYLES ▬▬▬▬
MY FAVS:
1. PASSION TWIST: https://youtu.be/7wMA_Qv2zjg
2. CURLY FRO: https://youtu.be/j8xHgc3ibys
3. NATURAL SIDE PART QUICKWEAVE: https://youtu.be/DIVAPv5YFX0
4. V PART + LAYERS : https://youtu.be/RYjHnb7-CBo
5. VERSATILE WEAVE: https://youtu.be/sRG_dfskG_4
6. KNOTLESS BOX BRAIDS NO BABY HAIR: https://youtu.be/vD14SlCCEuQ
7. BANTU KNOTS: https://youtu.be/JAbafgqWAUs
FAQS:
Location: Atlanta, Ga
Height: 5'2
Main Camera: Canon T7I
Vlog Camera: Canon g7x Mark III
Foreign, hey babes, welcome back to my channel. If you are new here, welcome now's a good time to go ahead and subscribe. Of course, as you guys can see from the title, I'm going to be showing you how to get your wigs to lay as flat as possible Right. Obviously, the foundation is important, so I went ahead and cornrowed my hair all the way straight to the back. You guys can kind of get a quick look at what that looks like and, of course, I do have a video on my channel to show you how to cornrow and kind of get this foundation in case you are not familiar with it. So let me give you a quick view of my braids okay, so rule number one: you want to make sure that your braids are as flat as possible. Don'T come over here, okay, with with uh, really chunky braids. If your hair is thick, obviously do your braids smaller. If your hair is thinner, sometimes you can get away with pretty like insignificantly sized braids. Today'S video was in collaboration with RPG, show y'all know how I feel at this point. We are not collaborating with any company unless we actually believe in the products so RPG show. I have been working with them, probably since the start of my channel um and I've absolutely just fallen in love with their units, the quality, how quick it gets to you all that good stuff. So I want to quickly show you the packaging and kind of get right into the video just so that I can show you how to kind of get that bulkiness out of the unit. So, of course, here is a quick look at the packaging. Y'All know RPG show is always on top of it, so much so that they won't even deliver your package unless she signed for it. So I appreciate that you guys can see it's just a black Sleek box. Everything came nicely packaged now. I'Ve already taken the wig out, I've already trimmed off the lace. I'Ve actually already worn this wig, but I want to show you exactly what it looks like when you actually get it. So, of course, there is like this nice magazine, which I appreciate so RPG show, makes it a point to not only highlight other creators, but also industry professionals so definitely make sure to kind of take a look at this. You can kind of flip through and get a Vibe check. Okay, I did actually flip through previously, and I think that I've seen a couple of familiar faces, so I think I caught. Let me see, let me see if I can find it real, quick for y'all. Okay yeah, so I did see Arnel up in here styling and profiling. Looking really cute. I think I also saw Simone in here as well, so congrats girl, um, but yeah it kind of like goes over what products they have what's new. What'S trending styles that you guys can kind of take a look at highlighting some professional stylists and so yeah great job RPG show on the magazine, I'm loving what that's looking like and then, of course they did actually have some little paper, but I've already kind of Removed that - and so they do give you a full detailed card, letting you know exactly the unit that you're receiving. So I highly recommend open this up. You know once you get, it definitely make sure to just kind of take a look at this little sheet here. It'S order, information it'll, tell you exactly what it is that you have so the unit that I'm using today is. I guess I just call it Booky b-u-k-i-004 and of course I have my order number here. The texture is Silky. It'S an 18 inch, the hair color. It'S just a natural, so of course it's always going to be like a natural Brown closer to like a 1B. The cap size is one also a cap construction, it's just cap, a glueless, full lace cap and then I have tinted transparent Swiss lace in the color light brown. They do give you a couple of goodies, so you get a little headband here, a wig cap. Of course, for the install and then also a wig bag, so this is just for you to be able to kind of store your wig on the go, and I absolutely love this. So their sister company also has these cute little bags and they always come in handy so definitely 10 out of 10 there, and so of course, before actually getting into the styling I've already trimmed off the lace. I did notice, while you know getting ready to wash the acro unit, that there was a little extra lace around the hairline. So I went ahead and cut that off and then I'm just using my Aussie Moy shampoo and conditioner to kind of just go through the hair right. So I didn't have to do too much of a deep condition or shampoo. But I wanted to get rid of any other products that had previously been in the hair from me, wearing it, of course, and then, of course, I am just going to go ahead and style it typically. I would do this on a mannequin head, but for the purposes of the video I know some people don't necessarily have access to that. So I want to show you how to get this done at home, on your head and in those top now, as I mentioned before, the unit is a full glueless lace. Wig. What does that mean? You do not need glue. You already will have combs installed on the unit. You guys can kind of get a quick look at it here and now, of course it is wet. So this is kind of what it looks like in its natural curl pattern and the density is not too too crazy. So it's not overly thick or thin to me it's about average and then, of course, The Parting space is pretty intense, so you actually get parting from the front of the lace. All the way down to the nape are y'all hearing. What I'm saying so literally once I split this, you guys can kind of see here I'll show you a little bit better on my head and kind of during the washing process. You guys will kind of see what it is. I'M talking about. You can literally see straight through this cap. I mean full glueless lace, and so I am in love with that. Of course, if you are not one of those people that really know what to do or really many styles, I am going to be uploading. Some cute little wig styles on Tick Tock. So if you guys are not following me, there definitely make sure to do that and then, of course, on the inside of the wig, you guys can see that full parting space, even the bottom of the cap, still kind of has that color going, which I appreciate And then, of course, we have an adjustable wig band, which always helps just kind of keep everything, nice and glueless and kind of fit snug, and then there's also comb. So you get these two Combs on the side. You get the one in the back and then the cap is of course adjustable, so you can kind of tighten this or leave it Loose. If you need to for me about the third Loop, does me well, I'm gon na go ahead and just adjust that now all right and then same thing for the actual band. I usually keep it on the tightest one just because I really like my wigs to fit really really snug and so, of course, I'm just going to go ahead and put this on and then we're going to get it blow dried and styled. Now, obviously you don't have to do this. While the unit is wet, you could totally just allow it to dry and then start to style later, but for the purposes of the video I'm gon na go ahead and take the risk for you so number one. You do not need a wig cap, I repeat, okay, if your braids are straight flat and Alignment, nice neat ordered all that you will be good. I promise you as long as the knots on your wig are bleached. You should be totally fine as long as that lace is bleeding through and melting into the skin, which RPG show definitely provides. Then you should be fine. I'M gon na go ahead and just tilt my head into this foreign and pull it down. Now your choice, you can either use that comb in the back. If you want to or not all right so flipping this back and you guys the wig is so freaking snug like whoo okay, now mind you. I did notice that the unit did not come pre-customized. If you guys are wanting to kind of tweeze this out and really make it your own, I do actually have a video for that, so I will definitely be sure to leave it down below so definitely make sure to check it out. So because the knots on this obviously have been hand tied and a lot of the strands of hair that are pretty much in the wig are also hand tied, you'll notice that some of the strands will naturally kind of like. I don't want to say, stick up, but they won't be super flat against the cap and so of course, you'll see. Please hold all right now, as for the combs in the front, obviously you just want to make sure that everything is kind of lined up, which I know that it does because again, I've already kind of worn this. I definitely probably could have tweezed this out, but for the purposes of this video I'm not doing it, I want to show you realistically what to do. If you are not a professional like everybody does not have that skill and I get it so. I'M gon na go ahead and tuck in the wig cap. You guys can see I'm literally tucking the comb in the front of my braid. If you can, if you have enough forehead space to get it done, which I do so, I'm gon na go ahead and tuck in that comb here in the front and make sure it's comfortable. So it's not like pulling you know, pulling on your hair and all that all right, so I'm just pretty much combing everything out of the way. I want to see exactly what it is that I'm working with make sure that I want to do this middle part and not a side part, but I'm going to do a middle part just to keep it simple. So you can kind of get the gist of how we're going to get some of this bulk out of it and having the braids underneath. Definitely make it a lot easier too, because you can almost feel where your actual part is which helps with the blending. You guys can see no cap boom, all right guys, so I'm really looking to kind of go for like more of a curtain. Bang look! So I'm really going to kind of chop this up just a little bit um, and so you guys will kind of see what it is that I mean all right. So before we get into the blow dry, I want to make sure that the cut is right. Okay, so I am gon na add just a little bit of layers here in the front. You guys will see if you guys need a full tutorial. Y'All know I got a lot of them and it will be listed down in my description box below alright and so quickly to show you the parting space here you guys can see. You are literally able to part this anywhere literally anywhere and mind you. This is with braids, underneath, let's get into that, and so we can even keep this middle part just going straight to the back. Let me show you foreign on this is crazy. Do y'all see this, so I'm just gon na go in and add a little bit of shape. I'M going to use my razor comb to quickly do that, if you guys need a full, detailed layering tutorial, definitely be sure to check out all the other videos that I have so I'm just going to start from here, and I want these to be pretty stacked. So, thank you all right, so I want to keep the length all around the other sides, but I'm really just going to kind of focus it here I'll, do like a tiny bit of layering right about here, just to kind of match up the layers. Just a tiny bit and then the same thing on this side all right, so we kind of got some little choppy layers going. So I like to go ahead and just brush everything to the front, and then this this extra length here, I'm just going to go ahead and get rid of it all right and now that we have a cute little cut going. You guys can already kind of see the shape. I'M gon na go ahead and just kind of round brush this out, and you guys see what I mean. So when you get ready to do those Styles, you already kind of will have that. You know the texture going, don't mind a little flap, so I like using the round brush just because it really will kind of grip the hair and pull it out and it'll. Give me the ability to go ahead and curl it, while I'm kind of getting it straight, so tip number two wash and round brush the wig foreign feels so soft, oh my God and you guys can see how it kind of creates that nice little curl at The end, so you don't really have to do too much just giving that blowout look, but we're still going to get those roots to be super straight, but we're going for a blowout already. I can tell that the roots have gotten pretty straight, just from really being able to pull that hair out. You won't have to do so much work later with the hot tools foreign guys, so you can already see just the shape the volume, the body the hair is super soft and I did not use anything to blow dry. Of course, we're just doing this fresh shampoo and look at that. It'S already like it's looking so cute and mind you. This is more so for the people that aren't really concerned about the hairline. You just want a nice wig to be able to wake up and go. I feel like this already is giving me the vibes like look at those layers. It looks so good so clean, so you guys see if I'm able to like press this down and then it pops back up. That'S considered bulk. Now, if we're going for more of a volumized, look, obviously that's okay, but in this case I want to make sure that this part is going to be super sleek. That'S what I'm going for, and this cut gives so much room for like versatility. You can do some half up half down Styles, I'm already like seeing it: okay, all right babes. So we are fully blow dry. You guys giving kind of like 90s early 80s shag and I'm actually in love with it, and so now that we have everything pretty much blown out. You guys can see. I'M really loving the bang here. It'S almost making me want to do like a kind of shag situation where maybe a few of these pieces are a little bit shorter than the other, so I'm actually going to do that. Let'S go ahead and create a little triangle and then once I determine the length here, I'm going to go ahead and twist it over all right and then I'm just going to kind of point cut and just to kind of connect. The layer go ahead and match it up. Y'All, we Loki got a little bang going, okay, Loki hockey. So now what will happen once we go ahead and kind of curl this it's going to give that little shag effect that I am just in love with these days, all right so now that we have everything situated, I'm really happy with just kind of like that. Shag layered, look, I'm gon na go ahead and show you how to get rid of the Balkan is now there's really not much here, but just the fact like, I said that I can kind of Pop It Up. That lets me know so. Okay, so tip number three. You want to make sure that you use some type of wax stick. I prefer to use the caracare wax. Stick you guys. I'Ve had this for so long, probably before wigs were even really a thing. Definitely at the start of my channel. So it's time to throw this away, but I'm still gon na get some more use out of this, because why not I mean it's a wig, and so the way that I like to use this product is any areas that I want to kind of cut down. On that bulk, I usually will apply this just at the base just at the roots and then I'll go ahead and hit it with my hot comb. So you really kind of seal the style. So you'll see what I mean so, for example, here I'm not actually mining the volume going down this way. But I want to make sure that there is no extra bulk here and then I'm actually just going to go ahead and take the wax stick and literally just apply it at the roots. So you don't need this going all the way down the shaft of the hair, and you really don't want it to um weigh down the hair too too. Much so definitely be light-handed and instantly you guys can see just how flat and, like I said, I'm not dragging this down because I'm not looking to really straighten the hair. I want to kind of keep this look until I add some extra curls all right and you guys can see the bulkiness literally right there, all right and typically once you add it under that second layer, you usually don't need it on top, unless you really just Want to go for that, like super pressed out look, and this is where you also kind of get a chance to redirect the hair. Whichever way you want this to sit, I like to add a little bit of lift there and you guys can see already this side is nice and kind of like flattened, and this side is a little bit bulkier and the goal is to keep the hair looking Like soft and able to move so voila super sleek see what I mean all right. So this is where I add a little bit of just a little bit of shine and kind of get it doing. What I needed to do, I'm gon na take some bio silk, just to smallest amount, put a little bit on the tops of the hair, all right so just to finish up the style, I'm literally just gon na throw some like soft little flat iron curls in Here and go like the granny curl, you remember when your mom used to curl your hair like this and used to hate it and I'm curling everything like towards my face. I got the ends curling it in and then I'm gon na do the same thing on the other side. So just a little curl and y'all see I'm literally doing like bare minimum y'all. I'M loving this, let's give them a 90s or something I don't know what the decade is. Is it 70s? Is it 90s, which one you tell me, okay, so to brush this out, I'm going to take a big, paddle brush and literally just start to flip. It back even though we didn't curl it back if that makes sense kind of holds it foreign, oh, my God, this is so cute. I'M wondering if I should keep this lit, because it's so choppy should I do here or should I keep it here? Okay, so just look in the mirror into my jaw: I'm doing this, but like the tiniest mirror like about two feet away, but in order to kind of blend the top with the bottom, I am going to take off a little bit more. I know this was a 18 but baby we going for about a 14 at this point just to go ahead and kind of blend this here on the sides. I want to make sure to kind of add a little bit more layers here and it's already curled. So it should blend easily, because I noticed that this side had a little bit more of that extra all right y'all. So I decided to kind of trim this up just a Teensy, tiny bits, so you can see here. I took off probably about a. I don't know how many inches is that I definitely cut this up to probably about 14., but hey we're going with it. So I'm just gon na match the left side or with the right is coming down so like the top of the boom yeah. I'M in love with this, this is so cute, it's so layered and fun, and you don't have to really think about it. So a little bit of playfulness with the bang. It'S me completely transforming this wig. It looks so good. Um. Definitely remember. This is a full lace. Wig can literally be parted anywhere. So if you are not already following me on Instagram Tick, Tock, all that good stuff definitely make sure that you do so because I'm gon na be posting some more styles, with this exact unit um a little bit later on this week so definitely make sure to Check that out I'll be showing you kind of like some versatile Styles, because right now it's given very much. We could do a quick little half up half down with a little bang action, Little Pony in the back. Like that's cute, and if you want you could definitely pull this up as well, because, like I said it is lace going all the way around, so you would just kind of like leave out some fun little pieces. If you wanted to put this up and like I said the laces Blends in seamlessly all right babe, so that's pretty much it for this video. I hope you guys enjoyed it. Definitely leave any comments or questions down below. Thank you. So much RPG show for always coming through with the Styles y'all know. Okay, I love you guys so much stay pretty and I will see you next time. Thank you.


Comments
Tamara T.: I love this company. Their wigs are worth every penny. I have never had any issues and the packaging is really nice.
Emma Noel: absolutely fantastic
Broccolii Cheesefries: Beautiful ! But the prices are a little steep !!! Wish they had something on sale or clearance
KW: Ohmy... I have to have her
ForeverCryssy: Cute Outfit at 24:30 Enjoy!
Amya Henderson: It’s pretty but 500 dollars overly priced for no reason