Loose Deep Wave Closure Wing Install |Ghostbond | Isee Hair
- Posted on 13 June, 2022
- Closure Wig
- By Anonymous
WIG SALE & MORE https://dollcouture.bigcartel.com
Hi Dolls! Here is a video featuring #IseeHair #ClosueWig #GhostBond
Any questions let me know… Thank you dolls soo much for all of your love and support. Xoxo, Kooch
♡H A I R I N T O D A Y' S V I D E O:
Hot Summer SALE , Up To 32% OFF + Extra $10 OFF!!! Don’t Miss Out!!!
More Information On: https://www.iseehair.com/
♡Use My Special Code: ‘’Kooch10’’ Get $10 OFF !!!
The hair I'm wearing in this video is : https://bit.ly/3N7sDYq
#ISEEPrincess
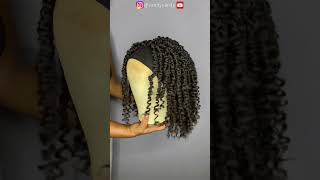
Texture: Peruvian Loose Deep Wave
Density: High Density
Length: 24inch
Lace Type: HD Lace
Cap Construction: 4*4 Lace Closure Wig
♡Crown Series--High End Series just dropped: https://bit.ly/3NmJjMb
♡Life Need Colors: https://bit.ly/3uzOGie (Code: New20 Get $20 OFF!!!)
♡Suitable For ALL Skin Tones- HD Lace Wigs: https://bit.ly/3wACAs2
♡$73 Pixie Cut Curly Wig: https://bit.ly/3EMuNJS
♡OTHER DEALS:
Peruvian Loose Deep Wave Headband Wig: https://bit.ly/3NPRTSZ
Peruvian Loose Deep Wave 13*4 & 13*6 Lace Front Wig: https://bit.ly/3tamump
♡C O N T A C T ♡
IG: @iseehairbeauty--http://bit.ly/2IyNNkJ
Email: [email protected]
Imessage/whatsapp: +8613271220951
****FOLLOW ME****
Instagram: https://instagram.com/princesskooch/
SnapChat: PrincessKooch05
FaceBook: https://www.facebook.com/princesskooch...
Twitter: https://twitter.com/princesskooch
Subscribe to my Vlog Channel: https://www.youtube.com/channel/UC4xwk...
Shop Doll Couture: http://dollcouture.bigcartel.com/
*My Amazon Store: https://www.amazon.com/shop/princessko...
Dolls Email Me @: [email protected]
***For Business Inquires Email Me @: [email protected]
Hey dolls, so i am back so this is going to be a video on this hair. It turned out so cute super duper flat. I like that, the waves are really soft and yeah if y'all want to see me install this hair and where it's from keep on watching - and i also did install this wig by using adhesive so stay tuned yeah, i'm rushing it's memorial day. I almost forgot to even tell y'all where the hair is from okay, so this hair is from icy hair, and this is the princess luxury - hair collection. Okay, so this is the box super duper cute. It comes with some elastic. You can use this to like tie around your edges whenever you are flattening it. It does also come with wig caps as well. It came with two. I actually did use the one that came in the box and then i also did get some press-on nails which are super cute. I'M gon na try to do a close-up, so y'all can see them. So yes, these are really cute. That'S really nice, like you know, if you wear press-ons or like in between, if you're giving your nails a break from acrylics or whatever, then they also put this little pamphlet in here as well, and then i also got a bonnet. I love these kinds because they don't get all loose, so it has like the drawstring, and i use these whenever i'm taking a shower like, instead of actually using a shower cap, because i feel like your head sweats, because it's plastic, so i like to use like A satin bonnet whenever i'm taking a shower and also sometimes at night. So that's really nice. The inside is pink. So i guess you can flip it because it's kind of like reversible and then they also sent some lashes, and these lashes are really cute background. On the lashes is kind of holographic, so it's kind of giving a glare, but these are really cute. They also did send me a bag to put my wig in um, and this is just like a satin bag, which i love when they do that, and they also sent an edge brush which has a brush on one in a comb and also the little spatula Thing for like applying the glue - and i was thinking like i don't have any like that - like mines are all like the brush and the comb on the other end um or it either has like a rat tail on the other end and the two, the combing Brush at the top, so i was like i need to give me one with a little spatula thing since i did do the adhesive and i didn't know it was one in the box. I could use this, but really really nice, so it came with some great. You know different hair tools and stuff like that um but yeah. So the hair turned out really cute stay tuned for the video to see me install it, okay doll. So this is how the wig looks. You can see the lace and then on the inside. We do have three combs across the top one on each side and one in the center and then also on the back of the wig. There is a comb as well as an adjustable strap, and there is also a little piece of lace there as well. So this is how the wig looks right now i haven't wet it down or anything, so i'm going to be taking the ghostbun glue and i've already just put the wig on and then flipped it back so that i can start to apply the glue. I did not do a ball cut the ball cap method, so i'm just going to put the glue small little dots and then i'm using an eyebrow razor, the back of it to actually smooth out the glue. And on this one side i kind of went down like way too far, so, instead of smoothing it out, i'm going to go in with a towel with some alcohol on it and kind of just clean it up right now so yeah with glue, you want to Try to be really really precise um because you don't want it to be further out than where you're actually sticking your lace down it so yeah after i do that it dries really fast. So then i go in and do a second really thin layer. I didn't want it to be like a hole. That'S going to last, like uh two weeks or something crazy. I just wanted. You know my week to look really late and last throughout. You know the weekend and for a few days so that i would not have to worry about redoing, my hair for upcoming things. So after i do that, i just go in with the blow dryer for a second. I believe i used it on a cool setting and the glue is going to turn pretty much clear as you can see, and then i'm going to go ahead and pull the wig down and place the lace right into the glue where i want it to be. So i would definitely suggest to cut off those tabs on the sides. Y'All know i always like to do that, but i wasn't thinking and it was too late and i had already put the glue and i'm like i'm, not even gon na mess with it. I'M just gon na go ahead and apply it like this and then just cut it off afterwards, and you can see i kind of use my comb to apply some pressure to the glue comb, the wig back and then went ahead and put on my elastic band And went ahead and blow dry it once again, so that the glue can dry really well and melts into place. So then i'm going to go in and cut off those tabs which i could have just went ahead and cut off. You know all of the excess lace at once, but for some some reason i just feel like i needed to cut off those tabs before i cut off the excess lace. So that is what i'm doing now, i'm just using some really small, sharp scissors and getting super close to the hairline as close as possible. You will see me kind of like flipping the lace up and kind of pulling, because i did glue it a little bit further down than where it should be, but i did go in and clean that up. So i will show you, you know how i did that to get any excess off. That is above the hairline, but try to be super precise and not make this mistake. But if you do you can clean it up and it still will be fine. So you can see that extra glue. I just took a towel and some alcohol and i am pressing pretty firmly to just remove any excess glue, because if you leave it, it is going to be tacky and your hair is going to like stick into it and stuff. So definitely take that off. Plus you don't want to leave it. You know on your head period, so now i'm going to grab my even wonder, lace, spray. I can't even think of the name of it right now and i'm just going to spray down the hairline. Once again, i feel like this also really helps the glue to dry and not be tacky at all like if it's not completely dry, but it also just seals down that edge where i have pulled up a little bit without me having to go back in and Do little bitty pieces of glue little dots and stuff to try to fill in any little areas that the lace is not down and with this method my wig has not lifted off or anything because for the most part it is all down with adhesive. I just used the spray to seal down the edge. So now i'm going to start working on my middle part. As you can see, i did have some over bleaching, which i am going to fix in just a moment, but i like to go in sections and start to lay the hair down working my way up to where my actual part is at. So i did just do a few different sections and hot comb them down and also using my wet stick to do so in the parting area. It was like some hair that was like right in the middle of the part, and it didn't matter how many times i went back in with the comb and tried to re-part it. It was just like extra hair in the parting area, so i am going to pluck that out and just fix everything up, but i did also spray some hairspray, just at the top to really smooth out the hair. I feel like this is an extra step that i'm starting to like to do versus just using the wax stick, because it is more oily. So i do like to go in with like a light hole spray as well. On top of it, and now you can see - i already put some concealer in my part, and then i did go in and pluck out those hairs that were in the center of my actual part, and then i'm going to use this um. What is it called? A dye brush, applicator type of thing, and i'm just going to place it on the sides so that it can cover up any areas that are over bleached, and this will also really define your part as well. Any areas where i can definitely see the bleach seeping through that is where i'm focusing mostly to really cover up those brown areas, and you can see now how it looks versus before you can't see it at all anymore and now the part is nice and defined. So now i'm going to work on doing my baby hairs and i just went ahead and parted my section down on the side. I did do my little heck that i like to do where i take two edge brushes. I take one to line it up and then the other to go ahead and part. I'Ve showed y'all in other videos. So i kind of just cut that part out and then you can see where, on the sides closer to where the bundles are sold onto the wig, it was a little thicker there. So i just go in and thin it out so that it can match up with the rest of the hair, because i don't want my baby hairs to be too thick so yeah, then i go in and just cut them down using an eyebrow razor and i'm Also going to use my little flat iron to go in and curl it and you can see how the little curl looks in the hair and then i take my hair spray spray it directly on the edge brush and then go in and swoop the baby hairs. In to place - and this is going to give your baby hair some nice hold but they're not going to be super crunchy, it's still going to give a soft wispy look. I don't know if it translates on camera, but in person they are definitely really soft and sculpted, but still kind of wispy and not too hard or crunchy, or anything like that. So then, i did the same thing: on the opposite: side: parted down my baby hairs, plucked out some additional hair and then go in and trim them down and once again, with my little flat iron going in to curl them and also sprayed the hairspray on my Edge brush and just swoop the baby hairs into place, then i kind of go back and look at each side to see if i have swooped one side too low or one side too high or what is given and then i'll just go in and fix any Little imperfections that i see that i want to do to fix up the baby hairs even more and using the comb also helps to separate the hairs and give it a more natural look where it's not just too thick. So then, i also go in and take a section down from the side to cover up where the tracks actually start. This is a good step to add in especially whenever you're wearing closures, because sometimes, if you just kind of like push the hair back, if the wind blows or whatever you will be able to see where the tracks actually start. So i like to comb or hot comb a little bit of the hair over that area where the tracks actually start and then i go in and spray the hairline with a little bit of hairspray and also using my wax pick and i'm just kind of pushing The hair back off of my face - and i like this because it just gives the hair like a polished natural, look because you can kind of see how those hairs are more thin in the front and the plucking, and everything like that, like it just gives like Natural hairline and then i'm also going to take my little makeup. It'S not actually makeup it's made for wigs, so i'm just going to take that powder and apply it right on the center and also a little bit. You know where my baby hairs are it so that it can match better with my forehead. So then i did go and wet my hair at the sink, and then i'm just going to comb it out. Detangle, it really good, and then i decided to use my carefree curl activator. I have some of this left that i have been having forever, but i used to actually really like to use this on my curly wigs, because it gives them like a juicy kind of look. It doesn't smell the greatest, but the the um. The smell does go away and you can always spray, like somebody spray or something in your hair, if you totally hate the smell, but the smell kind of goes away after it dries. And then i just go in and scrunch the hair, because this is a looser curl pattern. You definitely want to scrunch so that those curls really really pop in the hair. You can see all of the waves and curls and everything like that. So after i do that, i just let the hair air dry by going sit down in the house and doing whatever i did and then now i'm showing you how the hair looked after. I actually did air dry it. So i installed it one day and then the intro and outro is actually the next day. So this is how the hair looked once it was dry, and then you will see me in the outro showing you the compliment. Okay. So this is the completed look of the hair. I love how it looks. The layers is still really good um. I didn't have to like spray down anything this morning, like sometimes the next day or like the next. You know after a day or two has passed. You have to go in and re-spray the hairline whenever you just use hairspray, but since i used the glue and i tied it down last night, i feel like it really sets, and it's just really there. So i might buy some other different adhesives and try those out. Let me know what y'all think, but i really like this. Hair is really cute and i like how the curls are kind of like more loose and it's not super super curly. I really love this hair, so yes, don't forget to like comment and subscribe. Okay, i know also really quickly i'll. Just show you guys my outfit, so i'm wearing this top in this scorch is also from sheen. I have a haul coming soon and then i did my tiffany jewelry. I didn't put my watch on um and then i have my lady dior matte, black, so black bag, and then i also have on some matte black dior, slides kind of like sandals. It'S probably kind of hard to see them on camera, they're, real, cute, real, chill, easy, breezy, it's hot outside so yeah. This is the back, so super cute and yeah


Comments
The Rebirth Of Sabrina: You’re hairstyles be popping Kooch
Patrice: Thank u for always keeping the dolls hip ❤️
juicyma: Yes the Care Free Curl Gold lotion! Looks so defined!❤️❤️❤️❤️❤️
Erica Asante: Love it
ItsmeLaToya B: Cute and omg is your daughter walking already gurrrrl if so congratulations
Dee Luther: FIRST COMMENT QUEEN PRETTY THUMBNAIL THO YOUR BEYOND GORGEOUS U ARE MAKEUP ALWAYS ON POINT ENJOY YOUR NIGHT HAPPY FANTASTIC WEEK AHEAD BE BLESS N STAY SAFE ALWAYS
Princesskay: Cute hair and outfits
Bargain Beauty: Yassss.... Blessing, my timeline on this Sunday evening, why DON'T you!!
Kennedy Crutchfield: Where did you get the lace scissors from?
Faat: does it have volume ?
Dominican Butterfly: "wing install"
Christopher Ford: Love you too
Lí: Some angles you look like Aaliyah jay