The Secret To Achieve A Glueless Install On A 6X6 Closure Wig
- Posted on 10 April, 2022
- Closure Wig
- By Anonymous
#6x6closurewig #megalookwiginstall #6x6closuregluelessinstall
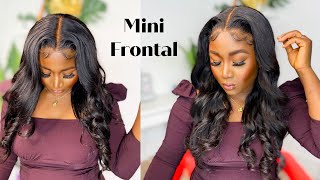
The secret to a closure glueless install also includes changing the inside of the wig. This video will come in handy the next time you have to install a 6x6 closure wig. The hair in the video is from Megalook on Aliexpress it is a 6x6 closure, 16” straight wig
⏰Timestamps
00:00 Intro
00:14 The secret to achieve a glueless install on a 6x6 closure wig
03:32 How to make a 6x6 closure wig glueless
03:07 How to install a glueless 6x6 closure wig
03:55 Outro
Thank you for watching Do not forget to subscribe for weekly tips and tools to help level up your hair game. Let's learn together.
FOR BUSINESS INQUIRIES ONLY: [email protected] (PLEASE NOTE I AM BASED IN SOUTH AFRICA)
Follow me on IG and Tik Tok: @keamogetse.mohlala
ABOUT ME
Age: 32
location: Gauteng, South Africa
Camera: Sony ZV- E10
Editing Software: Wondershare Filmora X
Today'S video is a tutorial on how to achieve a glueless install on a factory manufactured 6x6 closure wig. So if you're interested in that, please do stick around. So today's video will be broken up into two parts and i will say that each part is critical to ensure that you get flawless results. The first part we're going to be looking at the construction of the wig and then the second part will be the actual install of the wig on your head. So when it comes to the construction of the cap, we're going to be focusing on two parts of the wig we're going to be focusing on this elastic band, and then we're also going to be focusing on these adjustable head strips. So you're going to be using these adjustable straps to change the size of the wig so that it fits your circumference that is the circumference of your own head. You can bring it up here. You can bring it up here still in that crisscross manner. So it's up to you, it's it's! You can customize it as you feel fit so crisscross manner like this, where you have the bands as far apart from each other as possible, so here or you can have it in a criss-cross manner and bring the straps as close to each other as possible. So you would have in a criss cross like this, or you can even have the straps side by side like this. So if i had a really small head, my straps could be here. If my head was a bit bigger, i could move the straps to here and here. So let me just show you so you customize it according to your own head circumference and it might need you to go in with a few more tries before you get it right, but don't despair. The point is to get it right. So if you sit and do it for 15 minutes, while getting it right, it's fine get the perfect combination of the straps for the wig to fit snug on your head. Okay, so i think i have the perfect combination of the straps. I have it in a crisscross to the second hooks, and these are the results so far, so we're gon na remove this, because this is not the correct place for the wig not to flap up any further and for it to fit more snug. We need to move these straps from here to where the combs are to the ear ear, ear area. So finally, i'm done - and this is how the wig looks inside you can see the the elastic band is now near the cones closer to the ear and, of course, as we did before the adjustable straps in a crisscross manner. We can now get into part two of the video which is the actual install which is pretty much the easiest part. So if you do have any balding lace or excess leg, cut off little extra bits and pieces of that balding lace and then using a concealer or even foundation that matches your skin tone you're just gon na lightly tint the exposed lace and they have it. You guys a tutorial on how to achieve a glueless install on a factory manufactured 6x6. Clue wig. This method is a very easy. I hope that you try your next glueless install, but if you found this video very helpful, please don't forget to click on that thumbs. Up button, so that i know to create similar videos like this in the future and before you leave, i just want to let you know that if you are a lover of all things, weeds and weaves, and you wish to level up your game. Please subscribe to my channel for all my weekly tips and tools and until next time, bye


Comments
bwkimm: Good job. Looks good