Lace Wig Install 2021 28" Inch Loose Deep Wave Ft Wiggins Hair
- Posted on 22 April, 2021
- Fake Scalp Wig
- By Anonymous
════════დ #WigginsHair დ═══════
Get $8 off with coupon code”Love” !!
Direct Link➤https://bit.ly/3erttiN
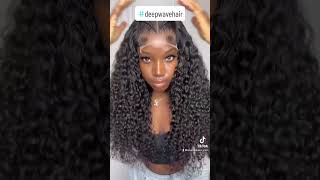
Hair details: #loosedeepwave
lace frontal wig
200% density
28 inches
Cap Size Medium
Hot selling #lacefrontalwig➤https://bit.ly/3auBzpz
You may also like:
1. Invisible skin melt #hdlacewig ➤https://bit.ly/3vbItrK
2. Premade colored wig➤https://bit.ly/3gueUgN
3. Lazy girl approved headband wig➤https://bit.ly/3vnMGc3
Follow @wigginshair on instagram: https://bit.ly/3ax1Gfr
Tiktok@wigginshairbest
Facebook @wigginshair:https://bit.ly/3dRRmQh
Email: [email protected]
If i can't have you, i don't want you to have anyone and if you don't want me, there's something wrong with them right. Maybe i got problems, hey you guys, welcome or welcome back to my channel. If you don't know who i am, my name is risi. This is my beauty channel where we come to sleigh, especially on a budget and if you're new, don't forget to hit that red button down below and turning on your post notifications. Today, i'm going to be showing you guys a full install process. It'S going to be four different parts to this video, i'm going to first show you how i bleach the knots pluck the unit install the unit and create beautiful baby hairs. I am so proud of my new install process. So, if that's something you guys are interested in today, then continue watching bye, lisa. Do you think you overdid it with our hair? No, i sure, don't because we're going to beverly hills now, if i'm gon na do good at that audition, we got to look like star before we get started. Let'S talk about this hair, real, quick. This hair is brought to you by wiggins hair. It is a sponsored video today they sell gorgeous gorgeous wigs. I got a 28 inch loose deep wave wig. This is a 200 density 13 by 4 lace, frontal wig, so two inches near the ear, while it's four inches back of parting space near the front. So yeah, if you're looking for a very deep side, part this wig might not be for you, but i still finessed a side part with this wig minimal tangling and a little bit of shedding it came with a scarf head, wrap a little bag. Also some lashes and a wig cap, so enough of this talking, you guys we're gon na get right into this video on how to install this wig. So you guys, i wanted to show you how the unit looks before i bleach it. So, as you can see, this unit still looks good. The knots look okay, but they still are black. So i wanted to make it look super natural. So today we're going to use 40 volume, developer, bleach and purple conditioner and a bowl to mix with. Don'T forget your plastic knife because that's how we're going to apply the bleach and just make sure the bleach is sticking onto your knife. That'S how thick the consistency is supposed to be don't forget to put a plastic bag over your wig head if you're using one. So you don't destroy it and then i am putting my wig inside out. So it could just be easier for me to apply this bleach. Don'T forget to brush those little hairs and flyaways back so now you just lightly. Add your bleach and let it sit for about 30 to 40 minutes and don't forget to wash it out with purple conditioner to get rid of the brassiness. I wanted to show you guys a before and after of how the hair would look if it's bleached compared to it not being bleached, it's a big big difference. The parting looks very very natural. So now we are moving on to plucking i'm using kendra, boutique's, hot comb and just flattening out the frontal. So i can have an easier guide to plucking and, as you can see, i part a little bit of hairs down and then just start working. I pluck. I never pluck in the same spot. I take my time and i just keep going back and forth. I part the wig sometimes and thin it out that way, or i literally just pluck it, how i don't really know how to explain plucking you guys, but you can see the big difference between that side and this side, i'm still going to work on it, but Just trying to thin out as best as you can your frontal, but never in the same spot, see how i'm grabbing that hair and then plucking and then moving my hand back up and down so basically grabbing. The hair can give you more of a control, as well as put an old girl in a headlock. That'S all you got ta, do put a girl in a headlock and pull the hair, see how i grab the hair and then pluck it with my other hands. It gives me way more control and, as you can see, it's looking really really good. The harshness of the hairline seems to be disappearing and i'm loving, loving, loving it i'll have a video of how i pluck or what video i refer to when plucking my units. This one - i don't have a video about, but i love doing this method of creating a widow's peak because on a natural hairline, those two pieces of those that hair is thinned out the most. So i try to focus on that area as well to thin it out, and it will look so gorgeous see. This is the final result. I'M just going back in and doing the final plucks and it looks so so natural. You guys look at that. It looks like the wig head is growing hair out of it, so we're going to move on to our install process. So we are on installing the wig i'm going to use that brown cap wiggins provided as well as some sheer pantyhose that i bought from my local walmart in the size large. This is going to be used for my bald cap method because it's so sheer and clear. So it's more seamless, as you could say, i'm going to take some got to be glue, blast, free spray and put that throughout the hairline and rub it in don't forget to cut out your ears while doing this process as well. So it can lay flat towards your ear area, while that cap is drying, we're going to tint our lace using our maybelline fit me foundation, make sure you have a plate on hand to pour the foundation get a brush rub it into the lace. Don'T use too much foundation. That'S why i have my plate to just test out how much i want to put on there turn the wig inside out and then after you're done from the inside, we're going to place the foundation on the perimeter of the head as well. Don'T be too shy to get it onto the hairline so now that our lace is dry or our wig cap is dry, we're going to cut our excess wig cap off to create the ball cap method and then add some more of that foundation onto your cap. As well just so, it can have a seamless look and just touch up some excess frails and strings, so we're gon na add our wig and just measure it out. This is where we're going to cut our excess lace near the ears. So here i'm combing the wig back and then just measuring out how i want my wig to lay with this wig. It doesn't give too too much lace so make sure you select the correct measurement for your wig cap size because i'm a cap size medium. So it fits me perfectly so make sure you do your measurements, you guys so it can fit seamlessly. So, as you can see, i cut off that ear tab as you can see, and then i'm doing the other side just cut upwards and diagonal towards your ear. So it can lay as flat as you can and then see how seamless it looks. So now we are on the glue part. You guys make sure you get your rubbing, alcohol and makeup wipes and just wipe off your face, your excess, any excess dirt or makeup that might be in the way, get a popsicle stick, some go spawn glue or whatever glue you like to use. My method is to do the whole perimeter, because that's the easiest for me drying time is way faster by doing the whole perimeter and not just in sections get your popsicle stick you guys and cover your perimeter of the head in between your skin and the cap. So it can lay flat and do a very, very thin layer. So this is round two of me doing a thin layer of glue and then i do another round. You guys make sure it dries before. Each time you add a layer of glue. This is my third time doing the layer of glue you guys. Three is the magic number. This will last you about four to five days with me, especially if you cleaned off the area perfectly, and so now it has dried super super clean. You don't see any white spots, it's perfect to start laying down. So here take your time. You guys get your handy, dandy, comb and comb, your hair back, while just placing your wig. So, as you can see, i'm using the comb to just lay the lace down and if i make a mistake, it's okay to lift it back up and place it again. So don't be scared! That'S why we let the glue dry clear. So we could just measure our head out, and so it could be perfect. So that's basically it once you find a perfect spot to lay your wig and just comb, your frontal down, get an elastic band and just help melt that lace into your head. Once 10 minutes is up definitely take off the elastic band. So during this process of the 10 minutes, i'm trying to figure out how i want to part my hair. I went on pinterest and saw this picture and fell in love, so i had to recreate this look. So basically she did like a nice little side, part it's not too deep. So it's perfect for this type of wig. I went in with some tweezers to thin out the hairline, because her hairline was a little bit thinner once we finish with stu parting, our hair we're going to take a wax stick i'll, have everything linked below get your handy, dandy, hot comb and just swoop those Edges back you guys, i took off the elastic band and now it's time to cut the excess lace off. You can't even see the lace. That'S how laid this wig is shout out to wiggins for a beautiful, beautiful lace. I don't know if it's swiss, i believe it's a swiss lace, but this lace melted, girl, so bomb and, as you can see, i'm using an eyebrow razor and i am slowly slowly taking that lace off with it at a downwards cut. This will create jagged edges. So it can look way more natural and it's growing out of your scalp now it's time to part our baby hairs away. What i like to do is part a thin layer around the whole perimeter. I try not to take out any hair towards the front of the frontal or your forehead area. I just like to use baby hairs towards the sides of my face. I seem to like that version better and then, once we braid those up we're gon na take our wig dealer melting spray. This stuff is so bomb. I bought three cans of these, because this stuff will help you melt any of the lace that might lift up that didn't get any of the glue. So this is just a step that is so imperative. If you don't have this specific item, you can use, got to be glue, blast free spray on this step, and this will help melt your lace down even more so once we have that elastic band on for another 10 minutes. I just took it off and this lace girl, it's melted for the gods, so get your makeup wipe and just wipe any excess residue. Maybe it might have turned white or your hair is a little stiff that will help just loosen up the hair and revert back to normal. I'M going to take my hot comb and just hot comb, all the pieces, all the baby hair pieces and just clean up the frontal area, so we can start working on our baby hairs. So i like to use my eyebrow razor to cut off any excess hair. I like to leave about two inches for styling my baby hairs. I got this item off of amazon. You guys i'm putting you on girl. This item changed the game for my baby hairs, it's a very, very thin flat iron and i'm going to use it to create those seed curls that you see on instagram or pinterest, just those flawless nice looking baby hairs, you guys this will help shape and form. Your baby hairs, it changed the game for me, i got so excited when i first tried this out. I was like. Oh i've been sleep. I saw this method on tick tock and i had to go grab this item right away to add to my install process. So it's super exciting to find out new things. People like to get keep a lot of stuff, but us girls over here we like to share so i'm here to share you share with you guys all that i learned and i'm just so hyped to just start. Slaying y'all so after i have my edges curled i like to go in with a brush and start shaping and forming my curls to see how i want my baby hairs to lay so right. Here i am using my eyebrow razor to cut the baby hairs. A little bit shorter um, that's the reason why i leave my baby hair so long at first, so i can. It gives me room to style and see where i want my baby hairs to lay and if it's too long i can cut them. But if it's too short, i can't make them longer we're going to use our edge control to lay these baby hairs because mousse, we don't need that anymore. We used our heating tool, it already created our shape. So now we just need a little bit of edge control to just let those bad babies stick and girl. These baby hairs are so cute, i'm just so proud of myself. You know people be bullying me about my my little edges baby hairs on my videos and i've upgraded. I have upgraded, bullion does work, but don't bully me too much, but i really did that you guys. This is such amazing, unique tactic to installing my wig. I am loving this install. That is basically it. It is giving me island guide vibes. Oh my goodness, thank you so much wiggins for sponsoring this video. If you're interested in this hair use my code, love down, link down below and don't forget to like comment and subscribe for more videos, i'll be seeing you in my next video bye, you


Comments
AdamLoL: Hey friend nice video man i enjoyed it very much good luck on youtube +sube