Super Simple 4X4 Closure Wig Install With Beginner-Friendly Instructions Ft. Beauty Forever Hair
- Posted on 24 November, 2022
- HD Lace Wig
- By Anonymous
Open Me ❤️❤️❤️❤️❤️❤️❤️
I'm showing you step-by-step how to install a 4X4 Closure wig. It's super simple!
●▬▬▬▬ ❤ #BeautyForeverHair ❤ ▬▬▬▬●
Get $20 Off Use Special Code : beautyytb
☛Link to the same wig: https://st.beautyforever.com/d8ti8
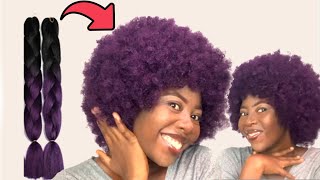
Hair Info :24 inches Natural Body Wave 4x4 Lace Closure Wig
https://www.beautyforever.com/ ►More#Vpartwig: https://st.beautyforever.com/d8ti9
New In Wig : https://st.beautyforever.com/d8tia
Lace Frontal Wigs : https://st.beautyforever.com/d8tib
Invisible HD Lace Series : https://st.beautyforever.com/d8tic
Headband Wigs Available : https://st.beautyforever.com/d8tie
►Buy Now, Pay Later, 4 or 6 Interest-Free Payments
►Super Brand Day: https://st.beautyforever.com/d8tif
The 3rd Friday&Saturday of Each Month EXTRA 15% OFF
#beautyforever #beautyforeverhair #beautyforeverwig #humanhairwigs
Beauty Forever YouTube Channel : https://bit.ly/34a1Y8Y
Aliexpress Beauty Forever Website : http://bit.ly/3ceVkl2
Amazon Beauty Forever Hair : https://amzn.to/3p4FYHL
Instagram@beautyforeverhair : http://bit.ly/IGBeautyForever
Promotion Email : [email protected]
Customer Service Whatsapp:+8613783534924
MY INFORMATION❤️❤️❤️❤️❤️
❄ I N S T A G R A M➜ http://instagram.com/dionalatia
❄ T I K T O K➜ dionalatia
- - - - - - - - - - - - - - - - - - - - - - - - - - - - - - - - - - - - - - - - - - - - - - - - -
Serious Business Inquiries Only: [email protected]
Hey, what's up y'all, welcome back to my Channel or welcome to my channel. This is your first time here. My name is Diana and in this video I'm showing you how I installed this wig that I have on my head from beauty forever, hair um. This wig is a 4x4 24 inch body wave closure, wig 4x4 closure um. So that just means like the closure goes like just this far and then the rest of the wig is just like a regular, regular wig. It'S not laced like all the way down here which works for people like me because, like if you've watched my videos before you know, my hairline is a little funky and it's hard for me to do. Um frontals, sometimes because my my hairline is just not like straight across it does its own little thing so anyways. This right here really helps me out, and it's super fast and easy and convenient to install. So, if you're interested in seeing how I installed this wig - and you want more information about this wig of keep on watching so like I said this hair is from beauty forever. All the details for this wig will be in the description box below in the Box. They sent me this cute little package, which included a wig cap. Two of these little hair tie band things to tie down your edges, some really cute lashes and this little brush here that I use for putting the concealer and the foundation on my hair super convenient. But yes, so this is what the wig looks like as well. It'S a body wave wig closure. It has the clips on the sides and you can see how much lace you get and it has a clip at the back and that lace at the back as well. So I'm going to start by putting on this wig cap that they sent me, and I really love these wig caps, because these are the sheer like pantyhose type wig caps, and you can see straight through it. This one actually was super small, which I appreciated like I didn't even have to pull it over my ears or anything. So I'm just using my, I think, that's wake Bond. Whatever that's called that's right. There spraying across just the front where the closure is going to be I'm not going to spray it across my whole hairline and I'm going to blow dry it after the spray is dried. I'M going to go through my scissors and just cut off the excess lace on here, um yeah because of the size of this wig cap. It was super simple to cut all of this off and it Blended really easily and really well into my skin because of the material of this wig cap. Like I said, these are the best type of wig caps to use, in my opinion, because they're extra thin and then after I'm done cutting off the wig cap, I'm going to go through and use the lace, tint and spray, some of it on the lace of The wig and I sprayed a little bit of it on the wig cap just to help everything blend better foreign makeup. I got this from Walmart, but in this brush that they sent me with the package and I'm just going lightly across the wig cap, to make it a little more color to make it blend more with my skin tone, I did spray the lace tint lightly, but I wanted to go through with my own makeup and now I'm just sliding the wig on my head to make sure everything Blends correctly and now you're ready to lay the wig down. It'S literally that simple mind you before this. I did pluck this hairline a little bit and I did bleach the knots before I got on camera so that helped the wig hairline look more natural as well. So take that into consideration. I'M using wig dealers glue and I'm just going to go across the front where the closure is and lay down a couple of layers. Thank you. Foreign glue is completely dry, well, not completely dry, but once the glue is tacky, I'm going to go through with my comb and my hot comb, of course, and just melt my lace into the glue. I really love closures, because it's super simple to just do the line across my forehead and then I'm going to take the Wonder, lace, Bond, hairspray and spray just across the hairline just to get it to set a little better and stick some more um. If that makes sense - and it helps it like stay in place better foreign, so this part here is one of the most important parts of even laying this wig and that is making sure the top lays flat honey, because if it's lumpy at the top you're not Going to have a cute hairstyle, so what I'm doing is just taking small sections across the closure and I'm going through with my um my wax stick and then I also use some of my got to be free spray. But I was running out, so I didn't use too much and then my hot comb and I'm just making sure it lays super flat here. It looks like I'm doing a side part because I did initially start off doing a side part, but I decided later on that I wanted a middle part, but I just want to explain why you see me with a side part right here, foreign foreign, the reason Why I decided on doing a middle part and not a side part is because this is a closure wig, the side part wasn't going to lay exactly where I typically light my side parts to lay. So it was a very, very tough decision y'all. I struggled so much with this, but I just decided to go ahead and do a middle part. The wig does come with a middle part kind of like already parted in the closure anyway. So it was just easier for me to go ahead and just use the pre-made part, and now I'm going to go through and lay down my edges. Thank you, and now I'm just using my black Eco Styler gel to lay down my edges. Thank you, foreign. So initially I flat ironed this hair because I thought I was going to want to wear it straight, but I decided to give it some more volume. As you can see, it looks really pretty and silky straight. I love this hair straight and I actually kind of prefer it straight, but I decided to throw in some waves just to add some versatility just add a little Razzle Dazzle to the style. I know like straightening hair is just so plain and boring, so I just wanted to do something different, even though this is not really different. It'S just some curls y'all, so I'm just using my Hot Tools, curling iron, which is like a one and one fourth inch. One and a half inch barrel and just wrapping my hair around the curling iron foreign foreign, all right and then after that, I'm just going to take my flat iron and kind of like bump bump my hair away from my face. I know the word bump is triggering for a lot of us, but um. I promise this is a good kind. It just adds like a little bit of volume towards the front of my face, and it also helps to frame your face by cutting layers, which I did do, but I just did it off camera um, the hair. How I showed you at the beginning is the hair with layers but yeah. Besides that, that's it to this video. The hair itself is really really pretty and silky. Of course, it's Beauty forever, so they're super. They have super good quality, never have issues with like tangling or anything like that. I absolutely love this hair company. If you like a silkier texture, then this will probably be for you but um yeah. All the information for this hair is in the description box below so thank you guys so much for watching adios till next time.

Comments
Naturally curly mama: I love look so beautiful
D E N E S H A ⭐️: Firstt