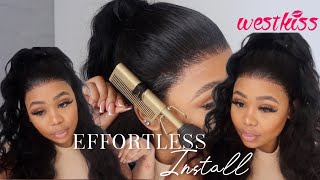
Most Natural Lace Wig Ever | Hd Lace | Glueless Wig Install | Beginner Friendly Ft. @Ali Pearl Hair
- Posted on 12 November, 2022
- HD Lace Wig
- By Anonymous
I hope you enjoy this wig install video. This has become one of my favorite wigs!
- Be sure to watch this video until the end.
- Like, subscribe, and activate your notifications.
- Leave a comment in the comments section.
- Don't forget to share with your friends and family.
Watch More Videos:
➥Vacation Prep Vlog: https://youtu.be/yjObYlRjcnQ
➥How To Groom: https://youtu.be/GahMHsQovW4
➥Wash And Go Routine: https://youtu.be/K9JWqzaSM6E
》》》》》》》》》》》》》》》》》》
❀ Let's Be Friends ♡
⇢ Instagram/Twitter/Tiktok: Dreaakinz
Email: [email protected]
(THE MOST NATURAL LACE WIG EVER | HD LACE | GLUELESS WIG INSTALL | VERY DETAILED | BEGINNER FRIENDLY TUTORIAL FT. ALIPEARL #hdlace )
Hair Information:
Ali Pearl Hair:
Hair I’m wearing: 22inch #4 straight hair 13*4lace front wig 200%density
Shop Now➤https://bit.ly/32IoHrt
Trending Ombre Color Hair:➤https://bit.ly/3dMJ4u8
❤#AlipearlHair Official Store:➤https://bit.ly/3dLY9fr
❤Lace Front Wigs for Sale!➤https://bit.ly/3tRk9Lp
❤Invisible HD Swiss Lace Wigs:➤https://bit.ly/3sN2LpQ
Hashtags:
#alipearlhair #brownhaircolor #gluelesswig #dreaakinz #torontovlog #torontovlogger #torontoyoutuber #canadainfluencer #torontoinfluencer
#hdlace #hdlacewig #13x4lacefrontal wig #alipearlhairwig #alipearlHDlacewig #alipearl #4wig #wiginstall #beginnerfriendly #hairtutorial #hairtutorials #verydetailed #hairvideo #naturalhair #protectivestyle
Hey lovely people welcome back to my channel for those returning. Thank you so much for coming back and for those who are new, I go by Drea Atkins, Please Subscribe and join the family. I promise you will not be disappointed. Today'S video is going to be a hair and stall and we're featuring hair from Ali Pearl hair. Now this wig right here is 200 density 13 by four and it's 22 inches. Usually it's best practice to bleach the knots if it's not already bleached. In this case, I had an event to attend, so I didn't have the chance to bleach it and that's why I went in with powdered foundation and just shaded the lace. Then I went in with a cotton pad and rubbing alcohol, and I just cleaned around the perimeter of my hairline, and this allows the hairspray to stick on well and then we're just gon na move all our hair out of our face and clip it at the Back before we begin the sticking process, foreign Wonder, lace, adhesive spray to secure my hair. I love this spray simply because not only does it stick on very well, it's not strong enough where it damages my hair and my hairline, and on top of that it leaves no residue on my lace, and I love that. So I find it easy to spray in sections and after I spray then I use my blow dryer on the cool setting to just run over it for they're no more than 30 seconds. It gives it like a soft hold before I go in with my band. After I've completed each section, then I go in and cut off my ear tabs on both sides. Before I wrap it down with a band, I wrap it for like a good 10 to 15 minutes, depending on how much time I have and then, when I remove it, it's usually laid and that's when I Can Begin cutting off the excess lace. When I cut the lace, I find it easy to again go in sections. I don't cut all at once. I used to do that in the past and I don't know what I was thinking. So it's definitely way easier to do this. It'S also way better to use eyebrow razors, but I didn't have one at the moment, so I had to use scissors. So if you notice I'm trying to go in like a jig Jag and not going a straight line with my scissors just to mimic a natural hairline foreign is cut, then I go back in with the spray again just around the perimeter to melt the lace again. Once again, I put the band around my hairline this time. I do it tight. I make sure I get the ears because I want the ear tabs to also be secure. Those are the hardest parts for me. My ear tubs never stay down, so I always have to wrap it extra tight, the second time around. So, while the hairline marinates, I work on the rest of the hair, I'm straightening it today, so I'm gon na go in Define my part, use the hot comb to lay it and then go in with my straightener and just straighten the rest of the head to Perfection, this hair straightens so nicely it took heat very well and if you can see it has a really nice natural wave pattern on its own as well. I really love this hair. I have no complaints, foreign. Thank you, foreign. Once I'm done straightening the hair. I remove the headband and whoo ciao when I say this lace was laid to Perfection. I was even Shook at myself, so I'm gon na create my part where I think I want it and then I'm gon na apply some hair wax and go in with my hot comb just to define it foreign and just because I went with the side part. I wanted just a little sparse baby hairs just a little bit, nothing too crazy foreign with a hair wax to separate the rest of my hair from the baby hairs before I went in with my Eco Styler gel. So this is a final look guys. The wig is beautiful, it's very full. This is 200 density. I'Ve ordered some 200 densities before that were not this thick, so this is true to thickness she's gon na say true to size, but this is definitely true to thickness. The fall is about here right at my waist um. It'S good like it takes good to heat. To curls um had no smell, barely shed like this is a great wig and I love the chocolate color just perfect for the season so yeah. If you made it to the end of this tutorial. I just want to say thank you so much for watching. Please don't forget to like comment and subscribe and I will see you in my next video bye. The righteous person may have many troubles, but the Lord delivers him from them all. Psalm. 34. 19.


Comments
Bami Kuteyi: ❤❤❤love it
D. Answers: Ordering it
David Roux: You could leave a few natural peppercorn protrusions for fun
Rickey Z: