Chocolate Brown 90'S Side Part Layered Wig Install | Ariluvsfrenchfries |
- Posted on 22 January, 2023
- HD Lace Wig
- By Anonymous
wig revamp hd lace #wigtutorial #wigtutorials #transparentlace #wigology #lace #lacefrontal #frontalunits #brown wig #amazonwig #amazonwigreview #90shair #layeredhair #wiginstall #wiginstalltutorial #lacefrontwig #lacewigshumanhair #humanhairwig #amazonhumanhair #layeredwig #meltedlace #4cnaturalhairstyle #hdlace #transparentlace
thank you so much for watching my video !!!
DONT FORGET TO SUBSCRIBE AND SHARE!
Click to see more:)
BALD CAPS : https://a.co/d/f4VRKPH
MUSIC USED : https://youtu.be/1yFm9RoeV7E
HOT COMB : https://www.amazon.com/dp/B077DXLN5C
FLAT IRON : https://a.co/d/1kkpqtw
BLOWDRYER : https://a.co/d/9yxOanp
Email:
TY FOR WATCHING ILY ALL SM!
FOLLOW ME ON TIK TOK!
ariluvsfrenchfries
FOLLOW ME ON INSTA!
@ariluvsfrenchfries
FAQ:
* age: 17:
grade: 11th
" editing software: capcut
* subscriber count: 445
"subscriber goal: 1000!
*current subscriber goal: 500
4c hair,amazon wig,amazon wig wig install chocolate brown wig
installation,how to melt lace ,dark skin lace frontal,dark skin lace tint,darkskin lace,darkskin lace melting,darkskin makeup,deep,deep side part tutorial,deep side part wig tutorial,how to melt lace,how to melt lace darkskin,lace front tutorial,lace front tutorial with glue,lace front tutorial without glue,side part burgundy wig,soft glam darkskin makeup wig revamp water wave wig,water wave amazon wig,sza inspired hair,4c hair,amazon wigb,flexi rod how to,how to use flexirods,flexi rod on wig,flexi rod amazon hair,amazon wig install,hd lace install,transparent lace,how to melt lace,melt lace,amazon hd lace,amazon transparent lace,amazon wig review,amazon lace wig review,flexi rod curls,heartless curls in wig,
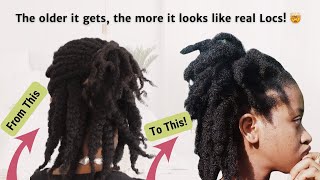
Hello, you guys and welcome back to my YouTube channel. My name is Arya if you're new, if you're, not new, welcome back to my YouTube Channel. First and foremost, I just want to say I'm a little sick right now with covid y'all. So if I'm, if I don't sound well, that's why? But today I'm going to be revamping this old wig, as you can see, y'all this wig looked bad before so I'm gon na be revamping it into these cute 90 layers for you guys today. So I really hope you guys enjoyed the video stay tuned for the next one already off. So I'm starting off my wig cap already on and I'm just gon na cut, ear tabs and I'm gon na say when you're cutting ear tabs you want to make them as small as possible. I made this side too big by accident, but it's okay. Next, I'm just gon na go in with the even spray and I'm just gon na spray. It one layer on my wig cap just to make sure my wig cap is secure and I'm just going to spread it out with my fingers, making sure that the ears Tabs are all secure and then you guys, I'm just going to blow dry it on the Little cool setting, please understand, I'm just a man, that's nearly and once that layer is all dry, you guys I'm just going to go in with the second layer again just spraying on the wig cap, I'm not going to add as much spray this time, I'm just Gon na add a little bit just to make sure everything is secure and again, I'm just gon na blow dry on the low cool setting and now that that it's all set, I'm just gon na go in and trim my wig cap y'all, I would say, make Sure that your spray is completely dry mine, looking completely dry, as you can see. On the other side, it started peeling back a little bit. I'M just gon na go in and trim my wig cap and as for the pieces in the back, I realized I never show it in my video, but for the piece on the back. I always just tie them in a little knot, so it's secure in the back next, I'm going to tip my wig cap with this only go pro concealer and I'm just going to get it all over the cap focusing on the edges, because that's where my wig Is going to be laid to make sure everything is all seamless in addition, y'all I'm gon na go ahead with that same concealer and I'm going to tint my wig again Focus on the edges, because that's where you're going to see the mold and just adding it All around the perimeter of the lace, what it should look like when you're done tinting next, I'm just going to go in with my first layer of the gold spawn glue and I'm just going to add it all around the perimeter making sure to spread it very Thin so it can dry fast and then next, I'm just gon na go with my blow dryer on the little cool setting and I'm just going to blow dry the glue afterwards y'all, I'm just gon na go in with a second layer of glue and I'm just Gon na apply it as a thin layer, so it can dry again and then, after that, I'm just gon na go on my blow dryer again to make sure everything is all dried here I already applied the wig and I'm just combing it back just to make Sure that everything is all down and pressed in y'all look at the quality of this hair. Like this looks so bad like it looks like Barbie hair but watch how I finesse it as always, but I'm just going to make sure everything is all secure and pressed and using my comb foreign next, I'm just going to go in with the black, even spray And I'm just going to spray it all around the lace to further help melt because, as you can see, y'all there is little to no lace on this wig like it's so bad, but I'm just gon na add some of the spray just to help melt. The lace next I'm just going to brush the hair back you guys, because I'm about to pluck next, because, as you can see, this wig needed some clearable like this hairline was mad bulky for no reason. So I'm going to take my tweezers and I'm just going to pluck making sure that I'm not plucking in the same area, because when you do pluck in the same area it calls balding in your wigs. So I'm just gon na pluck all around the perimeter. Never staying in one place for too long, and also I'm just holding the front of the wig just in case like I pull too hard and the lace comes up or anything like that. I'M just gon na brush through to make sure that all the hair that I plucked is not on the hair, because that's how you cause tangling and just make sure that everything is Thoroughly brushed through now for my party, I'm going for like a side part. So I'm just gon na create like a little small little section to the side. I will say you guys. This wig has always been worn at the side part, so it kind of automatically has the part I'm just gon na go in and part it more detailed, and this is what it looks like with the side part y'all look at how uneven these layers is like When I cut this, I had no common sense like it looks. It looks so so bad to try and smooth out the hair just a time, I'm just going to take a little bit of my wax stick and just apply it only on the top of my hair just to try and get as far as possible, and then I'M just gon na go in with my hot comb and just hot comb only over that top layer, oh sex, in the air. Deep in the spirit, could you please act like you're unaware, but we both know I'm just a dog afterwards, y'all, I'm just gon na start sectioning, one half of my side part, because this is how you get your side Parts flat and I'm just gon na detangle. It and then go in with some of the wax stick and then I'm just gon na hot comb it down making sure that's completely flat like when I say flag, I mean like flat like go over it 10 times. If you need to to make sure that it's completely flat and then I'm just gon na make another suction clip it back and then I'm going to add some of the wax thick over the hair and then I'm gon na hop home again. I'Ve seen that you're able and then you guys, I'm just gon na repeat these steps a couple more times and I'll come back when it's completed before we both knows more than a love for you to bear is this is what my hair looks like after I Finish how combing out it looks a little bit better. I mean it's still giving Raggedy Ann but hey next, I'm gon na go in and trim my edges and then after I'm going to curl them with this mini flat iron that I got from Amazon. The link will be in the description afterwards, I'm going to take some of my Edge booster and I'm just gon na apply it over the edges and then I'm gon na start swooping them with my brush. I realized that I never really showed this part on my videos, so here you guys go it's a little treat for y'all, I'm showing you how to do my edges. It'S really easy, really simple, just make sure to swoop and make sure to use your fingers to hold the hair in place because it will move next. I'M just going to add some spreads to my lace. You never want to spray directly on the lace because it will make the lace very crunchy, and you don't want crunchy leaves so always make sure to apply it with your finger. Next, I'm just going to go in. With the same conceal, I use the tip my lace just to help blend in and melt the lace a little bit more with my brush and then I'm going to put on my band I'm using the silk band, because I find that with the other band. Sometimes like the products thick, so I'm using a silk band instead. Next, you guys I'm gon na prep to start straightening, my hair and I'm going to use my flat iron. I think the degrees was 4 30.. I'M just gon na find my hair using the tracking method, which is using a comb to comb through the hair while flat ironing. So it's completely straight. Teach yourself always stand next to me before we both knows more than a load for you to bear you're all unique. This is what it looks like after I straightened it. As you can see, y'all it's coming together. It'S coming together. It'S not giving raggedy in no more. It'S not it's, giving like it's giving like heat damage, so pressed, but it's just cute! It'S cute! Next up, you guys, I'm just gon na bump the ends to really get that 90s look and I'm just gon na bump. The rest off camera next, I'm just going to go in with this illegal Pro concealer. Just to add a little highlight, so the part looks a little bit more natural and then I'm just going to take this little brush just to blend it out. So the part isn't too old and y'all. This is the final result. You cannot tell me. I did not get this like look at what it looked like before and look what it looks like now. This genuinely turned out so cute. Let me know what you guys think down in the comments below and I'll see you guys next time, bye,


Comments
ALISA MYRA: LOVE YOUR VIDS GURL!!! and im definitely coming back when I start wearing wigs
Imanis Life: you make it look so easy
BlackPorridge: Omg no way ♥️♥️♥️♥️you honestly did THAT
heaven was here: Ate as usual
Brilliant Christina Nation:
Cosmic: w vid