*Start To Finish* 5X5 Closure Wig Install | 22 Inch | Bleaching Knots And Plucking | Arabella Hair
- Posted on 15 January, 2023
- HD Lace Wig
- By Anonymous
hey babes, in this video i will be doing a detailed tutorial on how to customize and install your wig!!
************** #ARABELLAHAIR OFFICIAL ************** ╱
The hair I'm using in the video➤https://bit.ly/3WdSRNs
Hair info:Real Glueless 5x5 Lace Closure Body wave wig 22 inch
Exclusive discount Code: AYTB get 18% Off
—————————————————————————
- Installment is available.Afterpay&Klarna&Credit card
- Free return service in 30 days
- Fast shipping service in 2-5 days
HOT STYLE RECOMMENDATION!!
[Top 1.]24'' 13x4 Loose Wave wig➤https://bit.ly/3PPR6ns
[Featured]Honey Blonde Piano Highlight Color wig➤https://bit.ly/3WBy7z3
360 Lace Body Wave wig➤https://bit.ly/3ViDT7q
Chestnut Dark Brown Color Wig➤https://bit.ly/3WEqyb0
5x5 Real Glueless Curly wig➤https://bit.ly/3GcxfLZ
[Melt HD Lace] Body Wave wig 210% density➤https://bit.ly/3YUD9sz
#arabella hair social info:
Youtube: https://bit.ly/3Ou6vZe
Instagram:https://bit.ly/3QnQuEi
Tiktok:https://bit.ly/3zZbYSU
Contact for promotion:
Email: [email protected]
WhatsApp:+86 18937456160
♡︎♡︎♡︎♡︎♡︎♡︎♡︎♡︎♡︎♡︎♡︎♡︎♡︎♡︎♡︎♡︎♡︎♡︎♡︎
social media
♡︎ Instagram: @c.miaaaa
♡︎ Tiktok: @miaxbia
♡︎ Twitter: @prettyygirlmia
♡︎ business email: [email protected]
about me
♡︎ name - mia
♡︎ birthday - april 18
♡︎ age - 17
♡︎ height - 5’1
♡︎ film with - canon G7x mark ii & iphone 13 Pro Max
♡︎ fav color - pink
P.O Box #11075, 7717 Loretta Rd, 77379
- Send me anything and I will feature it in my video
#wiginstall #roadto13k #MiaChanelle
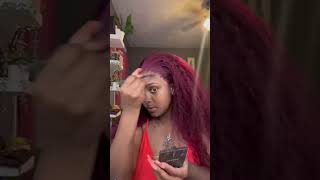
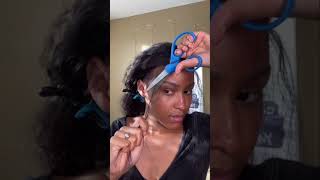
Trying to make it hey y'all, so today we'll be working with Arabella hair. This is a glueless five times five lace closure body wave wig in 22 inches. This video will be showing you how to customize your wig. So this goes for bleaching, plucking, installing and also styling. Your wig information to this wig will be in my description box below and use the code aytb to get 18 off. Now, let's get into this video, so the first process will be our bleaching process to get those knots away. I use the chlorio 2 for my bleach. Then you will need a mixing container. You could buy at your local Beauty Supply. Then you'll need a developer. I use the chloriel for the volume only because the 40 volume it bleaches the knots really fast and you just have to be very careful. So whenever I'm making my bleach, I don't actually have like a specific. You know number I just go on based off of what I think I will need so since this is only a five times, five closure, I'm only going to use like maybe like a couple. You know scoops of bleach not too much, because this again is a five times five unit and then you just want to add your developer, and then you just want to keep mixing until you find like this chunky texture. If you get what I'm saying like it's not going to be watery like you, do not want watery bleach, you want like this thick custard, that's like not gon na. You know leak. If you get what I'm saying so before you begin bleaching your knots, I recommend spraying your lace with got to be the yellow bottle, because it just gives you that protective barrier. Just in case you do press too hard into the lace so yeah. I recommend just spraying it with the um got to be just you know, one little spray, let it dry and then bleaching, because it just gives you that protective barrier that you need, and so when you start bleaching, you want to start from the very backyard. Do not start from the frame, because your back Knots is going to take longer to bleach than your front knots y'all, and this just goes to say that the front of your hairline like that is where your edges are so like. You do not want overly bleach because the hair is very thin rather than a bag where it's very thick, so it's going to take very longer to process so yeah just start from the back of the unit and work your way to the front pressing lightly and Yeah, so once you're done, this is how your bleaching should look very light. You don't have to you know, do too much, and so now I'm going to set a timer for 15 minutes, but I will not wait the whole 15 y'all. I literally would check every like five minutes just every chance. I get to make sure that the lace is not getting over processed and yes, now I'm going to be washing the lace, I will be using our purple Shimmer Lights shampoo and I just find that after washing it out and then using this it like tones. The bluntness, if you get what I'm saying so like little tone or knots for you, and so when you're washing it you just put on water under it, like it's, not really, nothing special, you just put it under the water, washing it out making sure you're getting All the bleach out tell me what you say now tell me what you say. You said that you would come again. Please don't take this person. I just can't keep running away from me. So now we're about to start plucking our hair. So first I'll just make two rows like they don't have to be thick thick, but they need to be at least something for the edges. You know just to leave your edges out because you don't want to pluck your edges because then you know it's going to be too thin for your edges, so you just want to just Mist that Row for right now and you worry about plucking your edges once It'S actually on your head, so yeah, I'm just making two simple rows and y'all. You could pluck your hair like wet or dry um. I do it both ways. This was my first time doing it wet and I just feel like I don't know it plucked. A little bit better than it dried, but at the same time you know I'm not a true, you know, hair stylist or whatever so yeah. This is what I left out so that I know not to touch it yet and wait for my um once it's on my head, so yeah, that's my part right there and now, when we begin to pluck you want to just plug from far from the line That you drawn so like you, don't want to hook right at it, but you want to plug a little bit behind it. If you get on saying, like you see how I'm plucking behind the line, I actually at the line, because when you plug actually on a line, that's how you make bald spots and you're just going. You know random, it's not no! Certain! Like method to it. You just plug in literally so yeah you just keep plugging and you'll comb it out and yeah. So that's how you do that so yeah. Thank you. Thank you. So now we're about to move into the installing of the wig. So for me to install it, I don't know how to braid, but I know how to do you know a little something so I'm just going to put my hair in a slick back and then split it into two sides and braid it. You know down so yeah, I'm just bringing it down. As you can see, I don't know how to braid at all, but this is why I made this new little method for me, because I can't braid so yeah. This is how it looks in the back, and all I'm gon na do is whenever I put my wig cap on, stick them up like that, and it's gon na be good. It might not be as flat, but it works. So now I'm just going to put my wig cap on this is a very simple. I recommend getting it in your skin tone because it just goes better with the makeup or whatever, but yeah. That'S that - and this is how my hair looks with the hair braided. It'S a little bump, but you know it's not as bad. So now I'm just cutting the ear hose. You know just cut a little small holes, nothing too big and just put your ear in it and I'm doing it to the other side. So, as you can see, I cut a little small hole like nothing too big and then just put it on my ear now for my beginners, I recommend doing this stuff. This just puts a little line from where my closure is so that I won't cut too much off. If you get what I'm saying so, you could take concealer, which is what I'm using or you could just use anything like eyeshadow brush um a pencil like literally anything, and now I'm just spraying, my even um. I forgot what it's called actually, but I just know it's like. I know they got to be, but I actually like got to be more because this right here is kind of sticky like if you ever used it. It takes like a while to dry. Like I don't know, I don't really like it as much. It'S got to be because it's got to be drives faster, but this does hold your um cap down the entire time your wig is on, and then I like to go in with my blow dryers so like I just like to do a lot of layers and Then let it dry with the blow dryer just because I'm just extra like that, like y'all, I don't be wanting and like nothing to mess up and, like I know someday. I like. I know me some days. I don't wear my um wig bands, so I be needing this extra layer, so you can do extra layers. I do about like four because I'm dramatic but yeah you could do whatever you choose to do, but I just do four because I'm extra now that it's all dry, you want to start cutting decaf, so I just cut with scissors. It honestly doesn't really matter like. I tried doing it with you know the proper scissors, the um hair scissors and stuff, but that took too long way too long, but you could use scissors, you can use hair stitches. You could use a razor. It really doesn't really matter, because this is just a cap. You know it's all going to do the same thing honestly, but see me I just I'm reckless, so I'm gon na use regular scissors just because you know I'm a yeah. Now, I'm going to use this lace tinning spray in dark brown by red. I think that this is very much easier than using makeup. Makeup is still good, but like this should just go so much faster, like all you have to do is just buy a little spray if you can and spray your hair literally and it's fun so yeah, I'm just spraying my head all around and then once I'm Done with my head, I'm gon na also spray the wig and yeah. That'S basically what that is. I really recommend this product, because it's just way easier and plus makeup gets expensive, so you can just buy a little spray. Can there's probably like only like seven dollars once you're done, tinting the lace? You want to go ahead and cut off the tabs of the closure. This only applies to closures. It does not apply to frontals, because closures has this little end piece just so you know you have like ways to grip it. I guess I don't really know what it is, but yeah, I'm just cutting that off. So, as you can see, just cut a little piece off, you'll know what to cook, because it's like a thick piece and like if you keep that on it's. Your like wig, is not going to lay at all, because it's going to be this big piece. That does not stick for nothing so yeah. You just cut that off and once you're done with that, you want to go ahead and figure out your part. So y'all know me. I am a like. I love me a bust down middle like I. That will forever be my part, and so once I'm done with that, I go ahead and just hot comb it just so it can. You know stay there and, yes, I'm just hot combing um, my part, so that it's just easier to just put back on and yeah. I just find this more like helpful for me, even though the wig is not on like. I just feel like this. Just look. Good, you know step to do now, it's time to actually start putting glue on so the glue I use is boat hole I feel like boho is just like the best glue out there like for referral, so I just do two dots one on my head and Also one on the actual cap and yeah they're, just small little dots, but back to what I said, bow holders like the best glutes y'all. I literally go days without putting a wrap or anything and like that glue would still be like it'd be stuck there like. It does not push back for real and another thing I like about boho, it doesn't take long to dry and once you put it on there like, you have to be very precise, because once you push that glue and then you put your wig, that thing is Stuck there, which is a good and a bad thing, so you just have to be precise, with where you put it, but yeah, I'm gon na do like probably like five or six layers of this again, I'm very extra. I recommend doing at least three just so. The glue can be like very strong or whatever so yeah y'all finna listen to some good Tunes because I'm telling y'all I'm extra - and you know I want myself to be stuck so yeah sexy for this change too sexy sexy thing to say Too Sexy For This Fame yeah, I'm good. Okay, all right! That'S fine! Okay! Okay, I'm feeling too sexy too several questions. Another thing is way into the glue turns clear before you add new glue. If you add new glue on top of glue, that's still trying to dry, it wouldn't mess up. Your old lace like it'll, be white and have a little white chunk. So wait until it turns clear and then add your next layers. So now that the glue is dry, you can apply your lace. You just pull it up for making sure that the um glue is not shown and use a home to flatten out the lathes, because it's going to get your lace flat by getting a comb and also make sure that the lace is actually. You know stuck to the glue so yeah. I just do this most of the time pressure and through and yeah. So now I'm going to apply my lace band provided by Arabella and you want to keep it on for about 10-15 minutes and then once that's done. I apply my Wonder: Lace by Evan and just spray it on my finger and then apply it to the lace. This only so that I know that it's for sure going to be. You know stuck there. You don't have to do this, but I just choose to do this because I just you know I'm extra so yeah. I just feel like it. Just I don't know everything I do is because I feel like you know, that's what you know helps me but yeah. I just do this a few times, just Pat it on there. You don't want to spread directly because it's going to spray like too much so yeah just do that and apply my lace band again and you know wait a little 10-15 minutes again then I just like to go in with my blow dryer. Just you know pressing it on the lace just so you could speed up the process and everything so yeah. You could just go in with your blow dryer. You don't have to do this, but again, you know this just speeds up the process and make sure your lace is all dried and ready to be. You know cut so now I like to actually start styling, my hair, so I will be just doing you know a bus down middle because y'all need to learn how to really you know style, hair for her. So yeah. You know me just the bust down middle. So wow the band is still on, nothing has been cut. I just go in and start actually you know styling my hair. So for this case, I'm just gon na be flat ironing it I used to achieve flat iron, serum um. I just feel like it works good for me, you just apply a little and then you know flat on it. So yeah, I'm just gon na be flat out of my hair and yeah hello. The question oh baby. I know that you, like me, you're my future. I just wan na kiss you so much okay, so now that I'm done with that, I just put my hair out with a clip and then yeah so y'all see that laid and slayed you cut your lace or whatever you try to cut as close as possible. That'S why I have my hair scissors and then you just do little touch-ups like you know. The first cut, don't always be too great, so you just go in and you know touch it up, and so next you want to just use a makeup, wipe you can use anything. I just like to you know clean up. You know everything because you know sometimes you can get the makeup and stuff all on you or whatever so yeah. I just you, know clean up, make sure everything is like clean or whatever. And yes so now I'm about to just start, you know doing the edges. So I actually like the no edges look, but I don't love it like I love edges. So for the edges, you just use a little comb and you know push some forward. You don't want them to be too thick, but you don't want them to be too thin because I like fluffy edges - and I don't know that just gon na always do it for me so yeah. I just do that and then I just start plucking it like. I said because when you pluck it before it, just doesn't look right and then I like to go in with the black spray again just spraying it on my finger and then Pat it around my hairline again mainly getting it on my edges too, and this is Just so, I know that it's gon na stay whenever I take the band off and nothing's just gon na you know, fall off. I just feel like when you just do the extra steps, like that's how you get the install so yeah, I'm just gon na Pat. It on my hairline making sure I get it on my edges and then I'm just going to go in and wrap my um hair again with my lace span. So now that it's done y'all, so look how tight that thing was. I wanted to make sure it was laid that might pop me in my head. I just want to go and start cutting my edges. You know cutting a diagonal because I, like the you, know, fluffy swoops and I just start curling, it rotating upwards for the fluffy edges and doing the same to the other side. I just really like fluffy edges y'all, and so then I just go in with my got to be the Black Bottle. I know I didn't show it, but that is what I'm using and just going in with that black gel and doing my edges. So this takes light times because see I'm very like a perfectionist when it comes to making sure something is symmetric, so you just want to keep brushing. You know the angle and like just basically swooping what you you know want to swoop, and you could do this. Many different ways, but I'm very basic and like to stick to the just the normal two ways. Plus this is a closure. So you know you can't really do too much because yeah, I only have enough for two swoops and I don't like the middle swoops. Sometimes it really just depends on how I'm feeling and how it looks but yeah, so I'm just gon na do that and yeah okay. So now that we're done with the edges, I'm just gon na keep restyling it by restyling. It I'm just fixing everything up. So, like I had to refix my middle part, because apparently I don't know how to do a straight middle part and then I'm just going to keep hot combing, my hair, you know making sure it's flat and neat, and so then I pluck my um edges. You know the basics and so for my edges, I like to do like a little bump at the um front, so like I'm doing just a little bump, because I don't know, I think it's just really cute. I don't know it just gives like that. You know professional work, but yeah. This is the hair and like y'all, I love that, like for a short person like y'all, I am five one. This hair is only 22 inches and it touched my butt like don't play, but y'all see the unit bomb as ever. Like be for real, like y'all, this was some good hair. I really enjoyed working with it. It was very easy to you know customize when it came to bleaching plucking and installing, like it was so you know easy so yeah this is the hair like it just looks so good like a bus. Now I'm gon na always do it for me, like yes, girl Celia, this is another look at the Quality like y'all. Do y'all see the quality of this hair like it's really shining, and I really like enjoy working with it. So I really hope this video was very helpful for my girlies, that's trying to learn how to install their own wigs, and I really hope this helps you out again. This hair was from Arabella hair that they sent me a five time. Five closure and yeah go check them out. The information is down below, but till then bye, y'all, foreign
Comments
Ama.23: so pretty
#MadeInDesignzSlay:
TheReallBty: Skinnn