Beginner Friendly Straight Wig Install 5 X 5 Closure Wig By Wiggins Hair
- Posted on 28 January, 2023
- HD Lace Wig
- By Anonymous
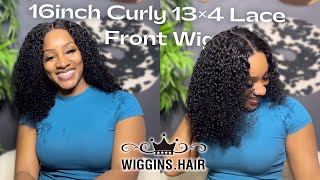
Hair details: 24 inches HD Body wave 5*5 Closure wig 180% density
Direct Link➤https://bit.ly/3VrUlDi
#WigginsHair Official Store:➤https://bit.ly/3gPDr2G
More coupons!Join In Facebook Group➤https://bit.ly/3pzwi8e
You may also like:
1.Skin Melt HD Lace Wig➤https://bit.ly/3ikLoNu
2.Top Selling Lace Frontal wig➤https://bit.ly/3ijraUj
3.NEW V part wig! More Natural➤https://bit.ly/3ugwo5Z
#wigginsloosedeepwave #wigginshdlacewig #wigginshairreviews
Follow Wiggins Hair On Social Medias:
Instagram @wigginshair ➤https://bit.ly/3ILWwdL
Tiktok @wigginshairbest ➤https://bit.ly/38krOfq
Facebook @wigginshair:➤https://bit.ly/3IQd84f
Wholesale WhatsApp: +86 18339906150 Email: [email protected]
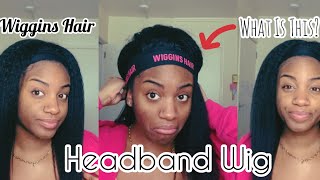
Hi guys welcome back to my channel. This should be my first wig install of 2023. You guys, I have so much like about already at the moment. I have so much content for you guys coming out by God's grace in the coming weeks, but I have been absolutely under the weather, so we're just going to go right into this video just pardon my voice if it sounds very different. It'S just that. I am just um getting better so here, I'm just unboxing this package by Wiggins hair. All the items inside stocking caps, wig bands, eyelash toothbrush um Edge brush, which is very nice, was all added to this puzzle to ensure that your hair looks very nice. So this is the hair I am just unboxing the hair as well. First one, I can see, is a mesh net covered. The purpose of this is just to ensure that there's minimal flyaways by the time the hair arrives to you, I'm gon na try to make my videos even a step further more informative, this new year. So this is the wig cap, as you guys can see. I'M going to put the specs of the hair in the description below box below and on the screen as well. This is a 5x5 closure wig, as you guys can see it's very wide. Basically, you can use a tape rule to check on the um the length and the breadth just to see - and this is the hair very lovely, very silky. This is it in with the ceiling light. So the first thing that I noticed that was that the hair the closure was in bleached, so I'm just going in with bleach and developer. All the products will be listed in the description box, I'm using just a capful and the equivalent of liquid as well. You can you don't need to do too much guys. A little goes a long way, and I'm just mixing this up, as you guys can see. The consistency that we want is the consistency of um. What can I call it now like a thick pop thick pot? Custard, like a thick paste layer like you, don't want it to runny. I know I say this often, but just in case your first time coming on my channel. That'S the consistency that you want. Then you want to kind of splatter it on the closure. Please do not touch the surrounding hairs on the flip side. Just try to be very careful, but if you're just a newbie person doing it they'll make mistakes, but when you bleach hair wrongly it can always be fixed. So this is me just coming closer, so you can see then the the ball of paper that came with the hair. I am just putting it under the wig so that it would um stay in place. Then, once we're done, we want to definitely wash the hair wash out all the bleach and developer. Then you dry, it naturally like I did here, I'm just placing it on a canvas cork head now, just to brush it out and I'm going to try to flat iron it as much as I can um just because it dried naturally and obviously with all the Washing everything would have changed, I'm just using a wide plate. Um straightener. You can decide to use any type of flat iron that you prefer once I'm done flat iron, this hair, I'm still going to restyle it re-customize it put a part on my own head. You can decide to do it on a mannequin, but I prefer to do it on my own head once you're finished, you know flattering the hair. The next thing is obviously install it on your own head. The next frame you're going to see is me. I already have my hair on cornrows. I went to Doom conrose stir for another day recently, and I asked the lady to do a center part when she just started cutting it. I was just like, but this is just what this is just the outcome, hi guys. So, first things: first um you want to ensure that your hair is on cornrows like this as flat as possible. Then I'm going to go in with a stocking cap. Let me just show I have the right side up and I have a mirror here. So I can see what I'm doing okay and I'm just going to wear the stocking cap. You can skip this step, as I always say, but I just prefer to wear my stocking cap personally. You don't need to follow my instructions, so I like to move you back a bit just ensure that all the hair here is a bit covered. You can also use like a hair wax I'll put the gummy I like to use that I find very effective for my edges. I'Ll put it on the screen, so you guys can see. So once that's done, this is the hair, that's my daughter! So, even if we straightened it, we still have so much work to do because I did not Define the parts, so you can Define the part on the mannequin, but I choose to do it on my hair. I'Ve also removed my week, Combs that were on the sides. Um sorry, you just fell off. I'Ve also removed my weak homes, so you want to place the hair on your head like this, and you guys to see how jacked up it looks. Even if I flat iron the hair, although, as I said - oh, I love the texture of this hair guys. I really really love the texture and this is without any product. Usually I like to put like a I don't know where my daughter is screaming. I like to put a serum so um, I'm just going to use the metal end of a comb which I've removed. You don't need to do this okay, so we have our part. I'M gon na move you obviously backwards, because I'm not trying to look like I'm from the Ice Age so just make sure it's very straight, don't be afraid to always go back to amend. Okay, before I even apply any products I like to go in with my hot comb from wall, you guys this hot comb. It'S almost like a hit or miss. I don't know. Maybe they have batch issues, but some people say that theirs is not as hot mine is hot, but the Combs are not as thin, and I think that's good, because otherwise it will be a hazard. So this is self-explanatory. I'M just going to comb it down. Trust me guys this is still not flat enough for me, but maybe I should just keep quiet and I'm just going to go on and then I'll do a voice over yeah. That'S what I'm going to do so here is the make or break part of the wig. You need to certainly go in with the hot comb by a curling wand or any hot tool that you use and you're convenient using. You want to ensure that it's very flat. This is what we avoid um a very bumpy part. It will avoid Cone Heads. Don'T worry, I'm still going to going to do that at the back. The back part is still a bit bumpy, but here I'm just trying to straighten my part so that I set it as you guys can see. This is me just opening um a wax stick and I'm just going to apply it on it. You don't need to use it if you don't want to if you don't have, but I recommend you know just having one handy and I you're just going to go back in with some hairspray. It'S also optional, but I prefer to then I'm going in with my actual curling wander. If you guys can see, I was just describing with my palm there that you need to just ensure that that back part is very sleek and taut. The reason why I was a bit um not too satisfied with the corners that the lady wore for me, because she didn't listen to basic instructions, was that I told her. I wanted to use it for a week and I just didn't want to argue that day because I said I was under the weather, so I just let her do what she wanted to do to my very much display so you're kind of affected. The way I was flat, ironing, as you guys can see the that place is a bit bumpy because that's not where the braid is meant to be, and the sizing was just a bit off. So here I'm just I'm going in with so that's another thing. You also want to consider, if you're going to be a wig wearer, it's important that you find a braider that listens to basic instructions and um literally just makes your hair in a way that, if you're styling the center or your side part, it actually works. So you can decide to do all back, no cutting or you can do a center part if you prefer so here, I'm just going in with a tweezer and I'm just tweezing the hairline. This is also optional, but you guys know you just want to take things. A little a notch up so I'll see if I can um title this video in such a way that it's very big enough friendly um step by step with customization for 2023. Just so that it looks like I'm doing a lot. But literally this thing took me less than 30 minutes and if, once you already have this initial customization done every day, you're just going out is just to wear the wig literally and at most we flat iron it. If it's rough. So that's also here I'm just going to go um and I think I'm going to get scissors now and I'm going to cut the lace. I want you to look carefully, so you can see that part. You want to kind of put your hand at an angle, and you want to just cut the hair in such a way that you're not too close to the hairline reason is when you cut it very, very close to literally where the strands have been wefted. You can start losing hair unnecessarily on the wig. It will start shedding unnecessarily. So you just want to complete that process. I chose not to fast forward this bit because this is what I know a lot of people struggle doing on their own head. Please, if you do not know how to do this on your head feel free to bring it off your head and cut it off your thigh. That'S what that's, how I usually cut mine actually, but because I wanted you guys to see how I do it on my head, I decided to do it this way. Next up you want to lay the hair, you can decide to use a gel, an adhesive or you can even be a little rookie and just wear it out like this. But that's a No-No for me. So I'm just going with some hair sprays, a Ticky hairspray and I'm using my tail comb the end of the tail just to kind of press it into my skin. Then we're going to go with the headband that came with the wig initially, which is the Wiggins headband this and it's like a velcro. It has velcro attachment. You can try to use your regular elastic if you do not have that once this is done. Usually, what I go and do is this process takes me about 30 minutes at most, and then I do my makeup and I'll be back okay, so I gathered some strength. Did my makeup and here I'm just putting some powder on my part. So this is how you get um a very well customized, hair closure, wig or closure hair wig, and this is the hair. I absolutely love the outcome. I'M gon na see if I can zoom in so I can show you guys the part as well. It looks from here very, very flat, very beautiful, and the length is just so so good. As I said, I'm gon na go to a more spacious place and put my camera in such a way that you can see the full length, always a pleasure. You know reviewing hair from wigan's hair, also, as you guys could have seen from the headband that came with it. Wigan'S hair, very beautiful, very well done very silky and yes, I'm very proud of my hair. So I'm gon na put all the links. I totally think you should get this hair. I recommend this hair 100 just follow the steps that I did and I that I did when you buy your own hair play this video and just follow the steps one after the order. Don'T forget, if you don't need baby hairs, don't feel free not to do, and if you want your baby hairs even more than my feel free to do that as well. Hair is all about making it look like you not somebody else. So this is the hair and and yeah absolutely gorgeous. So the pros and cons of this hair Pros Pros very silky, as you guys can see the way, I'm running my hand through it and true to length. I love the density, not too full, not too scanty. Just perfect, I love the lace set as well. It Blended, very easily. Delivery was very fast con. Do I remember any corn? Oh just that I had to bleach the hair, because the knots came on bleach. That'S the only thing I can think of now, but it hasn't shed. I'Ve been brushing it. I'Ve not experienced any shedding. Maybe when I wear this hair for long, but usually most of the hairs that I do on my YouTube channel anytime, I go back to wear them. I usually don't have any issues with them, so I know that a lot of people say that you have so many wigs and um. How do you know how they hold up is because I don't wear one wig every day I have a video on how to get the most out of your wigs, so I'll link that here or here make sure you guys go and watch it. So yes, thank you guys so much for watching and shout out to Wiggins hair for this beautiful unit. So this is what I'll be rocking now. So, thank you guys so much for watching this video and make sure you like you, share, leave a comment and you subscribe bye, guys.

Comments
Anthonia: Thank you for this video, Tosin!