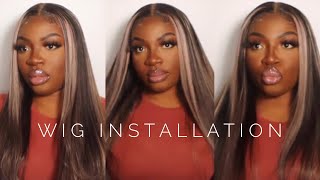
Step By Step Hair Color Balayage Highlights & Layering On Wig Beginner Friendly- Mspreciousmarie
- Posted on 04 February, 2023
- HD Lace Wig
- By Anonymous
Easy detailed beginner-friendly balayage on a brown lace wig. These are simple tips that can help you color your wigs at home without a salon.
WIG LINK: https://ronniehair.com/products/new-su...
DISCOUNT: Marie
LENGTH: 20 inches (Custom cut by me)
DENSITY: 150
Colore: Dark Brown (Custom colored by me)
SHOP EVERY TOOL AND PRODUCT I USE: https://www.amazon.com/shop/msprecious...
Every product and tool I use will be in this link.
✦ ✦✦✦✦✦✦✦✦ HELPFUL INSTALL VIDEOS ✦✦✦✦✦✦✦✦✦✦✦
HOW TO CUT EAR TAB ON WIGS https://bit.ly/3AkkyL1
HOW TO CUSTOMIZE A LACE WIG https://bit.ly/3QrGuKM
CUTTING EAR TAB AREA 360 LACE WIG https://bit.ly/3w8zYAp
HOW TO MEASURE WIG TO FIT HEAD https://bit.ly/3A41UXg
NO BABY HAIR BEGINNER WIG INSTALL https://bit.ly/3CdZLuX
TIPS FOR APPLYING WIG ON NATURAL HAIRLINE https://bit.ly/3CcyCZy
SECURE NO GLUE WIG INSTALL https://bit.ly/3c00y8e
8 TIPS TO MAKE YOUR WIG LOOK BETTER https://bit.ly/3w94quf
HOW TO BLEACH KNOTS ON A WIG https://bit.ly/3w7zASY
HOW TO REMOVE WIG & WASH PROPERLY https://bit.ly/3SWCLq8
HOW TO SEW FAKE SCALP MATERIAL https://bit.ly/3PP5MBH
✦✦✦✦✦✦✦✦✦✦✦✦✦✦✦✦✦✦✦✦✦✦✦✦✦✦✦✦✦✦✦✦✦✦✦✦✦✦✦✦✦✦
Get the SCALP Material:
Fake Scalp Material https://bit.ly/3mp7qwU
___________________
FOLLOW ME HERE:
♡ Tik Tok https://vm.tiktok.com/ZMRwbmjdu/
♡Instagram: https://www.instagram.com/mspreciousma...
♡My Website: https://mspreciousmarie.com/
SPONSORSHIP INQUIRES EMAIL: [email protected]
If you would like your product shared in my videos, email me for details.
TIMESTAMPS:
00:00 INTRO
00:39 Q&A POLL RESULTS
1:26 3D LACE WIG INFO
1:49 BALAYAGE HIGHLIGHT TUTORIAL
5:52 AFTER COLOR HAIR PRODUCTS
6:10 BLOWOUT ON WIG
7:29 ROLLERSET CURLS
8:21 COLOR RESULTS
8:55 LAYERS ON A WIG
11:04 FINAL THOUGHTS
*Hair or products shared are my OWN personal and honest experience. This video may contain sponsored content and affiliate links which I get a small percentage that helps invest back in my channel to continue to bring great content! Thank you for being so supportive!*
Hi everyone welcome back today's video, I'm gon na show you all how I achieve this beautiful hair, color and also layers on this wig. This wig install is already up. So if you would like to know how I installed the wig and all those details, click the video that just popped out but honey. Today, I'm gon na show you how to get those Salon results at home Valentine's Day is coming. This style is perfect for love day. So, if you want all the details, we're going to get right into it so before we get into today's video, I want to go over the poll results I asked you all should I bring. My makeup looks towards the end of the video, because someone did suggest it now, with 153 votes, 64 of you said, yes to add them at the end of the wig install videos and 36 of you said to put them in YouTube shorts. I just want to say thank you to everyone who truly support. You know my videos, regardless of how I do them. So I was going to listen to the majority of you and if I do a makeup look, I will definitely put it toward the end of my wig and stall video. So if you want to see how I do my makeup for a particular video, all you have to do is watch. I thank you guys so much again, if you have any more questions or comments, leave them below, and I will answer them either directly or in a video before we start this wig does come in a natural brown color. I have already bleached the knots. I always like the bleach knots before I do any type of coloring or anything like that, but this is what the Cap Construction look like. This is a 3D frontal, um 13x6 lace wig, you can see it got Combs and adjustable straps. Today, I'm doing a Balayage highlights throughout this wig now, as you see, I'm starting with a wig, that's already brown in color. Now, if you want to you always start with the base color of what you want, your hair to be so for me, I, like my base, color to be brown. So that's why I'm using this color, but if you want it to be a natural black, of course you just get your wig in a natural black and you can add the highlights through so first things. First, when it comes to wigs, it's really hard to part the back of the wig, because a lot of them, if they're, not full lace, they have wefts. So you want to make sure you are evenly sectioning the hair into four sections and making sure that these parts are straight as they possibly can be even parting through those wefts. Now I'm really excited about today's tutorial because I told you all. I was practicing coloring hair and someone said I should have highlighted the last wig. So I was like okay. Well, I'm gon na come back and highlight this wig, but I did go back and highlight the wig with the bangs. It'S so pretty. If you follow me on Instagram or Tick, Tock you'll see um video clips me wearing it all right. So I'm going to start with this back section here we are going to be taking 30 volume developer. This is what my preference is. If you want really good highlights, go with the 30 volume developer and you can use any type of bleach that you feel comfortable using all right, so I'm going to start by parting diagonal sections, I'm parting, the hair. Accordingly, on how I want the highlights to go so if you wanted them to go straight down and don't have an angle, you can just part the hair straight across it's just up to your preference. Now, with the Bleach, I want to tell you guys something that I have learned over time, and this is going to blow your mind, because not only will it be a game changer to how you highlight your wig, it's going to make it easier to get the Looks that you are Desiring when it comes to adding highlights, and it's so simple, I never even knew that this method even existed. So what you want to do when you are highlighting your wig? Is you want to pretend like you're painting a lot of times? We go into bleaching, um to add, highlights and we use chunks of bleach the less bleach you use. The more it'll have light highlights going through the hair and the bleach won't take as fast at the top of the hair. You see me stroking the hair very lightly, adding just thin layers and then at the bottom, because I want like a intense color, I'm going to use a big chunk of bleach and saturate. The hair very well - and this part will lighten faster than the previous part that I just did because of the amount of bleach that I'm adding. So I hope that makes sense. It makes a huge difference in how your highlights turn out how the wig turn out, but if you want chunky, highlights then use big chunks of bleach. If you want soft highlights, of course, like what I'm creating today, then make sure you use light Strokes throughout. So with this I'm going every other section, so I will highlight a section skip a section highlight a section skip a section and I'm going to do that throughout the entire wig. But I hope that was helpful, giving you guys those tips, I'm so excited to do this. Today'S wig install is all about getting those real Salon results at home. So if you want your wig to look like, you went to a stylist every step in today's video is mandatory. Okay, you have to style, and after we get out of this part um of the video we are going to go into styling the wig. And yes, I'm going also into layering it so make sure you stay tuned. So this section and I'm braiding, I'm gon na actually highlight last that'll be the last area, but I'm doing the same exact thing with the top. This entire process took about 35 minutes. For me to apply all of the bleach to the hair, and then I let it sit an additional 20 minutes. It can go faster. I was recording, so it did take me a little bit longer once your time is up make sure to hit up that hair with the purple shampoo. This is the one I like to use. I will have all these products Linked In My Amazon, storefront and then, of course, follow up with shampoo and conditioner. This right here also is necessary to restore the hair all right, so after a whole hour of coloring. This is the result. This is what the hair looked like when it is damp. I am going to blow dry it, so we can see what the color looked like when it's 100 dry, but it turned out really pretty. I have to admit I love the results so much, I'm going to take a bit of Biosilk serum and apply all of the hair before I blow dry, I'm so glad I started out with the base colors being Brown, like I told you all um. If you want your base color to be brown or black, that's where you start and then you add those highlights, but this wig is so pretty now like. I love that I added highlights and I'm not the one to give myself credit for coloring hair, but this turned out so pretty and look at the hair quality after a whole hour of bleaching, it's still very, very good quality. The ends are not dry. Everything just turned out so nice, so I highly recommend this wig. If you are looking to color a wig, this wig will be down below in the description box or you can wear in a color that it naturally comes in, but I love the quality of it. It definitely held up really well and the products that I use to shampoo and condition the hair is a must. Okay, everything will be linked in my Amazon storefront, including the tools um that I use for my wigs right now, I'm giving you guys the full Salon. Experience at home, I'm dropping some gems. Some tips so go ahead and give this video a thumbs up for me. If you don't mind um, so what I'm going to do is go ahead and curl the hair. I always curl the hair before I decide to add any layers to it, because I feel like it gives me the results that I want. You guys to see that as I get through this video, but I'm going to also set these curls with some rollers so that I can get some volume. I want the hairs to flow. Very, very you know bouncy and just really pretty okay. This is welcome to Miss Precious Marie Salon, I'm giving you guys The Full Experience, so I let this sit for at least 10-15 minutes and now we're going to move into the layering tutorial. All right. So here are the results. After I took the rollers out the hair, this is absolutely gorgeous you all um, but I am going to do the install in a different video. I'M just going to show you the last step that I'm going to do um and that is layering the hair. I haven't add any layers to it at all, yet so that's what we're about to do, but if you want to see how I installed this wig, make sure to check out part two to this video. I will link it at the end of this video um. If it's up, it will be linked. The Next Step I took was to cut layers into the hair I like to do this after I have curled that way. I can get a visual better of where I want my layers to fall. My first set of layers will start at chin level and I'm cutting at an angle using a razor and I'm using a razor because it's going to give a more gentle cut and it's going to be more feathered rather than a big chop. So, starting from the front, I am cutting at an angle so that the longer layers will be toward the back and at the face, it'll be chin level. So this is what the first section is. Looking like and again, the whole goal for my layers today is to make this wig look more like. I am wearing hair extensions rather than a wig, and sometimes, if you notice, people who wear hair extensions and their hair is chin level or a little bit shorter. They always have a layered look, something like what Lauren London likes to wear um. So that's my inspiration behind the cut for today. Honestly, I am not the best egg cutting hair, so I think this turned out pretty good for what it's worth. But if you feel like you can't do this at home, then you can definitely, you know, find a stylist that will do it for you, but today's video is about doing it yourself, making it work and hey if it work it work all right. So I'm just going to take my um curler and just re-curl this section not really creating a curl but more like a Bend so that the hair can flow really well and then for the top section. This is how how much I'm going to take for each section - and this is going to be my next layer - this section here - I'm going to cut at my cheekbone. So I want this to be like the bang area, but I don't want a short bang. I want it to just be the length um touching where my cheekbone stops now, with this section, you don't want to cut it too short. Of course you want it to stop a little bit above where your last layers are that way to fall. Naturally, and that's why I'm kind of using my face as a guy, so the first layer was at the chin and then the next layers at the cheekbone but yeah. That'S how it look. I absolutely love it. You guys can go check out my previous video. If you want to see how I installed this wig but yeah, I love this so much. I will be sure to put this wig Below in the description box. It performs so well with everything that I did to it and it still look healthy. The hair is gorgeous. The lace is amazing and blends so very well with the skin, so yeah everything will be below in the description box. Even the products will be on my Amazon storefront. Thank you guys so much for watching foreign

Comments
Graciously Blessed: Hi Ms. Precious Marie. This tutorial is indeed a master class, giving specific details on highlighting and layering hair. Thank you for giving us precise and concise instructions. Excellent job and excellent results!!! (I like the pink bling on your curling iron.) GOD BLESS you & your family, in JESUS' Name. Good Evening.
Felicia Moss: You always have the most informative videos and you make it look so easy. How long did it take you to learn all of these techniques before you mastered them? I am so in awe. Your make-up always go with your hairstyles too. Very pretty.
Johnny Rocket: Love your videos always a detailed tutorial! 8:11
Beauty by Jay Morris: Very detailed video Marie, I loved it, the hair is beautiful, thanks again
Isabella Van Ombergen: Hi Marie Following you for a couple of years now on the gram. And now on YouTube alsow. Thank you so much for this tutorial I’m suffering alopecia for many years now. At first I received beautiful wigs from health insurance, not anymore and now I only receive synthetic hair it’s ugly and it makes me look old I think. Thank you for taking us with all of your tutorials. Could you do a blond 613 wig with dark roots and honey overall and than a ash bayalage x I’m from The Netherlands
G S: Thank you so much Marie
Esther Sowell: You are right it is geourgeous and I'm going to try ronnie wig ordering after video
Юлия Каштанова: Благодарю, привет из Москвы.
Paricia Jones: