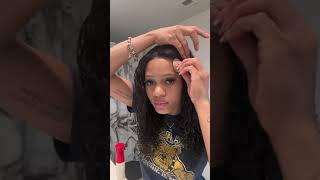
Hd 5X5 Kinky Curly Closurebob Install| Rubber Band, Linked Style |Yasgrl Hair
- Posted on 20 March, 2023
- HD Lace Wig
- By Anonymous
- Unit5X5 HD Lace Kinky Curly Wig 16''
- Direct Link to the unit in the video: https://amzn.to/3l0U0KY
️⚡️ YASGRL SOCIALS️⚡️
Yasgrl Hair Amazon Website: https://amzn.to/3WDDE8D
Instagram: https://www.instagram.com/yasgrl_hair/...
Tik Tok:https://www.tiktok.com/@yasgrlhair
Facebook:https://www.facebook.com/Yasgrlhairoff...
Welcome Beauties to IambeautifulhustlerTv ✨
Be sure to THUMBS UP THIS VIDEO✨
Leave a COMMENT BELOW✨
And most importantly SUBSCRIBE TO OUR CHANNEL✨
To Purchase Hair & Products Www.ibhslays.com
Allow 3-14 Business Days For All Orders!
CONTACT & BUSINESS INFORMATION ✨
Instagram:_Beautifulhustler
@thebhslay
YouTube :IAmBeautifulHustlerTV
✨For Sponsorships ,Reviews,& QuestionsEmail:[email protected]
786-571-1313
#miamihairstylist,#miamihair,
#browardhair,#browardhairstylist, #Atlanta #atlantahair,#atlantahairstylist #reels, #explore #trending #tiktok #viral #miamimakeup #miamimua #miaminails
Thank you, hey Beauties and welcome back to. I am beautiful, Hustler TV. Today we are back with another video and today's hair is provided by yes girl hair. Now they sent me over this 5x5 Kinky Curly 16 inch, HD lace, wig, y'all super pretty, and the uh. The knots already came bleach, which was really good, so you know it saved you some time for the install now included in the package. Of course, you get there. Yes, girl, um little instructional card about how to maintain the hair about the hair. All that you need to know, of course, caps Combs. You know um the little things you need to install your wig as well. But, however, this is what the wig looks like fresh out of the bag y'all. When I tell y'all it's raw, it is so raw. So pretty and it's super super full. It does feature the elastic band in the inside and, like I mentioned, the knots already did come bleached, okay, so um and also pre-part it down the center. So for today, I'm going to show you guys how I did this quick little install and for the style, because I didn't wanted to just be so plain Jane, just like bust down the middle, I decided to do like this cute little um linked um. You know this link little rubber band effects in the middle of the curly bob, so it can just really give everything you're supposed to give and more so for starters, y'all know we got to clean the hair along with alcohol. Then I also went in with my skin protective spray that blow dried up and, of course, we're going to go in with uh four layers of my strawberry scent adhesive and once again guys. Don'T forget that my restock will be on March 14th. So you do not want to miss it on my birthday, so make sure you guys have your notifications turned on for that, okay, but nevertheless getting back into the install I'm going in with my Ruby kisses Foundation. I am using that uh palette number 16 and I am using the lighter brown shade in that palette and once I have that Foundation all on the inside and on top of my lace, I will go ahead and pull that back and begin to apply my layers, Foreign and after adding my last layer, I went ahead and waited for the glue to dry, clear and I began to place the wig right down into that glue. Then I'm going to go in with my blow dryer and blow dry, that lace right one in um and I am using the heat setting as well um then, once I finish blow drying it all of it in I'm just going to jump straight into um. You know taking the comb Coleman that lace on in as well to help with the melting process. Thank you now, usually after blow drying a leash. I know I go into tying down the Melt belt, but usually with the closure install. I just go ahead and cut off the extra lace and you know prep the baby hairs and everything like that before I tie it down with the Melt belt. So usually, when my closure installs and I'm doing it on myself, I want to use the Melt belt once, but on my clients, I usually you know, still do it twice or whatever, but nevertheless, now that I have the lace down, I'm going to go ahead and Take the glue and just tack down any little pieces, that's still lifting on the edges, then I will go ahead and pull down my baby hairs spray it with um. You know the even holding spray, also adding a little more Foundation to the lace and then tying it down foreign foreign. I'M also going to go in with that wax stick, because you do want to make sure that everything is nice and neaty. I know I like to kind of like pre-prep my hair for styling before I even get into the final meltdown process of my install, so I will be going in with that wax stick and sleeking everything else around it too, because, like I mentioned y'all um, I Will be doing the rubber band length method and that does require the roots to be very sleek, and very straight. So, while that melt bill is sitting, I am going to go ahead and you know make a parting area around the closure part. So the tracks are covered and just hot combing and sleeking that area down using a wax thick and a hot comb, because you do need to make sure you cover the tracks on the side and um in the back, because it is a 5x5 closure. So once I do that, I will go ahead and hop comb um My Little section and then I'm going to part it into three squares and with each Square I'm going to spray the holding spray and take a rubber band and you know just secure the square. So I'm going to start from the back to the front here on this side, like I said just part, it add some spray and then take a rubber band and just you know, tie it up so well. Rubber band is so. It has like three clean sections and I'm going to do this on both sides. Foreign foreign is complete, so I'm going to go ahead and repeat the same exact steps to the other side, using a wax stick sleeking around The Parting area and then parting off. My three sections using that holding spray and rubber bending them together. Thank you, foreign foreign, I'm just going to go ahead and crisscross each section, so um just crisscross everything going diagonally. So you know the first one will go to the diagonal and then the second one goes to the other opposite diagonal, and I'm just going to do all that. Um do this until you know, I get all the way to the back making sure I crisscross each piece, so it does have like that crisscross looking effect and then once I get to the last one, you guys I'm just going to kind of like let it Hang as if it's like two little ponytails and then I'm just going to go ahead and remove that melt belt, getting to slam my baby hairs and we're going to whip this wig up foreign foreign, the baby hairs um, you know we're going to keep it very Cute with quick and simple, so I'm just going to cut that um um, baby hair curl it up and just using a holding spray. Just you know: um soup, it up and of course, I'll bump it before I get started just to make the whole process easier. So I'm just going to do my two quick, simple baby hairs and then we're going to go ahead and go in wet up the wig and off camera. I am going to you know like black spray and conceal up the parts, because I have to do that in the mirror, because I really have to concentrate with these parting sections but um we're almost to the end. So stay tuned foreign foreign ahead and you know how comb I'm not hot comb, but you know cleaned up my parts and now we're going to go ahead and just go in with some water and just add um. You know spray the water onto the hair, so it could get nice and get the curls defined um yeah. So once I wet this thing on up, I will give you guys 360.. So you guys can see what the hair looks like. Like I said before, this is a kinky curly, 16 inch, 5x5 HD lace, closure wig from yes girl, hair, okay, y'all um. The wig was super easy to install very quick. So I hope you guys enjoyed this tutorial and stay tuned for the next video. Thank you, foreign look, so I'm going to show you guys, you know a 360 all around of how the hair looks, but don't forget to check out the description details down below once again. Thank you guys for watching. I am beautiful. Awesome TV make sure you thumbs up like comment subscribe share all of the above and you know, take advantage of them. Coupon codes that y'all get down below all right y'all. So thank y'all for watching, see you next time. Thank you.


Comments
Queen Tea: Yaaaasss! I love it. I’ve been looking for a birthday look and I just found it . You always come through with the Slay ❤
Destiny Green: The curl on this unit is beautiful
Kimberly Smith: Like always never disappoints Queen of Slays always doing something bomb
Taylor Raquel: I don’t usually like short hair but this is cute!!
Shama Rhoden: Love it!! I want that ❤
SimplyBeautiful25: Yesss I love it
Everyday Working Woman Jones: Pretty on you girl!
yasgrl_hair: Thanks for sharing!
Titiana Mitchell: ❤ ate and left no crumbs per usual
Sammy Da Goat: Cuteee Install Pretty Face
lneal2800:
👉 BUY YOUTUBE VIEWS 👉 Link in Bio: love how comfortable you are in your world