Best Pre Colored Blonde Highlight Wig Install + Side Part | Ft. Yolissa Hair
- Posted on 20 March, 2023
- HD Lace Wig
- By Anonymous
●▬▬▬▬▬▬▬▬▬♛Yolissa Hair♛▬▬▬▬▬▬▬▬●
Video Wig Shop Now➤https://bit.ly/3lNvay6
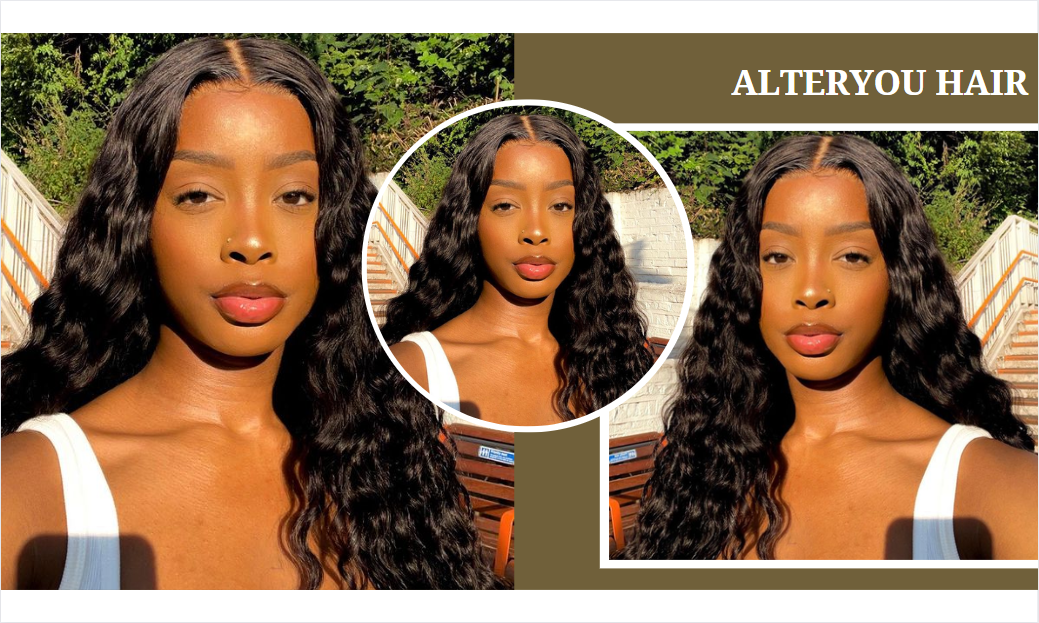
Hair Info:#yolissahighlightwig Body Wave 13x4 Transparent Lace Front Wig 24inches 180% density
❤ #yolissahair Official Website:➤https://bit.ly/3EjzyL4
Yolissa Hair New Comer? Look Here!
Get ❗️$100 Coupon Package❗️Join in Yolissa group:➤https://bit.ly/3momOuu
New Arrival #yolissahighlightwig :➤https://bit.ly/3AnTnj2
Follow Yolissa Hair On Social Media
Instagram: https://www.instagram.com/yolissa_hair...
Facebook: https://www.facebook.com/yolissa_hair/...
✔Wholesale Contact +86 15803834514
Foreign, hey guys, welcome back to my Channel today, I'm going to show you guys how I created this look, but before we get into it, don't forget to hit the like button subscribe if you're new and you like my content and comment below. If you have any questions about this hair about this look, this hair is from your Lisa hair, I'm so obsessed - and this is gorgeous - look at the edges. Look at this. They did not mess with this wig. All the details of this hair will be in the description box below, let's get into installing this wig hope you guys enjoyed the video okay. So, to start this install off, I'm gon na be doing the Bobcat method using this Evan spray, I'm gon na be using broken seal to blend the bald cap to my complexion, make sure you're using a shade darker that will help the lace look more natural. So a little bit about this wig, it is in the color, P4 slash 613. The texture is body wave and it is a 13 by 4, transparent Lace, Wig. It is 24 inches, it's 180 density and the cap size is small. I also wanted to show you guys what the original curls looked like. This is the original body wave curls before I bleached the knots and washed the wig guys. When I tell y'all, I was so excited to get this particular wig, because I really love the way they highlighted this wig from the way that the roots look. So the highlights it's seriously. One of the prettiest highlighted wigs I've ever gotten. It was so easy to install the lace was easy to work with blending it. Everything was smooth, as you can see, I'm doing the install a little bit different than I normally do. I cut the lace and I'm adding the glue onto the edge of the bald cap. This has made my installs a lot easier foreign. I also like to go in with the rat tail comb to press on the wig, and I use my hands. I even use the comb part to make sure any FlyAway pieces or any pieces that are stuck to the glue are nicely pushed back. I decided that I'm gon na do a side part today make sure you also part the back so that it covers the tracks. I'M going in with my hot comb section by section this allows the wig to lay really really flat. You don't only want to hot comb the area that you're parting, but you also want to go in section by section and go in with your wax stick to make sure that the flyaways and The Parting just lays even flatter. So I'm doing that on this side. As well just this step is so important in making sure that your wig just really lays a lot foreign order to get that wig to really Mount. You got ta spray that lace with your ebben spray, which is what I'm doing to create that melt effect and I'm adding the headband onto the wig while the spray was drying. I put on some makeup and I took the headband off. I do my baby hairs. The same exact way every single time I just take little pieces on each section and I'm going to hot comb the pieces of the baby hairs that I want to work with. You don't want to overdo it with baby hairs. That is the quickest way to make your lace wig look fake. I like to take little pieces and work with that and I hot comb it so that way the hair stays in place and I cut it in a slant, as I am doing so, foreign spray to lay my baby hairs and I noticed a huge difference in How long the baby hair stayed in place and how easy it was to work with? It was a little sticky at first, but it was a lot easier to work with, and the baby hairs stay in place all day literally all day. So try this method of doing your baby hairs this way and you will notice a difference in how your baby hairs just will not move the entire day. Oh I'm gon na go in with some concealer to straighten my part, and this is how my edges look guys. Doesn'T it look really good and I'm going in with my bronzer to get the edges even more Blended and now we're about to curl the hair honey? So I'm using my Tresemme heat protectant and I'm gon na comb through my hair and we're gon na begin curling. If you guys want a more detailed video on how I create these exact curls, please click the link in the bio. I will add a video on how I create these exact curls - oh oh foreign, foreign foreign, so now that I'm done with the curls, I'm going to add in some layers, if you guys want a detailed video on how I add layers onto my wigs, then comment Below and I'll make a separate video about that, but typically all I do is make sure that the front is a lot shorter than the back of the wig, and I cut it in a slant as I am doing so when I'm done cutting my layers, I Go in with a wide tooth comb to comb out the curls combing out, the curls is the final step to really seeing how the wig looks like, and it really makes the curls look more voluminous and big and beautiful. So I go in with hairspray for the final step to make sure the curls stay in place, and this is the final look. I hope you guys enjoyed this tutorial and this whole entire video please be sure to like subscribe to my channel. If you're new comment below, if you have any questions - and I will see you guys on my next video - I love you guys so much bye, guys, foreign


Comments
Yolissa Hair: Sooo cute! Thank you so much for trying Yolissa Hair~❤❤
Fefe Fefe: You look good sis❤wow