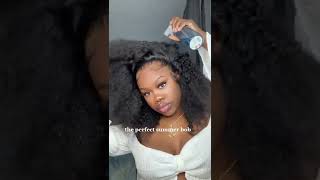
Ready To Wear Wig Straight Out Of The Package! Beginner Friendly In Depth Wig Install | Rpg Hair
- Posted on 13 July, 2022
- HD Lace Wig
- By Anonymous
This highlight wig is from https://www.rpghair.com/
►► : https://www.rpghair.com/5-5-part-180-d...
*********** Rpghair Independence Day Sale is Going On ***********
-------------------------- --------------------------
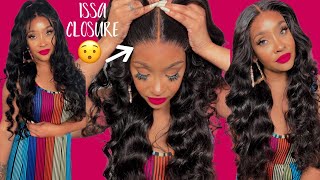
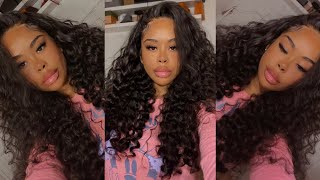
5.5'' Part 180% Density Ombre Highlights Wavy Style Lace Front Wigs [LFW92]
Hair Length: 16 inches
Wig Density: 180%
★ Skin Melted HD Lace
★ Upgraded Clean Hairline
★ Whole Front Bleached
More Affordable 13x6 HD Lace Frontal Wigs: https://www.rpghair.com/6-parting-lace...
------------ ------------
Youtube Channel: https://www.youtube.com/c/RPGHair
Instagram: https://www.instagram.com/rpghairwig/ @rpghairwig
Facebook: https://www.facebook.com/rpghair/
My Socials let’s be friends! (literally) :)
IG: @kamanijeann
Twitter: @kamanijeann
TikTok: @manijean888
Snap: @manijean
Wig IG: @wigssoldbymani
Email me for business inquiries only [email protected]
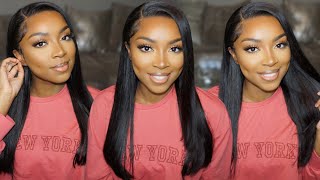
Hey everybody welcome to my channel and welcome if you are a returning viewer, hey what's up! So if you guys would like to see how i installed this wig that was pre-bleached, pre-plucked and ready to wear, keep on watching! So i'm starting off here with flat braids in my wig cap, stretching that out and getting that snug onto my head and then i'm going to take my scissors and begin cutting out my ears so that we can get started on the bald cap because you cannot Put that liquid on this cap, without it you know, staying on your head. So this is what helps the cap stay on your head. While we do this so now, i'm taking my ebbin wonderlace spray in the red can and i'm spraying that spray right along my hairline right in the front of it and using my finger to smooth this product out and i'm making sure to try my best to Not make it messy and keep it in the same place, and once that's done, i'm going to take my blow dryer and blow dry this on a cool high setting and now that that is dry. I'M going to be taking my scissors and cutting off this cap. All the excess cap that we do not need and the scissors are just going to glide off really swiftly and smoothly just like this. So this is what you want your cap to look like nice and smooth around the edges and very flat, i'm taking my ruby, kisses cream foundation in the shade rd15 and i'm patting that into the cap, and i'm really trying to press it right where the cap Begins so can give the illusion of my cap really being not my cat, but my head really being bald. So this is what the wig looks like straight out of the package. It is pre-bleached and pre-plucked, as you guys can see. I did take some lace tint to this lace from the wig dealer and now i'm taking my ruby, kisses cream foundation in the shade rd15 to the lace, just to add a little bit more color. And now i'm cutting off my ear tabs. And if i don't like the way it fits, if i feel like it's too long, i size it up, and then i cut off any extra piece as i'm doing here. That is too long and isn't cohesive with my wig cap, because i like it all to be the same length. Okay. So now i'm taking my acetyl alcohol in 70 and my paper towel to clean off my skin before i apply my glue because it's not going to stick as well and it's just going to be very oily, because our skin is naturally oily so make sure to Clean that off y'all, so the glue i will be using today is erika j hold me down glue, i'm going to be dotting that along my hairline pretty evenly and basically just spreading this glue out and once it's all evenly around i'm going to be taking my Popsicle, stick and smoothing that out until it is dry or until it is kind of dry, so i'm still going to blow dry it, but yeah. I'M smoothing it out so that it's not all white and gunky and i'm blow drying it on a high cool setting, and this is the third layer that i'm doing here. I showed you guys only two, but i did do three layers and once that is all smoothed out, i'm being really intentional, putting it on my cap and on my skin for the placement that i want, but yeah you guys. This is how it should look like up close. It should be clear and tacky, but now i am pulling this wig forward onto the glue getting this lace melted into the skin. I'M really trying to press that in you guys, using the palm of my hand, to press it in and i'm saying really get that into the glue and to further press this out. I'M going to take my fine tooth comb and my blow dryer on a cool high setting once again and really getting that lace and that hairline pressed in to my cap as well as my skin. Okay. So now i'm going to be taking my carry care wax. Stick and smoothing that, along the front of the hair and my hot comb to press this hair out, this hair didn't need too much pressing. But i did do it until it was completely flat, because when it came out of the package it was already really flat and really flowy. So it wasn't too much styling that i did to this hair. But now that that is complete and the tie is off. I left it on for, like maybe 12 minutes, i'm taking my scissors and i'm cutting two um spaces out for me to cut off the lace with my eyebrow razor and i'm just doing that in like a really jagged motion um, so that it's not leaving a Straight line of mark of like cutting off flakes, because that looks very wiggy and i hate when i do that so y'all make sure y'all cutting in like a jagged motion, because y'all don't want that wiggy! Look when you cut it straight across! Okay, please! This was one of those wigs that i installed too low on my hairline, i wouldn't say too low because it didn't look terrible, but i do want to say y'all if you don't want your wig to be low on your forehead. When you apply your glue, don't apply it so far on to your actual head. Just keep it near your hairline, where your cap is don't, do it don't do all the extra, because this wig was a little too low sitting for me, but you know this is still a look too, like some people prefer a low hairline so yeah. If that's what you want to achieve, this is actually the perfect video for you, because i did just that, but now i'm pulling out my baby hairs as you guys can see. I want them to be more in the front if that makes sense. My two pieces here but yeah, i'm taking my hot comb and i'm smoothing that hair out so that it can lay super flat when it is time to do the baby hairs. I'M also pressing out that hairline as well to keep it looking nice and sleek, but show you guys, i'm just pulling out my baby, because i like to use the back, not the back, but the bottom of a comb like that to pull them out because it Gets out pieces very um singularly, and that helps with being very precise with where i want not wear, but how many baby hairs that i want. So the hairline is looking really good already and i haven't even did the second melt, but i'm taking the same red, evan, lace, spray and i'm spraying that right around the lace to really get this wig to lay flat and these baby hairs to lay flat as Well, and to just give it a super seamless look, even though i really didn't need that so initially i wanted to give this hair more volume and like more prettier curls, i guess, but i really butchered the hair when i did this and that's why i didn't Show you guys how i styled this hair, because it would look a lot better if you just added some layers. If you wanted to and just brush this hair out, because me adding curls, it did not look good because i don't really know how to curl hair. Like that, so i kind of messed it up, but it still came out super cute because i brushed it back into the form that it was originally but yeah you guys now i am taking my eyebrow razor and i'm cutting off my baby hairs and i want Them to be shorter in the front and longer as they go down, so that is how i'm going to be cutting them and same with my sideburns as well. So now i'm taking my kiss pro half inch, pencil flat iron and i'm curling these baby hairs in a upward motion, and i like to take it piece by piece because once it's all combed out and it's been a couple of days, it looks really fluffy and Natural and i love that look so i'm curling them in that way, but on my sideburns i like to curl them under and so yeah. That'S what i'm doing and i release it and then boom and it's curled and it gives the perfect layout for my baby hair. So i'm taking my got to be glue gel in the black version and i'm just taking my finger as well in my edge brush using the comb side and i'm really just giving those baby hairs the shape that it needs kind of getting in a c shape. Curl, you guys know that's the form that it has to be, but um yeah. That'S all i'm doing here. I'M going to repeat that all the way as brown as well and this side of my baby ears was longer than the other side, and that happens. You know, but it really doesn't look that bad. So if that ever happens to you and then like oh my gosh, my baby hairs are not even do not freak out, because it really is not that noticeable to anybody and barely you so yeah. So now, for the final touches, i'm taking my ruby kisses cream foundation in the shade rd11 and this small pencil brush, and i'm going to be smoothing that out along the hairline and then smoothing it out with my finger to give it the illusion that it's really Coming out of my scalp, i'm telling y'all i have to do that part because it makes your wigs look really really good and natural, but show you guys, i'm taking my hot comb and i'm just pressing my hair out some more to give it a final touch. You know of sleekness of you know. This install was pretty quick, and i liked that about this wig you guys, because it didn't take me long to install this wig like it took me 40 minutes less than the regular time that it takes me, because it was already styled and it looked really freaking Good, the lace was pre bleached and pre-plucked, and it looked really really good. So yeah you guys this is going to be a really quick install for you, guys too, i'm taking my tresemme holding spray, my hot comb, to really get this hair. Looking nice and sleek and flat and removing all fly aways from this install bumping it in the front to give it that completed. Look. So this is what the wig looked like completed in this completed install. Thank you guys so much for watching. I hope you guys enjoyed, and you guys can achieve this - look because the work is already done for you. You guys need to check the information about this here in the description box, as well as information on me. You guys - and i will see you guys in my next one bye
Comments
Mani Jean: This wig is available for sale on my Instagram @wigssoldbymani
Blasian Jae: I finally got my hands on the cream foundation & I absolutely love it, it makes the bald cap method really give scalp
Carmen D: you’re one of the few YouTuber’s who I DONT FAST FORWARD and Skip Parts all the way to the end.
DARLENE MATTHEWS: I this color on you! Once again BEAUTIFUL
Elegant Extensions: Plucked perfectly✅installed amazingly ✅ God bless ❤️
Therealprecious: I love your videos!!! You inspire me so much
Bibi: Greatt video, i enjoyed it and you made it easy.
Hair Junoda: wow, so gorgeous!
Genesis Gissendanner: how long did it take for the wig to arrive?
Malikah Green: No this hair is really pretty
Amoy Shanai: This Unit Is So Pretty On You
Taylor Howard: What wax stick do you recommend?
keke: lovee the video, do you have amazon list for hair products ?
Reshine Hair: love your videos very much
Kayla Dion: do you recommend any full lace wigs?
Life with Leah: Can you do a makeup tutorial
Fiji: What’s the difference between the red and black ebin spray ? Which one is better ?
Oluwabunmi Ogunyemi: It beautiful
Arionna Rhome:
Highflyer757: ❤️❤️
Judenie: You are so pretty
Alana Jones: Where is this wig from?
Vibing With Sierra: Do you sell your use wigs
A-Stars: Where did u buy your hot comb
ayo hanna: Ouuuuuu
DaWonna Gee: firrrssttt