The Prettiest Wig Everrrr! | Start To Finish Frontal Install | Wiggins Hair
- Posted on 13 July, 2022
- HD Lace Wig
- By Anonymous
Hair details: 24 inches P4/613 straight 13*4 lace frontal wig 200%density
Direct Link➤https://bit.ly/3yy27Br
#WigginsHair Official Store:➤https://bit.ly/3z7WE65
More coupons!Join In Facebook Group➤https://bit.ly/3pzwi8e
You may also like:
1. Skin Melt HD Lace Wig➤https://bit.ly/3PCApKX
2. 3apeibSTop Selling Lace Frontal wig➤https://bit.ly/3RErXN5
3. NEW V part wig! More Natural➤https://bit.ly/3IwHsSW
#wigginscoloredwigs #wigginsloosedeepwave #wigginshdlacewig
Follow Wiggins Hair On Social Medias:
Instagram @wigginshair ➤https://bit.ly/3j1ooQS
Tiktok @wigginshairbest ➤https://bit.ly/38krOfq
Facebook @wigginshair:➤https://bit.ly/3Jb2Iw2
Wholesale WhatsApp: +86 18339906150 Email: [email protected]
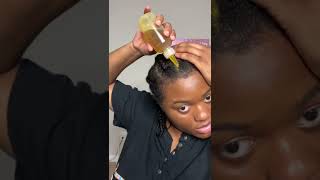
Hi guys it's zoe and welcome back to my channel today, i'm going to be showing you guys how i installed this beautiful literally my favorite wig in the whole wide world currently wig from wigan's hair um. It'S a 24 inch, 200 density wig. I'Ve got a medium cap size and it's this brown with like ash blonde, highlighted wig, and they have done an amazing job with this wig guys. I didn't bleach the knots i just literally went straight in and plucked the wig, and that was it. The lace is beautiful, like the color was so easy to tint. I didn't have any issues with this. Normally with some wigs i always feel like. I need to wash them first to really get like the full. I don't know how to explain it, but this wig. I just went straight in and it turned out so so beautiful, so here's just a clip of what the wig looked like before i plucked it and, as you can see it's not even that bad. I spent about five minutes plucking each side, and this is what it turned out, as so here's me just showing how it turned out. I literally, i didn't even straighten this way, guys i literally plucked part in the middle, and that is it did a little hot combing, but here's a closer look at the color. I just can't get over how nice this looks, whoever the designer or person behind dying. This wig was needs a raise wiggins if you're listening. You need to give that person a raise, because this is beautiful. So i just went ahead and just secured the clips in the back, as you can see here, had some elastic in the back um just to make it a bit more snug on my head. I then went ahead and tinted the lace with my boldness layer foundation inspires drum, used about a pump on a dense brush and then just tinted. The lace - and i just did this all the way throughout and bringing the color slightly before, where the hairline starts as well just to make sure it blends seamlessly with my skin. Now, before i go in to glue the wig, i'm going to take my rubbing alcohol in a little cotton pad and i'm going to go ahead and just remove any excess oil makeup and really make sure my skin is prepped for the glue that i'm going to Be using you want to make sure you do not skip this step, especially in this summer heat. You want to make sure that the wig glue holds i'm popping the wig on and guys. Please please, i'm not even like i'm not even overreacting. This wig is insane usually with like these highlighted wigs that you get from these aliexpress companies or they tend to have like very chunky thick highlights. So you can just tell it's, you know factory made, but this is easily. It could easily have been someone just hand dyeing this, and they literally did the most amazing job, and i i will not stop raving about this wig anyways. I went ahead and cut the little like cut some tabs into the lace to make glueing down easier. You you guys already know the routine for my glue, i'm using my better the melt, wig glue. This is their new formula and i just used the back of my eyebrow razor and applied a thin layer. I just started at the center of my head and worked my way to the sides. You do want to work kind of fast with this glue, as it does dry pretty quickly and you don't want to cause any get any like weird white lumps on bumps from where the glue hasn't dried properly. So let each layer dry completely clear and then go in with your second layer. I think, for this unit i did about two yeah two layers and then went ahead and pulled and stuck the wig back on over the top. Once i do this, i'm just grabbing the little um edge brush that came with the wig and i'm just going to go ahead and just comb through the hairline. Sometimes there's some little like white pieces of glue that just didn't get a chance to dry down properly, and this is like the perfect way to get rid of it and get rid of any white cast that might be visible in the lace. So, moving on to the rest of the hairline, i just went ahead and repeated this and for some reason the sides of the wig never ever glue down properly. I don't know, i think it might just be my head shape or what and it's super annoying because they always they're always the first to lift so for some extra security. I'M gon na go ahead and grab my got to be glued gel and i'm just gon na go ahead and spray just those side pieces while holding them down because they were already lifting the moment. I put down the lace so yeah, just making sure that's completely dry before then going in with my what am i doing? Oh okay. First, i'm just going to tie my hair back and then i'm gon na go in with my wig melt band from verno hair. This is from my own hair company. You guys can check that out. Please a link in bio, but i'm just gon na secure the hairline with this band and leave it on for about 10 minutes to let the glue completely dry. Once i take that off, i'm going to go ahead and clip all the hair back away from my face and grab my eyebrow razor and just start cutting the lace off um after i use my eyebrow razor. I also go ahead and use some scissors and just make sure i get rid of any pieces that i like lifting or just that i couldn't get with the eyebrow eraser. So i'm just repeating this throughout the whole hairline. Once all the lace is completely cut, i'm going to go ahead and grab some of my powder and i'm going to go ahead and just tint some of the lace that didn't like that's just showing up. Basically, so you want to make sure this is completely melted. Once i do this, it's time to separate off the baby hairs, i'm going to grab a little comb again and i'm just gon na do a section above my brows and i'm gon na do two little sideburn pieces. This is just my usual baby, hair, routine um. If you guys have been watching my channel, you know i always do the exact same baby hairs. I just like them fluffy and not too stuck down to my head because i feel like that makes it look really fake um. So yeah section of those four pieces and i'm gon na grab my eyebrow razor again and just cut off the baby hairs before going in with my hair, straighteners and curling them inwards towards my face. So i'm going to do that for each and every section. I'M then going to go ahead and grab my got to be hairspray again and i'm just going to use the brush side and alternate between the brush and the comb section of the edge brush. And i'm going to use my finger to guide where i want the suit to lay i'm using a very minimal amount of the hairspray. Because again i don't need to look too stuck down because i found especially with colored hair. You don't want to over. Do it with the baby hairs, because that's how it can start looking like a wig um, that's one of the main things that i've noticed that some people make mistakes on just going overboard with the baby hairs, and it just doesn't end up looking it just looks. Wiggy so yeah, once i do the baby hairs, i'm letting all the hair down, and this is what it should look like. This is the hair completely straight again, i did not straighten the hair guys. I love how, when it's straight, you can really see all the highlights, and it just looks super sleek but um. I was going out straight after this and i wanted to add a bit more glam and glamour to this because i was wearing a pretty basic outfit. It was just a white two piece, so i decided to go for a side part. To just add some, i don't know add some drama to the look. So i'm taking my bed head wax stick parting, my hair and then using my hot comb to just lay the part completely flat. As you can see, i'm also just using my hand to make sure that the part is perfectly perfectly perfectly flat. I'M going to go ahead and tie my hair up again and grab my melt band and just tie down the baby hairs to make sure that they're set for the whole whole night and they won't move out of place. I went ahead and just cut some face. Framing layers, i don't really have a technique to this, as you can see, i'm just grabbing sections and going in a diagonal line of my scissors once i do that, i'm sectioning off half my hair and then i'm gon na grab my baby list. I think this is a two inch curler, i'm gon na curl, each section, hair spray it and then grab these crocodile clips and just hold them in place without dropping the curl. So you wan na make sure you hold the curl before you clip it. So don't let it drop. I repeated this throughout my whole head and then once i finished took off my melt band, let the curls sit for about 10 15 minutes and took them out. You want the curls to be completely cool before you take them out. Um again, this is just going to make sure that they last way way way longer and just look the best they could possibly be. I'M grabbing this wide tooth comb once i've done that and i'm just combing through all the curls. I wanted to go for a very relaxed like bombshell curl, so you can obviously choose how much you want to separate the curls. But this is the look i was going for and, as you can see, listen i was gassed. No one could tell me anything that night, i literally felt like the baddest baddest baddest girl and i loved it. This is my new favorite wig. Don'T chat to me when i'm wearing this wig because yeah this is a 10 out of 10. For me, i had no problems with this wig. I hope you guys enjoyed this video make sure you guys give me a like comment subscribe and i will see you in my next video take care guys bye. You

Comments
Fiona Hawkes: That has got to be the BEST wig everrrrr !!!!!!!
Kamilah L: Beautiful
Dee Luther: FIRST COMMENT STUNNING THUMBNAIL THO U DID A GOOD JOB BEYOND GORGEOUS U ARE UR MAKEUP ALWAYS ON POINT NICE CHEEKS STRUCTURE ENJOY THE REST OF YOUR GREAT WEEK HAPPY FABULOUS WEEKEND AHEAD BE BLESS N STAY SAFE ALWAYS
Amal Jihani: Alles sehr schön. Aber zuerst zusammen die Nummern 10 und 1. Eine emprutt.ONLINE Brünette und eine anderew Blondine. Es wäre unfair, wenn ich 4 wählen würde