Half Wig Headband Wig Tutorial - Low Maintenance Quick Weave Protective Style Glueless Wig
- Posted on 07 November, 2022
- Headband Wig
- By Anonymous
Half wig headband wig tutorial - low maintenance quick weave affordable
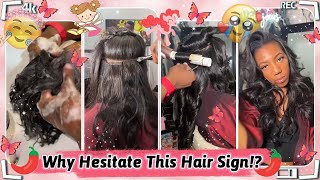
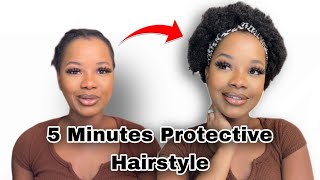
Foreign, so I heard you were looking for a low maintenance, quick, install beginner, friendly, affordable hair option, and I have something for you guys today. So welcome to my channel we're going to jump right in because right now we are combing out our hair from a freshly washed and conditioned fashion, and this is probably like my most exhausting part just going through and combing everything, because my hair is so thick. I love it, but sometimes it's a whole job, but then once it gets combed out, it's so much fun. I'M like look watch me swing. I love how it feels it's so soft and it smells so good. I'M gon na throw it up into a ponytail just to pick it out we're gon na pull off the little rubber band and shake it out. Oh my God, I love having fun with my hair. Now real quick. I know. Obviously, you see that I see that you see that my hair is like 17 different colors, but we we're not going to get into that today. It is. It is a lot of different colors going on in there, but um the Styles prior. It. It kind of made sense, so don't you judge me we're gon na go ahead and we're gon na section out our hair and we're sectioning out the front section, because this is the area that we want to have as leave out, but we're not going to leave The whole thing out, so this is going to be the front of where we have our our wig, our wig, that we're gon na install. So I'm going to take a moment and go through the parts and go through the parts. Again, though, to be completely honest, it is not that date to have these straight Parts only because it is completely going to be covered by our wig, so our head, our half wig, is going to completely cover this area that we're working on with the parts and Did the exact same thing to the opposite side, because I'm like all right, let me at least make it a little bit straight, just a little bit there we go just playing with it Perfect all right, so you got the front out the way. Now that we have to friend out the way we are going to work on the back, look at that poke that big old poof, so I'm sectioning out the back just so we can do vertical braids going from pretty much a little bit before the center of The head on deck on back to the bottom and we're going to braid them up and attach all of the braids together and then pin it up. So, just taking my time doing the Parts on the right and left again not over here super focusing on making sure that they are perfectly straight Parts. I could honestly parted with my finger. My hair wasn't so thick. It'S going through. First, braid perfect, get it in there girl and all the hair and, of course, we're gon na do the whole back portion the exact same way: foreign foreign foreign, thank you, foreign foreign, foreign, foreign oil. I use my son's lock oil to oil, my hair, because there's a lot of like really awesome natural ingredients and it smells so good so going through oiling my parts and then using excess oil to rub through the tops of my braids and get on the top Portion of my head - oh my God that feels really really good is going through there. We go, get it in there all 17 colors of my head. Oh my God. I look like the Cynthia doll from the Rugrats. We got ta get a little shine and jam. We'Re Gon na Shine and jam the front portion of our head just what's closest to our scalp. No need to go all the way to the tips, because that's going to end up getting braided, I'm brushing it back, brushing it back and we want to make the part straight down the center. Well from the front to the back. You know every time you do a part you got. Ta move the hair to the side, to the right to the left, to shift it to make sure that thing is perfectly straight because nothing's more annoying than having your part straight, and then you look at it or move around and say whoa this. This is not straight, and then you have to go back in and redo it or just have a crooked part for the rest of your hairstyle. So I am just taking my time playing with the part making sure it is perfectly straight just so we can section it out. Foreign you'll see we're adding braids going from the center of the head down to the ear and I'm going to braid it all the way to the tips and tuck the hair under the back bottom. So right in the back bottom and we're going to do the exact same thing to the opposite side of the head. Thank you, foreign. So the hair we'll be working with today will be our tray it. It is a halfway, quick weave. The style is Dominican, curl and it kind of Fades, so it fades from like a 1B on the top to a 30 on the bottom, which I love, because I wanted to have more of a natural look because you'll see my hair at the base is like A 1B minus the 17 colors, so don't judge me and then the rest is a 30 on the wig. So I love that I'm just taking a moment to use the Clips in the back bottom to attach them as close as they can get, because I need this to have a nice secure, tight, fit and because of my nails, they were a little hard to get Under it with like our anchor braids and then I go to the back bottom and I pull it up and then I kind of Tuck the braids from the front around so right now you can clearly and very obviously see you know the ridge of the separation Between the wig and my natural hair, which is why we got boom headbands, which I bought, I think the two pack was maybe like two dollars. So what I'm going to do is pull it up and place it right on the section where my natural hair and the headband meet that looks a lot more natural and then I'm going to use my dots to be glue and my little Edge brush, because we Want to do badges, okay, it was a little heavy-handed with that that y'all my headband, so I love this show I could do my edges and they'll stay just like this for 42 days, and I don't have to worry about it. Okay, now 42 days, but it'll stay for a while just going back in there with a little bit more, of course, getting the opposite side. They'Ll definitely stay for quite a bit perfect and we're gon na fluff it out a little bit and put our headband right back up tucking, any hair from the wig back, pull it around the ears and I'm going to pull it back. So I can still see a little bit of my part, but also not see the ridge of the headband I'm like oh, this is this is cute. I really do like the hair, so I was debating if I wanted to leave it longer or if I wanted to cut it shorter, because I did another you know, half wig install with the hair was shorter and I'm like I like the length from the other Wig, but I'm like I like the color on this, so I'm like maybe I'll, leave this one longer and then keep the other one shorter. So I was sitting here just kind of playing with it deciding like what am I gon na. Do I'm like well with it being longer, I can always go in and do like a high ponytail, a messy bun. It'S a lot of things I could do with that, which I really like I'm like. Oh look. I can kind of do a messy bun. Maybe maybe not I don't know I would rock it. I just play with it a little bit more. I pulled in a couple of curls from the side, so it looks more natural and messy I'm like whoa um, and the hair itself is very soft. The price for this package was 19.99 plus a little bit of tax, so it was very you know very much so affordable and I'll probably keep this for like a week week and a half at the longest and then, as the time goes, it'll be easier to Comb it out and puff it out, so I decided I want to cut a little bit to kind of taper it, so it's a little bit shorter at the top front and then, as we get to the lower area, it is a little bit longer because again I really was deciding like do I want to make it shorter all the way around and just make it kind of shoulder length, or do I'm going to keep it long, so I decided I'll. Keep it long, but I do want to you, know, cut a few pieces off the front, and I like this, like with faux Locs. You know if anyone's gotten faux, Locs you'll know like with the faux Locs the longer you have it in the more natural. It looks which is my favorite same thing for wigs like these, because I've had this one before, but not in this color, just the whole thing being like a four, and this is what it looks like in the bottom, in the back and the bottom. So if I did want to put it up in a ponytail, it'll still look fine, but the longer it stays in the more natural and messy and fluffy. It looks, and I like that, look and just going through this is our final product. If you liked, what you saw today definitely feel free to like comment and subscribe.


Comments
Aras Kozan: You're a gift to those around you
Mustafa Cihat: you're one of my favorite content creators, never stop!
IJKJYUKLÖL: Your kindness is a balm to all who encounter it.
Muhammet Abi: Your kindness is a balm to all who encounter it.
jason stadım: Such a lovely video!
SlyRix: Thank you so much for sharing
Wkwi Siwjjd: So excited for this
Au: Unbelievable work
Hasan Birgin: Woah ! I love it
06 - PUBG MOBİLE: Woah ! I love it
marliekessie: One of the best!
E: Oh wow! astounding
jill valentine: Damn I like this a lot. AMEN!
Atomic: Damn I like this a lot. AMEN!