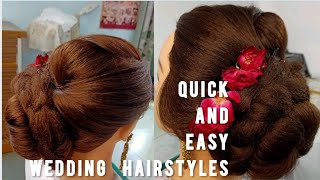
Ultimate Melt Hd Lace | Water Color | Jet Black
- Posted on 15 August, 2022
- T Part Wig
- By Anonymous
LETS CONNECT
♥ EMAIL: [email protected]
♥WEBSITE: https://www.forevercryssy.com
♥ INSTAGRAM: https://www.instagram.com/forevercryss...
♥ TWITTER: https://twitter.com/forevercryssy?lang...
♥TIKTOK: https://www.tiktok.com/@forevercryssy?...
♥TRILLER: https://triller.co/@forevercryssy
#black #lacewig #ultimate
You will learn how to dye your hair jet black using the wayer color method. You can use a rinse or a permanent hair color to achieve this.
▬▬▬▬▬▬▬▬▬♛#westkiss♛▬▬▬▬▬▬▬▬
Hair details: 22'' body wave 13*4 HD lace frontal wig 180%density
Video Hair Direct Link➤https://bit.ly/3aI9MVT
★westkiss official hair store➤https://bit.ly/3Ps7zwu
Join Our VIP Coupon FB Group Now(!!!$135 Discount Package)➤ https://bit.ly/3obsYPb
Hot selling HD lace wigs➤https://bit.ly/3IGef8f
Affordable 37% Off Curly lace wig➤ https://bit.ly/3PjNN6Y
Up to 43% off Lace Wigs➤https://bit.ly/3PbROdy
Hot curly lace wigs➤ https://bit.ly/3o59207
#westkisshdlacewig #westkisswig #westkisslacewig
#WestKissHair Official Site Huge sale Big Discount
image.gifFollow West Kiss hair on social media :
Instagram @westkiss_hair_store: https://bit.ly/2OlKstu
YouTube @West Kiss Hair: https://bit.ly/2Ol5U1m
Wholesale WhatsApp: +86 13323741050
Hey babies welcome back alrighty, so what i'm going to be showing you today is how to do a watercolor from start to finish. So, first things. First, of course you have your mannequin wig head, but i like to kind of protect it. Just a teeny tiny bit. I'M actually going to take a plastic bag and pretty much just put it right over it. Nothing fancy i'm going to go ahead and just tie it down just so that i can make sure it's completely out of the way all right. So once we have that down, i'm going to go ahead and actually just put the wig on and mind you. So this is a water color right, so it really doesn't matter if the wig is wet or not. In this situation, the wig is actually wet, because i did go ahead and previously bleach the knot. So again, if you need to check out that video definitely make sure to check out how to bleach knots video if you are a beginner and are not familiar um, and so obviously, if you're working with the unit that already comes with pre-bleached knots, then you shouldn't Have to worry too too much about this all right, so i'm just sliding the unit on to the wig head. What i'll do is also add in a mannequin head with the stand, and also some of these uh t-pins you guys may be looking for that. So if you can't find it in your local beauty, supply store i'll, add it to my amazon store that way, you guys will be able to just quickly purchase it and don't have to worry about too much hassle. So i'm just taking a t-pin and pinning down the wig, and this is just pretty much to make sure that it doesn't move. We are not going to completely saturate the wig. We'Re only going to be touching these layers, so hopefully about an inch out is what the goal is. So what we're going to do is drag that product from the root all the way to about an inch and a half upward. Now the product that we're going to be using to achieve this is actually the clairol. This is a beautiful collection, moisturizing color, it's a semi-permanent brent and it actually is the jet black. So so, if you want to use a permanent color, you definitely can, but obviously you are not going to want to start with wet hair. You are going to want to start with the unit already pre-dried, but i'm going to be using the semi-permanent wrench just because it does the job. Just fine definitely make sure to put on your gloves and then what i like to do is just pretty much open. This up and i'll go ahead and put some of the products into a mixing bowl just so that i'm able to just access it really easily and it's not too much of a hassle. When i tell you, you will not need a lot, you really won't, and so the other half of this bottle, along with one more, will actually be the mixture that we'll use for the watercolor. Now we definitely want to make sure to section off the hair just because there are areas that won't really need too much attention. So just section off the part where the actual closure is - and you guys can see here - we can find the tracks can literally put everything forward just to quickly do that hope you guys can see that there all right voila. So we have everything completely sectioned off. This is the back. This could totally just be dipped into the watercolor, as is, and you won't have to worry too too much about it. I can already look at the hair and see just how dark it is, but we're gon na get it even darker. So, starting off from one side, i'm literally just going to part this and start to apply our color, so you can start with the the base right. If you want to start from underneath you can, but i can see that we really won't need to kind of bleed that too too far. So i'm just gon na split this into two and then i'm gon na go ahead and take my brush and i'm gon na get as much of that product off of it as i can and then i'm literally gon na go in into upward motion. Being very careful not to touch the roots of this meaning the knots, because we just bleached them, and so the good thing about this is it already has like this little pointed end here, so i can easily part and keep going so we're just hitting the base Of it - and you can see a little goes a long way. You can even add some to the opposite side here and work in small sections, because you really don't want this product to bleed through and kind of get on the lace. You want to keep it only on the hair and especially focusing in on any of those areas where the knots may have accidentally been over bleached, meaning that the hair actually kind of got. You know bleached in the process and to be honest with this, having this type of contrast, it's actually really gon na amp up the style so that you're able to really really see that bleach work and it really makes the style look like it's growing from your Scalp, just because you have such a high contrast of that super dark black or brown or whatever color you decide to go with, and then, of course we have those perfectly bleached knots which just make everything kind of bleed and look so pretty, and this process may Take about five to ten minutes and then, of course, the watercolor itself will only take about maybe two minutes and you guys can see i'm just kind of moving at my own pace. Doing the brush strokes back and forward not trying to rush the process and the fact that we're only putting it at the roots, it naturally is going to go by quickly. It looks like we did a really really good job of bleaching. The knots we only had a couple areas that you know kind of got a little bleeding, then we're just going to continue this up into the other side. You can even go in the opposite way, so i like to take a little bit along the hairline here and then start to kind of just split it up a little bit, and you see just how quick that was boom. Just that quick, we're done, or almost done, i should say - and this is a quick look at just how everything looks you guys - can see not too much of a difference. The knots are still bleached. Everything is still looking nice and natural and i'm just kind of like parting, the hair, so that you guys can really kind of see what everything looks like and i'm very lightly combing. This back without actually touching the base of the hair. Super super flawless super easy, quick to do and then, of course, we're just gon na go ahead and start that watercolor method with it, which is just as easy all right. So i'm gon na let this sit. While i go ahead and prepare my water, i'm actually just going to go ahead and boil some really really hot water, and then, of course, you guys see. I have my container, which this is just like a clear container. I think i actually got it from where did i get this from target yeah, but any container will work, i'm just using a medium sized one because sometimes i'll use a large one, and i notice that the water is kind of too diluted with the color. So i want to make sure to use something: that's kind of compact and we'll be able to get the maximum effects out of it. So i'm going to use this and i'm going to go ahead and heat up my water. So now that i have my boiling water, i'm going to go ahead and just pour it into the container, and you really really want to be careful. So i kind of want to lean the pot in the container. You can choose to fill this up all the way or not. I don't think that it's critical for you to do that. All that i'm going to do now is apply the color and kind of just go from there all right. So i have my brush and then i also have my color, i'm literally just going to go ahead and open this up. This is a brand new bottle and i'm just going to squeeze everything into here all right and then i'm just going to take my little mixing spoon or brush. I should say and really graze the bottom of this, because sometimes the color will literally just sit at the bottom of the bowl, and you really want to make sure that it's completely gone and mixed up really really well. That way, you don't risk getting any chunks of color on the lace if for some reason it touches it which it shouldn't, but again, just in case it happens, you want to make sure that everything's pretty mixed up, so you could easily rinse it out i'll. Just do this for about 30 seconds, so i'm pretty confident that everything is mixed up now we're going to go ahead and just dip the unit. Now, before we dip, you want to make sure that you have a place to transfer this. I'M actually going to be transferring this into a bowl, so definitely make sure that you have something because you're literally going to dip and transfer here's the bowl have it here. I'M just going to put it right here on the side and then, of course, we have the unit and that rinse has had some time to kind of set into the roots. So we know for sure the color is going to stay once we rinse this out and then, of course, we're just going to go ahead and dip. So i like to start from the ends, and you kind of want to do this all at once. I like to grab the base of the cap here, just the bottom of it, so dip the bottom and kind of get some of the base of the cap in there as well. No big deal as it relates to the actual frontal part of this. This is where we need our comb, so we kind of want to comb down the hair, so it's hanging completely straight and then we're going to completely dip, not all the way into it, but just carefully go around and kind of dip this into it. So we just comb it, you see we're kind of just combing it down and i can already see it's mostly turned black, so that's perfect ever so lightly and then just to make sure that everything is completely saturated which it looks like it is, i'm actually going To go ahead and comb through a little bit of this watercolor and then just comb that completely through the hair. It'S ready to go so once we're done with that, i'm going to go ahead and just transfer it to our bowl, alright! So from here all that i'm going to do is go ahead and just shampoo and condition the unit i'm either going to allow it to air dry or put it under my hooded dryer and then, of course, i'll show you the final look. So if you have not already subscribe, give this video a thumbs up, leave any comments or questions down below, and i will see you guys in my next video bye babies, hey


Comments
West Kiss Hair: Thank you so much for the tutorial! GORGEOUS!
Angela Truly: @ForeverCryssy Much thanks for showing that technique!! I am a beginner and only own a few wigs, but there is one that bothers me. The color was natural, but to me it is almost a 2 and I would love to try this technique with the black dye. I would really like to find out how much water you added to the container? I think I can see it is somewhere between 1/3 - 1/2 full, but there are too many containers at Target to estimate the amount (I checked to figure it out on my own)?? Lastly, I am only dyeing a 14" wig. Is it the same amount no matter the length? TIA
Erica: Very tedious but I use a mascara wand to get close to the roots without touching
Rieka Chanel: I plan on doing this. Should we keep it at one wig per one bottle of dye? I want to dye a few wigs
Vladimir: ❤Only for fans over 18 year⤵️ Alles sehr schön. Aber zuerst zusammen die Nummern 10 und 1. Eine empru.ONLINE Brünette und eine andere Blondine. Es wäre unfair, wennq ich 4 wählen würde