Little To No Effort Styling + Wig Install With Ready 2 Wear Blonde Highlights Wig | Wowafrican
- Posted on 30 September, 2022
- T Part Wig
- By Anonymous
The beautiful Blonde Highlighted wig is from https://www.wowafrican.com
►► : https://www.wowafrican.com/13x6in-blon...
☆ ☆
☆ % | : ☆
-------------------------- --------------------------
13X6in Blonde Highlighted Honey Brown Wavy Wig [Kelly]
Length: 20 inches - Density:180%
13X6 Deep Parting Space
★ Undetectable HD Lace
★ Clean Hairline
★ Pre Bleached Tiny knots
★☆ Coupon code: Mani20 Discount: $20 off for 13x6 Wigs ☆ ★
★☆ Coupon code: Mani15 Discount: $15 off for all Wigs ☆ ★
------------ & ------------
WowAfrican Official website:https://www.wowafrican.com
Link to more HD lace 13X6 Wigs: https://www.wowafrican.com/13x6-wigs.h...
: https://www.instagram.com/wowafrican_o...
: https://www.facebook.com/wowafricanwig...
#wowafrican #hdlacewig #13x6wigs #HDLACE #qualitywigs #highlightedwig
My Socials
IG: @kamanijeann
Twitter: @kamanijeann
TikTok: @manijean888
Wig IG: @wigssoldbymani
Email me for business inquiries only [email protected]
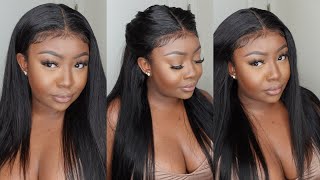
Hey everybody and welcome to my channel welcome back if you are a returning, subscriber and viewer. So if you guys would like to see how I did this really easy install because it was already customized for us keep on watching because yeah this is so freaking cute. Getting straight into it, let me show you guys a close-up of this hairline and how pre-bleached and pre-plucked it was and how good that lace looked like it was given thin and like yeah, but once it's on my head, I'm feeling it I'm feeling the color, the Hairline looks so natural. I love collaborating with wild African wigs because their installs are so freaking easy, like I have to put little to no effort in so since my ball cap was already done for my previous install and if you would like to see how I achieved that vodka, you Guys can tune into my last video but yeah since the wig is on my head now, I'm just hot combing it a little bit to push that hairline back and then I'm going to get into cutting off my ear tabs. The glue I will be using today is Erica J Holt made down glue and it is in the watermelon scent, and I am just slightly not slightly because I low-key put it - I put a little too much as you guys can see by my face. I was like damn that was not a thin layer at all, but I finished it. I just had to kind of scrape it off a little bit and smooth it out as I went, which are you guys. I did three layers of this and I wanted to show you guys the whole three layers that I did because yeah I wanted this to be super in-depth. So you guys can see exactly how I do all of my layers and since I only did three layers, I was like well, why not foreign each layer on a cool high setting so now that that is dry and completely clear. I'M going to go in with my next layer and this time I'm going to try to use not as much as I did the first layer. So it can be a little bit less messy and I can just swiftly Glide that glue around my hairline with the popsicle stick foreign, my wigs. Nowadays. I want to really make sure that I'm getting it at an accurate like level for my hairline, like placement wise for my wigs, because I noticed when I really focus on that. My Wick installs always come out really natural and looking good. The way that I, like so yeah, you guys I'm really focused on the placement of this glue and it's really just trying to keep it aligned with the cap and only putting it a little bit above the cap. Okay, not too far in front and not too close to it, but like directly in front of it and just smoothing it out from there and yeah. So once that's done, you're going to want to take your wig and push that not push that glute but push that wig into that glue and, as you guys can see, I'm using my fingers to really try to see where that glue is so. I can align it perfectly with the hairline foreign to further melt this lace, I'm taking this fine-tooth comb and my blow dryer on a cool high setting and I'm just really pressing that glue into the hairline to ensure the perfect melt. And once that's done, I'm going to be taking my elastic band and wrapping that around the hairline and in the meantime, I'm going to style this hair. So this wig was already parted in the middle part. So it was literally already looking like that. But since the hair was pushed back, you guys didn't see, but all I had to do was just use my fingers to get it back to how this was and how it came. And I'm just using my hot comb to press this hair out a little bit and now I'm taking my caracare wax stick to help press and flatten out this hair, especially in the backyard. Because I, like the back of my wigs to be super flat and as flat as the front foreign, can we take a moment and appreciate and just admire how good this lace looks like it's giving scalp like real deal Scout, but yeah guys, I'm trying to cut It as close to the hairline as possible so that it can look super natural but yeah. I was taking like little bits trying to make sure it was evenly distributed. If that makes sense like, I didn't want it to look choppy, but still at the same time, I didn't want it to look like a straight line, so yeah little pieces that don't let down I just cut off. If I feel like it would look better. But if not, I would just take some glue and glue it down foreign blend more with my skin tone. I'M going to be taking this fluffy makeup brush with some of my rd15 cream foundation, which is also what I use to tint this lace and just buff. It around the hairline and then once that's done, I'm going to be taking my ebb and wonder: leg spray and spray that slightly around the hairline, smoothing that out evenly foreign, I'm gon na. Let this melt for like eight minutes and once that's done, I'm going to be taking out my baby hairs. I wish I didn't use this comb because when I use like an edge brush and the comb side of the edge brush, I can pull out my baby hairs easily, but yeah. This is a kind of a struggle, but nothing too crazy. I pulled them out and they were looking even that was my main goal was to make sure that these were even you know what I'm saying and looking identical pretty much so as you guys can see boom. That'S layout, that's how we're looking don't mind that braid! That'S just sticking out right there, because I was trying to practice the braid before I actually did it because yeah as you guys seen in the beginning, I did a cute little French braid cute little French braid. I wanted to do a um. What you call it a fishtail ain't that what it's called a fishtail braid, but that was a little too hard. I need to do that like on a mannequin head, so I can really do it. The way that I want to, but here I'm just taking my Fantasia liquid, holding mousse and spraying that around my hairline I sprayed in entirely too much so once I wrapped it up. I just took my blow dryer on a cool high setting and blow dried that down a little bit. I wasn't too worried about it, though, because it's a Liquid mousse, so it was going to be crunchy or anything which it was all over my face, but getting into this hair. I just layered it a bit in the front and you guys do not mind that braid that you guys seen. I was just trying to practice because that's the look I was going for, but anyways you guys, I'm taking my wand curler and I am just wrapping it around this hair and while I was doing my hair I was contemplating like do I want to one curl. This whole head, because this wavy wig in this wavy texture was really pretty before I even added curls, as you guys seen, But I wanted this to look super neat. So I went ahead and curled the hair a bit as you guys can see, and I'm getting better with my curls I'm getting better. I can't lie. I can't lie, and I'm happy that you guys are seeing witnessing me like practicing these curls, because when I get great oh it's gon na be a good time for us. Okay, but yeah. You guys that's all I am doing here and, like I said, the wavy texture of his hair originally was super pretty. So, if you guys didn't want to add curls, you definitely don't have to you can do a half of half down side part. Add a little mousse to it add a little water whatever you want to do, leave it wavy because it was cute like don't sleep, don't sleep but yeah. Since this wig is 13x6 deep parting. You can literally do anything with this wig and, if y'all don't listen to me ever at least like purchase this wig or try out wow Africans, um pre-customized pre-bleached ready to wear wigs, because if you can Master the install part of it, the foundation like the plucking, The bleaching, all that you don't have to worry about and baby hairs are super easy to do when it comes to pre-plucked hair lines, because you know they're just going to look good like every time I install a wig, that's pre-blucked, pre-plucked and pre-bleached, especially from wild African, I have little to no problems so yeah. This wig is super beginner friendly or for anybody that just doesn't care to customize their wigs or you know, doesn't know how to which are you guys continuing on with these wand, curls I have to put on a glove y'all cause. I was burning my finger and I'm like I don't have time for that, because that stuff lingers like I don't have time for my fingers to be burnt up, but yeah just wrapping this hair around. I didn't take every strand of this wig, but I did take mostly all of it foreign foreign foreign, so I really really liked how these curls came out. I wish that I used bio silk before I added curl so that it could tame a little bit of this frizz, but that's okay. That is all right because it came out super cute, but now I'm going to get into this braid, I'm not going to explain what I'm doing y'all I'm just trying to braid it like Loosely, so it won't be looking stiff, but I ended up redoing this braid Anyway, so this is kind of just a test braid again, because I wanted this braid to look really good, like you can't mess this up so yeah. This was just my first little trial. I ended up actually doing it again, but for the meantime, it looked pretty cute but anyways, let's get into these baby hairs, I'm just cutting them off with these small scissors here and to get my baby hairs at the perfect length. I noticed when I cut them directly above my eyebrow and keep it at that length. They look super good. So that's what I did here and I'm doing the same with my sideburns, making sure that they're not too long, not too short, but the perfect length, basically aligning that with the end of my ear and then I'm taking my Pro kiss professional half inch, curling iron And um curling my baby hairs upwards for the front and then my sideburns under because I like that, look a little bit better but yeah getting into this. These baby hairs, I'm taking Nairobi, holding foam wrapping foam and I am just trying to make these baby hairs. Baby hair, but that comb side on that edge brush was too like not thick but too wide. I wanted something thinner, so I took this Edge brush and then I noticed like dang. This side is super thick, so I went ahead and plucked some baby hairs out, and then I tried to redo them and mimic it to the left side, because I do notice that left side be eating a little bit more a little bit more than the right Side, so I was trying to get that mimicked. There was still a thickness difference between the baby hair, so I just pulled some baby hairs or some more hairs into the baby. Hairs on the left side cut those off at the same length, curl those the same way and then added those to the baby, hairs and yeah that helped a lot because then it looked a little bit more together than having one side super thin and the other One big so yeah foreign foreign foreign. So since we used foam for the baby hairs, I went ahead and wrapped them up so that they can dry down and I'm layering this hair a little bit more. So it can look more. You know flowy fluffy and I didn't redo this whole braid. Actually I just redid that bottom half and I noticed when I pull a couple of strands accidentally but still kind of intentionally from like the hair it kind of like. I don't know how to explain it but made it a stitch braid a little bit so that it was staying still, which I liked. You know that looked good, so that was the finishing of The Styling part. And now I'm taking my rd09 Ruby kisses cream foundation. Not in getting this part looking clean, I did not have to pluck this part at all and when I'm doing this, I'm really trying to make sure that I keep it still and super precise, and I even like to take it further into exactly where that lace Is and kind of on my skin, so it can look super natural, then what I do is I just blend that it out with my finger and it looks so good. Like I love y'all. This is my favorite part because it ties everything together, but this is the finished look. I hope you guys enjoyed watching and learned something from this make sure to check the description box for more information on this hair, as well as coupon codes. With my name, and I will see you lovely people in my next one.

Comments
LovelySadanya: You really can't say that's not her hair
DARLENE MATTHEWS: Thank you for being you!
Nicole: Wow African is so expensive this looks gorgeous
Fitima Tucker:
Vibeinwith_lashaun: