Wig Talk: Making A Wig Your Own!
- Posted on 13 December, 2022
- T Part Wig
- By Anonymous
LINK TO HAIR KITTY KITTY: use Coupon Code ONEBRAVEWOMAN for 30% off!
https://hairkittykitty.com/elainejacks...
BE SURE TO CLICK THE LINK BELOW TO JOIN MY PRIVATE Facebook GROUP, ONE BRAVE WOMAN VIP GROUP!!
Link to Elaine’s Facebook Group:
https://www.facebook.com/groups/heygir...
Link to Elaine’s Mary Kay Store:
https://www.marykay/elainejackson.com
Link to Elaine’s Amazon Store:
https://www.amazon.com/shop/elainejack...
Link to Elaine’s Website:
https://www.ninjalifecoaching.com
[email protected] to contact
Link to Steamer:
Hair Thinning Shears: (there are lots to choose from but here’s one similar to mine)
Hair Cutting Scissors:
Wide Tooth Comb:
Lange Flat Iron:
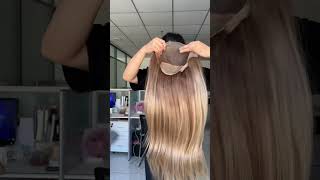
Hey guys, it's Elaine the ninja life coach and welcome to my Channel today today we're going to talk about making the wig your own, so sit back. Grab yourselves a cup of coffee I'll, be right! Back, hey everybody! I'M back today, I'm wearing Ambrose by hair, kitty kitty and Faded denim rooted now. This is a wig that I really kind of wanted for a long time. So when I ordered Ambrose and when I actually got the um faded denim rooted - and I wanted the faded denim that I wanted this color and when I ordered this, this was the only wig that I was able to at the time get from here. Kitty kitty. In The Faded denim rooted when I got the wig and I reviewed the wig, I realized after I had played with a wig a little bit after the review. I realized just how extremely hairy Ambrose is. This wig is a very hairy wig, so I have gone in a couple of times. I'Ve cut the bangs, the bangs were much longer and I cut them to where I can even wear it like this. If I want to there it's fine to to do this too, but I just chose today to kind of sweep them over to the sides, but I did cut the bangs and I thinned the wig. I even took a razor and razor cut right in through here. Simply to take some poof out of the sides, I have another video where I have completely revamped a wig that you can take a look at if you want to here on the channel and it's in the wig tutorials. I don't want you to get discouraged. If you get a wig and it just doesn't work for you right out of the box now, ultimately, there are times when you have to return a wig when it just there's no way that the wig is going to work for you, it's just it's just not Going to so there's going to be times when that does happen, but if it's something simple like if it's a little hairy, but you like the style, don't be afraid to take your shears to it and go for it. Now I brought in a few things you're going to need to thin and revamp your wigs, so let me show you what they are. First of all, this is the something I use on almost every wig that I have and it's this this is a steamer. I picked up this little thing from Amazon and you just the top comes off and you fill it up with water pop that right back on and just Steam steam your wig. Now this one is just imagine I steam. I can drop a link down in the description box. I think it was when I got this. I think it was like fifteen dollars. It'S not expensive, it's not a wig steamer. This is actually a closed steamer. It works just fine on my wigs. I don't think you actually need an expensive steamer unless you're going to be. You know doing this, you know daily, then you might you know you might want to invest in one, but this little steamer has done just fine for both my clothes and my wigs. So that would be a first investment that you would need to make. The second thing that I think is essential: if you're going to wear wigs all the time is you need some thinning shears now. This is something that I have another pair of these somewhere, but I've lost them they're here in the house somewhere, but I don't know where they are, but these thinning shears are great to thin out your wig and you always want to thin from underneath, don't thin From the top thin from underneath down in here when you, when you thin, and I'm going to show you here in just a little bit how to do that, you're going to need that, that's that's! This is a necessity. Something else that you're going to need is you're going to need a good, sharp pair of scissors. Now these are not hair cutting scissors. These are just some sharp scissors now these have dulled over time simply because I've used them a lot and I have used them for other things than sharp than doing my wigs, but mostly this is what I use them for, and you can pick up a scissor Sharpeners at Joann's and Hobby Lobby probably has them too and they're not expensive. Just a little round thing. You just run your scissors through and snip, and it sharpens your scissors back up. I'Ve got one here somewhere and I need to sharpen these the next thing. You'Re going to need is you're going to need a wide tooth comb. Now I got this at the Dollar Tree. You can get them anywhere else, but you need something wide with a wide teeth now, if you're doing a curly wig - and I would not Define this as a curly wig, this is got some waves to it, but it's not curly like say Jamila from Ellen Villa. It'S not curly like that or storyville. This is something good that you could use on your wigs because it slides through the hair really really easily. I mostly finger comb, my wigs, but when I need a comb, this is the one I use, and this this is a shower. Comb is what it is, but the the teeth are very wide and you want something with a really wide. You know with a really wide tee that'll slide easily through that synthetic hair when you're messing around synthetic wig. So those are Basics, things that you need. Something else you need is you need a wig head to put the wig on and I'm going to show you mine hang on just a second. This is my wig head and, as you can see, it's got the stand and it comes apart right here and you can set it to different heights to whatever you want now. I keep it right here, because this is a good you know spot for me. This was by booboostar it's on Amazon I'll, try to link it I'll, put a link in the description box to it, you're going to also need some uh wig pins. Now this is what this looks like. These are just little t-pins. You put your wig on here and you just push it in. It holds the wig in place, you're also going to need some clips now. My Clips are bent they're see how that's like on an angle, but I think I would prefer straight clips that are not don't have that angle on it, because it's easier to use those. If you're doing you know like your bangs or things like that, but I don't have any of those, so I've got a different kind of technique that I use, but I am going to get some of those in the future. So there are the basics that you're going to need to revamp your wig. Now you can also have hot rollers. You can use a curling wand or a curling iron. If you have one that's heat friendly like this wig is this particular wig? Will you can heat it with your curling iron on 280 and I have got one of those long flat, irons with a round barrel, and it works well well on my wigs and I gave this wig a little bit of Loft up here. On top with that particular Implement and I'll bring it in here and show it to you hang on here, it is. This is the one that I use on my wigs and, as you can see right down here, it's got different temperature settings and it's got an air setting that it blows air when um you know through these little holes, so your wigs don't get too hot. This is really great for your biological hair too. I use this on my hair and the wigs, so I really really like this product. It'S a great little thing now this is a little pricey, but this was actually a gift to me from somebody and I'm very grateful for it, because it has really helped my hair, my biological hair not get too fried from using Pro. You know things like this. On it, another thing I use is a round brush now mine looks kind of gross because it's got all kinds of hair and everything in it, but I do use that and I will lift thing. I will lift the hair up with this and then steam it with the steamer now getting ready to show you how to do a couple of things with some of these things that I've got here, I'm not going to actually use this, but I will show you How to do this, so one thing I normally do with my wigs when I'm getting ready to cut them is I do Squirt a little bit of water on them. It'S not absolutely necessary, but I do Spritz it just a little bit to get it wet. That kind of helps me actually see the length of the hair and all that kind of stuff. So this is a wig that I have definitely modified and I have taken some of the volume out of this wig and I kept taking hand handfuls and handfuls and handfuls of hair out of here, and I was like my goodness - I've got enough in my garbage. Can to make another wig and the wig steel is a little heavy right in here, but I didn't want to take too much hair out of it, because I do still want to be able to wear the hair back like this at the nape of my neck. So I didn't want to take too much hair out because I was afraid it wouldn't wouldn't afford me that opportunity something else I use, and I almost forgot to show you all this. I use an eyebrow shaper and I use these. These are available on Amazon, I'll drop, a link down in the description box. To this thing, this is a razor, and I like this little tool better than I like the hair, cutting razor and I'll. Tell you why this keeps me who is always in a hurry to do something from getting too much hair, because you can only go a little at a time with this little bitty razor, but this works great. All you do is take a little hair. Look right here and I'll go ahead and show you all this and run this down the line right like that and you take out some hair and I've actually taken out quite a bit of hair right there. But you can see how that kind of allows that to lay down flatter now it is perfectly okay to to razor the exterior portion of the wig. You don't want to thin the exterior portion, but it's okay to razor it, because I've done this many times to many many wigs and it helps the wig to lay better on your head. So, let's take a look at another wig that I've modified and then we'll go to the we'll go over to this and I'll show you some techniques hang on the Charisma in rose, blush rooted by hair kitty kitty. Now I took quite a bit of the of the weight out of this hair as well, and I cut some bangs in the wig and redirected the hair. This wig comes with a side part. I didn't particularly like the part and the way it looked right here at the hairline, so I just cut some bangs in here and made her a little bit different. I also steamed down the back to where she wasn't so Wild and Woolly and thinned her out right in here, so she wasn't so heavy in the back, and I really like the way this came out. I did not cut any layers. Well, maybe I did too. I think I did right in here. I did use this to thin out and create a few more light, choppy layers right in here, and I'm very pleased with the way this wig looks. This was another wig from here kitty kitty. That was just really too hairy. For me, I have a small head and I have to normally mess around with my wigs and do stuff like this. When I go with a wig, that's a heavier density wig, it's just part of the journey for me and it's something that I had to learn how to do pretty early on and that's something that if I can learn how to do this, I have no marketable Skills on being a hairdresser, but if I can learn how to do this, you can too now. I will put this caveat on here: don't try this with your human hair, wigs! This is strictly strictly for wigs that are synthetics. So let's go to her and let's do a couple of things so I can show you hang on. Okay, you all so here I am here - is the wig form I'm going to take Ambrose and I'm going to cut a little bit more hair out of her she's, still very hairy on the sides. So I'm going to place her on this wig head now. This wig head right here that I have is a little large, so I have to kind of fit her over here, so you might want to when you order your wig head. This one was sent to me for review and I really like it. It'S really good, but the wig head is large. So when you order, when you order your wig head, you might want to make sure that it's one that your wigs are going to fit on. My I struggle with my Ellen Villa wigs, fitting fitting on here, to be honest, all right, so first thing I'm going to do now. If you have a wig that has a lace front or a mono part or a mono top, you don't want to secure through that mono, so you're gon na this one doesn't so there's no danger. I can go right in here and do that right here without any problem whatsoever and that's going to secure this wig right here. But if you have a lace front or a mono, top wig secure it down here somewhere, where that mono is not because that can ruin your the top of your wig. So what I'm going to do? If I want to take out some hair, because she's still poofy right here, I'm going to take some of this hair right here, I'm going to take my back home and I'm going to go in like this and I'm going to clamp this hair right up here. So it doesn't get in my way and try to go in on a weft if you can try to get. You know like that on a weft where it's, where you've got that kind of thing going on grab. My garbage can get it over here and I'm going to pull up a little bit. Let me move her back a little bit y'all. So y'all can see better, so I'm gon na go in and I'm going to just go right here and I'm not going to get much hair, I'm just going to get a little small amount of hair and I'm going to grab my thinning shears and I'm going To go in, let me try to get to where you all can see this and I'm going to go in right here at the right up here next to the left. So I'm going to be as close to that weft as I can. I got too much hair. Let me get that out there and then I'm going to snip run it down snip again, all the way to the end snip again and then, when you pull it off, there's your hair right. There you're going to discard that and if you need to take out some more I'm going to go right over here, take out a little more. So I'm going to go right down here next to the West, clip about halfway down clip and then at the ends. Clip again and then there you have your hair that you've taken out. Now, I'm going to go right here on the side and do the same thing, because she's still bushy right in through here. So I'm going to go right here. Lift that hair up try to find the wefting. If I can right there grab my comb, and this is a process. Ladies, I mean this is not a quick process, just no, when you do this, give yourself plenty of time and because this wig is so hairy, I can take a hunk about this much and I can know I'm not getting too much hair now if you've got A wig that's a lesson, and that's still too much. I can take about this much because this is a high density wig, and this is not going to be too much with uh hair clip go down about that far clip again all the way to the ends and clip, and that gives you a gradual and see How that makes that lay down right there when you do that, so there's how to thin a wig with your thinning shears. Now the next thing I'm going to do is I'm going to show you with this little device how to cut some layers into your wig. Now I did just a little quick demonstration but you're going to want to take your wig here and you're going to want to get a small amount like maybe this much or even less. Let'S, let's go with this much and what you're going to do is you're going to pull this out like this. Let me get this where you can see it come on in with this, get it out like this and start wherever you want your layer to start wherever you feel the poofiness or whatever it is, and you're going to just cut like this and you're going to Run it down to the end of this hair shaft I'm going to get about that much hair, and then it makes the hair lay down a little bit nicer when you do that, let's do another one! Let'S go right in here! This is a little poofy right here, so let's get a little piece of hair. Let'S do the same thing, you're, going to just kind of run your razor like that all the way down to the end. Now this is going to make your wig it's going to make the wig hair look a little bit clunky like that, so all you have to do is go in and smooth it out with your fingers and it lays down really really really nicely. Now I cut the bangs on her and she could still use the bangs to be cut just a little bit more they're, still just a fuzz long. I think now I'm not going to do this on camera, because this is this is a process, but I'm going to explain it to you. How I do that I determine where I want my bangs to be then I take like if they're really long. Let'S say: let's call this the bangs right here. Let'S say it's really long bangs and it's the bangs are this long, but I want them to be this long I'll go in with this I'll place that there and I'll give myself a little leave way. Maybe about this much leave way and I'll just take my scissors and I'll clip that off then I'll go in and feather those bangs in where they need to be so that's kind of how I do that and it works better if you've got a straight. One of these I'll just go ahead and tell you I don't have one of those, but man I'm. I think I need to get one after watching. Some, ladies, do that, but it's really not much more complicated than that now after I have done all that. To my wig, you don't necessarily have to do this, but I usually do this. Like I said when my wig is damp because it seems like I can get a better result when I do after I've done everything I need to do about to the wig and I'm finished, I go in with my steamer and then I will you know steam. Some, if there's any you know, stick ends or anything sticking out. I will steam it down, just give it a little puff. I don't do much. I do about like that just enough to lay down any ends that are out here and I, like my wigs to be a little bit poofy. I don't like my wigs to be like flat down on my head. That'S why I like this wig, because this wig's got permatease in top Ambrose, doesn't have any so she's not going to have that poof on top, and you have to create that. So what I did to create some poof on this wig. I did a couple of things. The first thing I did was: I took the top layer and I took my round brush and I did this and steamed the hair this way to create a little bit of a bump. When I took that out, though, I'm going to just tell you that didn't work all that well because it left it left a dent, and I was like oh my now. I'Ve done that before and it didn't do that, but it did on this Ambrose. So what I ended up doing was going back in with my flat iron and kind of sculpting it back this way and on the sides to give it a little bit of a bump on top. So it's not quite so flat and that seemed to help it. Some so if you have an Ambrose and you think she's a little flat on a top, that is one way you can always go in and do that and of course, if you have hot rollers or you have a heating comb, you can do that. Just make sure if you have a hot comb, that you have one with a porcelain barrel and not a metal Barrel, because that metal Barrel gets too hot for synthetic wigs. So I don't have either one of those things I'm looking into getting that something else that you could do is, if you have those hot, not the rollers, but the hot um they're kind of almost like. I don't know what to call them. They'Re almost like um a pool noodle, if you know what I'm talking about, but they get hot, those would work as well, but you have to leave them in until the wig hair is cool, so that's going to be an overnight process. So what I do is, after I have after I have done everything to my wig and I think, she's ready. I will take her off of this and I place her on a wig head. I'Ve got some of those ventilated, wig heads and what I mean by ventilated they're, just like the four legs and the air can pass through, and I place it on that to let the wig dry, I don't after I have done all that. I don't want to hang her upside down and mess up what I've just done now. I do absolutely hang upside down when I wash the wigs, but I don't do that when, after I just restyled the wigs, I want to make sure my style stays that way and it gives it time to sit. I will usually let it sit overnight before I wear the wig, so give yourself plenty of time if you're going to do this because here's another reason not because the fiber, I think the fibers need time to settle down. That'S just my theory, but also because you want to make when you put the wig back on, because really it's just guess, work what you're doing now. Sometimes, if I'm just thinning out a little, you know if I'm just you know razor cutting I'll put the wig on my head and do that you know and that way I can kind of tell what's going on, but I can honestly see better if I do It this way so go go with small sections at a time, because sometimes when you put the wig back on your head, if you've gone too much, you'll put it on you'll be like. I have taken all the hair out of this wig. So try on the wig frequently as you're doing all this stuff take out a little try. It on. You know finger comb, it look at it, sit it back on the head and I know that's a process, but then getting a wig and making a wig your own is not a quick process. So that's why I like to take several of my wigs and do them at once set them on there. Let them dry overnight, and if that doesn't work, then I get them all out again and then I'll start working on them again, but it really helps if you can try the wig on during the process. Now Ambrose was a little bit curlier as well. She was a curlier wig when I got her out of the package and I did steam some of the curl out, but you can always put that in with hot roller. Put that back in with some hot rollers or or you know, a heating Implement. I could probably use that launch thing and put a couple of curls back in here, but my main concern is: I wanted to poof this up just a little bit, and so I was able to do that and give it enough lift on top. It'S still pretty flat on top, but I gave her enough lift to where I'm a little bit more comfortable wearing this style. Now I do have another Ambrose that I'm going to work on that is in Tahitian Sunset. I have thinned that wig considerably to get it where it is. I don't want to take out too much of this, because I do like to wear these wigs pulled back and in a half pony and if you take out too much hair you're not going to be able to do that, because your wefts are going to show. But remember this too: after you steam your wig and after a wig dries, it's gon na it's just like your biological hair. It'S going to look different after it dries from the steaming some of it is going to just poof back out this one did I'm Lord. I took a whole waste basket full of hair out of here and she's still poofy on the sides. So I don't want to take too much more hair out of her because I think she's a lot thinner on the sides than she was and I really love this color and I want to be able to style her in multiple ways. So I did leave her with a little bit of extra hair that I probably could have taken out like especially right in here, because this right here right here is where she's heavy. I have found that with wigs with me wearing wigs. That is where the main problem is for me, usually right in here, because that's where it's going to poof, if the wig's gon na poof it's gon na poop, either here or up on top, I don't mind so much the top poof. But I do mind right here because my face is already round and I really don't need anything to make it look more round. So there's my little quick tutorial on how to fix your wigs and if you have any questions, just drop it down in the comment section and I will try to monitor it and answer as many questions as I can. If I know I would love to hear your tips on doing this as well, if you all have tips and tricks and things that you can do to make a wig a little bit more wearable. But I guess I would encourage you don't give up on a wig just because it doesn't look great out of the box. You can always make it look great and if you're not comfortable doing all this stuff to it, find a place and take it there and have them do it a hairdresser. Can that knows how to cut wigs can be your best friend. If you don't want to do that, that can get pricey. So that's why I kind of learned how to do my own, but if I had a six or seven hundred dollar synthetic wig, I would definitely take it to a hairdresser. It'S fine for me to do this with my little. You know: hair Kitty, Kitty, wigs because they're, not an ex, you know horribly expensive, wig. Now, they're, you know they're a hundred dollars, but I feel more comfortable doing that and then, when after I do this, and I have to I've, cut all my Ellen Villa wigs, some of them and it's just it's not hard - you just have to go slow something. I normally don't like to do. Listen guys. I hope you all have a wonderful day. God bless you all love you guys. Maranatha


Comments
Jean Jacobs: Greetings Elaine! My goodness, you have become quite the expert at this over the years! Remember that first Amazon wig haul you did? Ambrose is looking good! Love and blessings ♥️
gillian lee: I bought a ondor wig that is really thick and I thinned it out by literally taking 50% of the wig out :). But the sides are still poofy so the razor technique will really help! Also, a hot hair brush really helps with the bangs and getting the volume in the roots.
JoJo: Hi Elaine! great video tysm for all the great tips! both of your wigs look so pretty on you! one time I put on one of my wigs that I wanted to wear forgot I had products on it and it needed to be washed so I would try steaming it & it came out beautiful… just a little tip..❄️❄️
Belgium Girl: Thank you Elaine these are some great tips!
Stef K: Such an informative video~ great tips~ thank you wishing you a blessed Christmas
Beauty From Within: Love your videos.