Lace Where !? Deep Side Part On Highlight Body Wave Wig Ft. Ossilee Highlight Hair
- Posted on 12 January, 2023
- T Part Wig
- By Anonymous
Learn how to melt your lace to make your wig installs look realistic. Today im installing a body wave highlight 13 by 4 lace front wig
♡ ♡ ♡ ♡ ♡ ♡ ♡ ♡ ♡ ♡ ♡ ♡ ♡ ♡ ♡
--Ossilee Hair Official Website--:➤https://www.ossileehair.com/
Pls use code “OSS10”to save $10 on Official Website
Hair Details:13x4 4/28 Highlight Body Wave Lace Frontal Wig 28inch 180%
Direct Hair link➤https://www.ossileehair.com/collection...
HD Lace Wigs➤ https://www.ossileehair.com/collection...
Colored Lace Front Wigs➤https://bit.ly/3tE155g
#ossileehairwig #ossileewigs #hdlacewigs #straighthairwig #deepwavewig #aliexpresshair #ossileehair
Ossilee Shop on Aliexpress
https://www.aliexpress.com/store/14152...
Aliexpress Direct Link:
https://www.aliexpress.com/item/100500...
4x4/5x5/13x4 Top Selling Straight HD Lace Wig
https://www.aliexpress.com/item/400037...
https://www.aliexpress.com/item/329586...
13x4/13x6/360 Body Wave Wigs:
https://www.aliexpress.com/item/400038...
13x4/13x6/5x5 Deep Wave Lace Front Wigs
https://www.aliexpress.com/item/400043...
Contact us
Facebook: @Ossilee Hair Products
Instagram: @Ossileehair1
Tiktok: @ossileehair &@ossileehairwig
Email: [email protected]/ [email protected]
Wholesale Inquire Whatsapp: +8615893718081 /+8618937416038
▷ CONNECT WITH ME!
FOR PROMOTION/ BRAND COLLABORATION ‣ [email protected]
TWITTER ‣ https://twitter.com
INSTAGRAM ‣ https://www.instagram.com/?hl=en
SNAPCHAT ‣ team.stacie
▷ OTHER VIDEOS YOU MIGHT WANT TO SEE:
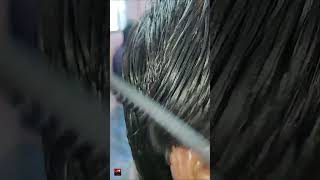
What'S popping y'all, it's your girl team, Stacy and I'm back for being said, I'm back another YouTube video and, if you're new to my channel hello, any particular subscriber. What'S up, if you guys can tell about the title and the thumbnail today, we are doing a hair. Install video I wanted to show you guys how I got this nice side part unit with these wand, curls guys this wig was sent to me, but I'll give you guys more details on this unit a little bit later on in this video. But yes, guys, this wig is just giving this is 26 inches. It did lose a little bit of length because I curled it, but I'm not mad at it. This hair is holding a curl very, very well, and it's just so freaking cute, like I'm obsessed like this is this is really crazy. This hair is just Flawless no problems, I'm telling y'all too much, I'm telling y'all too much I'll tell y'all too much. Definitely. Definitely if you are interested in seeing how we install this unit and how I style this unit definitely keep on watching Girl, alright, so let's go ahead and get right into it. So, let's start with this ball cap method. First thing I'm going to do: is I'm going to cut out my ear tabs, so this cap can lay flat on my head and we have no lifting and no tugging. So after I do that, I'm going to take my gold spawned glue and I'm just going to trace my hairline we're going right in front of my hairline and we're just tracing so this cap just stays on. I found this method to be better than just using some type of spray like gots to be or free spray those things kind of make your cap roll back. But when you use a little bit of glue, it just lasts a little longer. So here I'm just using my blow dryer and I'm trying to blow dry it as close to clear as possible, so today's video is sponsored by ausley hair guys period get into the unit. This is their 13x4 highlight wig. All the information on this wig will be linked down below, but I was super excited exciting. That'S a new word exciting, but anyways. I was super excited to install this wig, as y'all saw by the thumbnail bodied ate it up no crumbs, but here I'm just cutting off the excess cap, and then we are going to clean off my forehead with 91 alcohol um. That just removes any of the oils, and any of you know stuff that is gon na interfere with the glue. So before we glue anything down, I like to try the wig on yeah, I'm doing my happy dance because we cut the cap perfectly on the first. Try, if you have your cap to expose, definitely go in and make sure you don't have too much cap there here, I'm just parting, my hair, so I showed you guys the inside of the unit. A lot of these wigs have like a small side section where you can't do Deep Side Parts but, as you guys see we're gon na finesse it this part is going to be curved, so it can be nice and deep, but we have no tracks exposed. So I'm just going to take my Ruby, kiss cream foundation, I'm in shade 09 and we're gon na put that on my cap and we're also going to put that on the wig itself, and this is what's going to give scalp, definitely invest in this. You can get this at your local beauty supply store, and you can also find this on Amazon. That'S where I got mine and, like I said, I'm in shade 09 and I think that's the lightest shade that they have after we put the foundation on the wig in our cap. We'Re just gon na go ahead and take our gold spawn glue and start adding our layers. So I don't want my wigs for too long, so I only do two layers, but the more layers you put the longer your wig can last without needing too much of a touch-up. You guys want a video on how I touch up my wigs super easy. I can do that for you guys, but today we got a fresh wig fresh out the box, so we don't need to do all that foreign guys. So next up, I'm gon na go ahead and just lay this wig down. So I wanted to zoom in so I can really show you guys I like to pull the hairline, that's on the wig in front of my cap, so this is what's going to give coming out the scalp. You see how you can see the cap a little bit, but it's a little pushed back I'll, be fixing that really soon. But look at me pull this hairline in front of this cap. You can always re-watch this video to see exactly what I'm talking about, but this is going to upgrade your installs if you're having trouble okay. So here I'm just cutting out my ear tab, so my ears have room, and this wig can lay down nice and flat up. I'M gon na take my even lay spray, so you guys can see a little bit of glue, but once you put that spray down, this is what's going to help melt down and give skin and scalp okay, then I'm just blow drying it. So it's not sticky, but it dries down very fast yeah. I just have to pause the music real, quick and jump in and say this is before we cut the lace like yeah. This wig right now looks so freaking fire yeah, make sure y'all shop. Okay make sure y'all shop, this wig well, let's go ahead and get right back into it, alright guys! So next up, I'm gon na just take my elastic band and we're just gon na put that right in the front, and this is going to help give scalp melt down all of it. So do not skip this step. I leave my zone for 10 minutes, but within those 10 minutes, if I go over, that's better, I'm just gon na go ahead and hot comb. My hair, you guys know I live by a hot comb. You know how people live by that iron. Y'All know that statement: okay, maybe I'm a little too ratchet, but that's the hot coat for me. You got to use the hot comb. This is what's going to help the hairs just seem more neat organized and give that Salon finish. So I like to go in and part the hair, as you guys see, and then I I just hot comb, each section, I'm talking Tay, does this arrogant, Tay. You have to take this step, it's extra, but it's going to give you such a Flawless install and My Heart. Comb is set to 450 degrees for reference. So, after that's all done we're going to take off the elastic band and then I'm gon na just use my wax stick from She's bomb. I'M just going to put this on the perimeter of my hair and we're just going to hot comb. It I'm very extra with this hot comb. First, I hot comb, the hair raw and then I go ahead and take the wax stick, and this just gives me such a nice look. Okay, so we're just smoothing this product right onto the perimeter of this hair and, as you guys see it looks so Sleek you can see every part of the hair that I plucked. Okay, you could just see everything - and I just love that, like don't skip this step, if you don't have a wax stick, you can use edge control next up, I'm going to go ahead and just cut off this deposit alrighty guys. So here I'm just cutting off the excess lace with an eyebrow razor and, like I said I want to zoom you guys in so you guys are not missing any steps and you guys can always come back and take this lace class with me. Basically, that's what it's given, but I had a little bit too much lace exposed. So, as you guys see, I go back in and I just cut the lace off and I just wanted to show that because some YouTubers, they just cut this part out. But you know not the first time you do it. It'S going to be perfect. Like this side, I cut it off perfect, but the other side. It was a little janky, but I'm also going to show you guys how to have your lace melt into your skin and just really give keywords. Scallopiana period foreign I'm gon na go ahead and take that same cream foundation from Ruby kiss, and we are just going to put the foundation on the lace and, as you guys see, it is just silky blending into the skin like just so perfectly, then we're going To go back in with the even lace spray, and this is what's going to help melt everything down together and at this point I didn't even need edges girl. So you could leave the house like this, but I wanted to do edges just so. You guys can get a close-up and see how I do them. So I do like to section out my edges and because we're doing a side part I'm kind of grabbing it from the front portion of the part. So my Edge kind of just falls into like kind of formation. Hopefully that makes sense, but, as you guys see, I'm just sectioning out the pieces of hair that I'm going to do. I wanted it to be a little bit more dramatic, since it's going to be like such a deep side part. I want us to do three edges instead of two edges, so I'm just parting, those out alrighty guys. So next up, I'm gon na go ahead and just cut my edges, I'm cutting at an angle and then I'm going to take my half an inch flat iron and I'm going to curl under and, as you guys know, I like to do it multiple times. This is just helping the hairs really get straightened out. So when we add product it doesn't like curl and wave back up, because this is body wave hair. So you want to do that with straight hair, curly hair body wave any edges. You do really go back in with that hot comb and flat iron, those edges, so they are nice after we do that. I'M just combing my hair, just making sure it's laying how I want it to lay before I apply any product after I get it. How I want it, then I go ahead and go in with the product and we are just going to lay these edges down. Okay, so I'm not going to talk too much here, because edges is like it's a hard one, so just watch what I'm doing foreign guys so here I'm just going to go ahead and cut off the hair, because this third Edge third edges are always hard. That'S why I saved it for last that middle Edge, just kind of gets in the way, but we ended up. You know getting it nice and slayed and laid down. So here I'm just taking my one color. I have a set that I got from Amazon. This one color is so bomb the curls came out gorgeous, but I'm just going to go ahead and curl. My whole entire head, I'm going to curl majority off camera, because this did take me like 20 to 30 minutes. This is the most tedious part of the install after we dropped my last curl. Now I'm going to go ahead and just smooth the top of my hair down with a comb, then I'm going to spray it with this spray. This is going to help your your hair. Last long, I only spray the top because I'm applying heat but off camera. I did spray the curls as well and then finally, I'm going to take my cream foundation and we are just going to Define this part all right guys. So that is the end of today's video in today's video I wanted to go ahead and install and style. This unit, this hair, is absolutely gorgeous guys. I love it. I love it. I love it. I love it. I'Ve got so many comments so far, like literally I posted this hair on my Instagram and I got so many comments so far, I'm just like. Oh, I look so good. I love it so much so if you are interested in purchasing this unit for yourself definitely check out my description box down below there'll, be purchasing links, promo codes and all that good stuff, because I'm never gon na be my girl, hangout. Okay, I always look in my description box before you make purchases on the units that I review, but yes guys. I love this hair. Definitely TCC approved I'm about to go get some fire pictures. Follow me on Instagram team.stacy, so you guys can keep up with me and you know, see my pictures and be part of my story. That'S where I get real personal um, but yeah guys. That is pretty much it for today's video. I love you guys so freaking much, and I cannot wait to see you guys. My next video bye guys


Comments
Jay Thomas: ❤❤❤❤❤ gorgeous I love it
Catherine Mark: That hair and install is ! Thanks for sharing.
EJ Bruno: The best YouTuber ever ❤
EJ Bruno: My crush looks so cute and beautiful ❤❤❤❤
EJ Bruno:
EJ Bruno:
EJ Bruno: My favorite crush ❤
EJ Bruno: Bae❤
EJ Bruno:
EJ Bruno: Wife❤
EJ Bruno: Wifey ❤❤❤