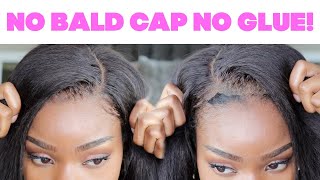
No More Frontals?? | Detailed T Part Wig Install | Jerry Curl | Mslynn Hair Review Wig
- Posted on 04 March, 2021
- T Part Wig
- By Anonymous
Check out my detailed T Part Wig Install on this Jerry Curl T Part lace front wig. This tpart lace wig is a Mslynn Hair review. It is a very beginner friendly wig since you do not have a lot of lace to install. After your initial customization you can really just pop on and go! I you like synthetic lace part wigs this is a perfect transition into human hair wigs. Plus it's a super affordable human hair wig.
#MsLynnHair #TPartWig #BeginnerFriendlyWig #EasyLaceWig
●▬▬▬▬▬ஜ۩Mslynn HAIR۩ஜ▬▬▬▬▬●
Hair Details:
HD Transparent & Glueless Lace Kinky Curly Wig Preplucked T Part Lace Wig
T part wig, 26 inch kinky curly hair, 180% density, Brazilian Hair
Same hair in the video: https://bit.ly/37ZAaGh
More Transparent T Part Wig Series: https://bit.ly/3bOBE7u
The biggest coupon code YTB7 for any item 7% off unlimited
●▬▬▬▬▬ஜ۩Mslynn HAIR۩ஜ▬▬▬▬▬●
Mslynn Transparent Lace Closure Wig Series: https://bit.ly/2NKEu5u
Mslynn Transparent 13*4 Lace Front Wig Series: https://bit.ly/3sD1Ybi
Mslynn Transparent T Part Wig Series: https://bit.ly/3bOBE7u
Mslynn Headband Wig Series: https://bit.ly/3uNwh0G
Mslynn Hot Bob Wig Series: https://bit.ly/3uHDjnQ
Mslynn PU Silk Base Wig Series: https://bit.ly/3bQNnCv
Mslynn U Part Wig Series: https://bit.ly/2PqNg96
Mslynn Wear and Go Wig Series: https://bit.ly/3bWs1DP
Mslynn Colorful Hair Series: https://bit.ly/2PqNfSD
Mslynn 360 Lace Wig Series: https://bit.ly/380ziRT
Mslynn Transparent Lace Wig Series: https://bit.ly/3dU50nw
Mslynn Bundles & Closure Series: https://bit.ly/3bPPTsw
●▬▬▬▬▬ஜ۩Mslynn HAIR۩ஜ▬▬▬▬▬●
Subscribe MsLynn Hair now: https://bit.ly/3lzM65W
Follow Mslynn Instagram now: https://bit.ly/3nD62GS
Join Mslynn Facebook team: https://bit.ly/30WpaGc
●▬▬▬▬▬ஜ۩Mslynn HAIR۩ஜ▬▬▬▬▬●
Want to Promote or wholesale Mslynn hair?
Contact: [email protected]
Whatsapp: +86 18039917601
Shop My Amazon Store: https://www.amazon.com/shop/xoxosheba
Amazon Headband Looks
How to DIY Highlights on Wig
https://www.youtube.com/watch?v=tSv9Zz...
How to Pluck a Human Hair Frontal Wig Like a Pro
https://www.youtube.com/watch?v=ytu8Pf...
Blonde for Black Women Playlist
https://www.youtube.com/watch?v=WvWUaY...
Beginner Lace Part Wigs Playlist
https://www.youtube.com/watch?v=rwGtH8...
Human Hair Wigs Playlist
https://www.youtube.com/watch?v=vhfKcE...
Synthetic Lace Frontal Wigs Playlist
https://www.youtube.com/watch?v=hJhRud...
My signature lip look:
NEW TO YOUTUBE? PICK UP MY GUIDE TO REACH 1K AND GET MORE VIEWS: https://mailchi.mp/ad7b5933b0ee/new-yo...
Paid Promotion: [email protected]
Follow ya girl!
Twitter: https://twitter.com/XOXOSHEBA
Instagram: https://www.instagram.com/xoxosheba/
Equipment:
Canon G7X Mark II /iPhone XS
Ring Light
Box Lights
Macbook/iMovie
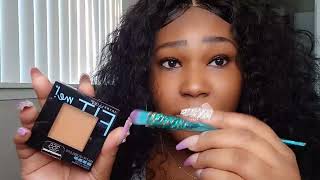
What'S up guys welcome back to my channel xoxo shiva here, if you're new to my channel hello and welcome and if you're og subscriber, what's good welcome back so this hair is from miss lynn hair and i just wanted to show you all the hair real quick Before we get into how i got this, you know look at how it's looking how i installed it. I didn't want to show y'all. They gave me some lashes along with the wig. They gave me some wig caps along with the wig, and they also sent me some super thick elastic band. It'S not quite thick enough to do the hair with, but it is nice if you would like to do this glue this. You can sew in some elastic band and it came with this gorgeous little pearl clip too. So, if you're interested in the tea on this teapot wig just keep watching so the hair that i have today is from miss lynn, hair shout out to them for sending this to me, this is their jerry, curl, textured, tea, part wig tea part. Wigs are really awesome for those who are like beginners into human hair. Wigs, and you want something. A little less intimidating because you can see within this cap is really just lace in the part and lace slightly around the edges. Now it still has your combs on the inside and adjustable straps within there, but the lace is very, very minimal. So this is a great wig. If you are a beginner, i went ahead and bleached the knots, even though this is an easy tea part wig. You can look there and see those knots are very noticeable, so i wanted to go ahead and bleach them, because, no matter what wig i'm working with, i want to make them look as good as i can possibly get it. So i did bleach the knots on this and i left it on for about 30 minutes. I was using a 30 volume developer and my l'oreal quick blue bleach and those got me right together. I left it on for about 30 minutes. I think i said that so anyways moving on. I did pluck at it just a little bit if you choose to pluck getting this unit, make sure you go slow because you don't have a whole lot of room to work with, and you don't want to expose the tracks that are literally right behind the little Bit of lace, you have in the front so be very careful doing that, but i did want to add a little more naturalness to the front of the hairline, especially since you can't really push it back or anything. This is a transparent lace wig. So, as you know, with transparent lace, you're gon na have to darken it to fit your skin tone. I am using the don't touch my hair lace, tint spray that i have been using in the warm brown color and i'm using that i prefer lace tints, i'm finding that are very, very thin and watery before i didn't think i like lace tints, but this one Changed my mind, and it doesn't have to specifically be this one, because i know it's kind of hard to find as of right now, but if you find a lace tint that is more of a watery based lace. Tint over like a creamy base. Lace tint, like the ebbing spray you'll, have a better install. I also like to cover it with the got to be glued spray and then blow dry as well, and that helps seal in the product and help you to not have it. You know transfer onto your wig caps or your hair anything. So this is the hair post being washed, and it's now dry air air dried it overnight and i took the back lace off because what am i going to need it for there's no lace in the back and then i also just kind of darkened up the Front of my cap, so it wouldn't be so noticeable through my lace part, the fit was pretty decent. If you have a lower hairline or a larger head, you usually go for larger size. Wigs. This might be a little bit snug for you or throw you a little bit off. But if you don't mind your edges out being out a little bit, which some people might actually want, that with this kind of unit, seeing as you don't get much edges to work with, then you'll be fine. If you don't mind that i'm cutting and installing, as i go with this unit in sections, you really could just install the front and leave the sides, as is seeing as you can't really wear your edges out with this unit. If you wanted to do it that way, but i'm just installing section by section - and i always like to tack down my sides anyway, so i will be doing mine - i'm using got to be glued in the yellow tube, as i usually use try to like use Light amounts at a time so that way, i don't get a residue or not too much residue, and then i also go over with my got to be spray as well. This hair is a hundred and eighty percent density. It also is available in 150 density. I have mine again in the 26 inch length and i believe it runs for 229, which is not a bad price for how long how thick this unit is, but it also runs as low as like a hundred and two dollars. So this is a really great steal, perfect for beginners who want to get into human hair. This is a great way to start. It'S also curly hair, so it's not so intimidating as far as styling. You don't have to do too much now for this install process. I'M just taking my comb and i'm pressing the lace in and also using my blow dryer to help me dry it. I had a little bit of difficulty with this one. I think it was just you know again the lack of lace. That'S at the front with these units it made it a little bit hard to tack it down. I kind of was, i would say, i put the glue a little too far back behind my hairline than i actually needed to, but i got it together. I just wanted y'all to see the process, i'm not perfect either i mess up. I try to like condense it down, so you don't have to see everything that i do, but you know don't think that i don't struggle just like you struggle putting these wigs on, because i do so. I just touch it to check to see if it's dry or if it still needs to be blow dried, a little more and once it's all good, that's when i go ahead and cut off the lace, can you see how well that tint got me together? Don'T sleep on lace, tints! That'S me speaking to me first because i was sleeping on lace tints, but this lace tint and any other lace tint. That'S you know similar to that is going to get you right because usually i would have to go over that with. Like foundation or concealer, or something to make it blend - and this is blending right on point and we went from transparent lace and i still don't need any makeup to help me. So, yes, i'm just doing the same thing to the other sections of hair. It gon na it's gon na go pretty quick for the rest of these because i got it together. At that point, figured it out, got my life together, but yeah my so the sides did not get quite as dry as i wanted them to before. I cut the lace off, but it's fine, because i'm just gon na stick on my elastic band and let that sit on the hair and really tack it down and melt it into place. While i work on styling the unit, i'm really loving these curls, you guys this is my first time actually trying a jerry, curl texture, and i just really really like it. I posted this on my stories and i was just getting dms about you guys liking. It too, so it's a winner for all of us. I guess because it's just really really pretty like it's a big hair, but it's also somewhat easily tamed as well. So i cleaned up my part a little bit, even though there's not a whole lot of room to do with that, which again is great for beginners, because you don't have to make any of the hard decisions of where to part how to part all that stuff. It'S already done for you with this style of unit. Again, if you like lace, part synthetic wigs, tea, part, wigs are right up your alley. You get all the ease of lace, part wigs, but you get the versatility of having human hair. So i used a little bit of some wax. You can use any type of wax. Stick you want to it really doesn't matter, and i also use that to kind of help me form and flatten it down as much as i can. I was really really trying to get that part flat, because you know the lace is not the lace. The track is right up under my part, so i just wanted it as flat as i could possibly get it and it came out really good. I used the mousse from don't touch my hair as well to help me define the curls because i didn't want like that tamed wet. Look. I wanted big hair. I like big hair, i'm a leo. I was made for a mane, so i really love big hair, but i wanted the curls to be a little more defined yet still big, so the mousse or any setting, i always say, mousse, but it's really setting foam any of those types of products will help. You to get some definition without losing some volume. This hair really wasn't giving me much tangling or shedding issues now keep in mind. It is curly hair, so it can be tangled if you're doing a lot with it if you're wearing it often make sure you brush out, especially the back, because that is where curly hair gets bunched up and matted and tangled no matter what, if you are doing A lot of activity or wearing it a lot. You know you just have to keep these units brushed out, and that is how you keep them longer and make sure that any tangles you dig do get are not too bad. I did go ahead and add some baby hair to this hairline a little thicker than i normally do it, but still the same amount that i normally would use and because this is again cherry, curl hair. I did take my hot comb to help me straighten that out a little bit so it'd be easier for me to maneuver those baby hairs. I used edge control and setting foam together to help me brush the baby, hair and just put them in place and all of that stuff i like using light products like that that won't cause it to like cake up or get too hard too fast um. If you use got to be straight away like if you already have like makeup or anything on your face, it can kind of cake it up and ruin things. So i like to use light products like edge control or gel. If your face is like bare faced at the time, it's really not going to matter which you use, but for situations like this definitely like to use lighter products and then follow it up with like got to be spray or something to seal it in place. I did also pluck out these baby hairs because, even though i wanted them a little bit thicker since we don't have much of a hairline, i didn't want them too too thick. I still don't have much of a forehead myself and then for brightening up the part. I took some of my setting powder and i believe it's light brown i'll, have it linked down below, and this is the final result - y'all see how pretty much easy that was compared to like trying to install a whole frontal. The ease is unbeatable. After your first install where you've customized, you can literally just pop it on and go from there if you're interested in this unit, the details will be down below in the description box. Thank you guys so much for watching, and i will see you in my next one bye.

Comments
Andrea Steele: You did a great job with this one especially since it's SO THICK! As always you look GORGEOUS!
Beautiebymark: The natural curls are so pretty. I have not tried a T-part yet, but I plan too. They look eaier than a full frontal. Great Review
Tracey Boyland: Very nice unit. Your vids are great. You always give good details and all the info we need to install a unit. Your skill level is A-1 You style any unit
Love Yourself: Jerry curl Texture is soooo pretty and t part seems so easy. So beautiful I love big curly hair too. Blessings and Peace
Shanise Nicole: This looks beautiful but let them know we not perfect and we mess up too
Blackberryrose: ❤️ this. That curl pattern is . You Look Beautiful
Kara Cee: Some beautiful vacay hair!
SAWLIFE: Slay and layyyyyy
Adeshola Afolabi: Hey can you wear this as a side part
Miss Khrissy: Cuzzo! I found that Spray and they only deliver to Nevada hopefully soon they sell it
Fantisha Sherifa: Heeeeeeey Sheba! Shes beautiful n beautiful on u!
Junior Chaves o Picasso de Yahushua: Hey bae ❤