How To Diy: Tone 613 Raw Hair And Make A Wig To Get This Flawless Install |Crowns4Queens Exclusive|
- Posted on 24 September, 2021
- U Part Wig
- By Anonymous
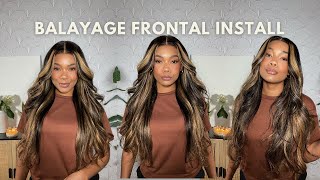
Grand RISING , Good afternoon, Good evening where ever you are right now! Thank you for taking the time to tune in with me today. In this video you will see me color and tone this 613 blonde wig constructed and installed by me .
Hair from www.Crowns4queens.com
Book your install, book a class and purchase your wigs today.
Thank you for all the love and support :) I hope yall enjoy this vlog! Dont forget to like, comment, and subscribe XOXO I love yall
Ma'am Make Sure You Follow Me On Social Media:
♡ I N S T A G R A M @IamSalicia
♡ I N S T A G R A M @Crowns4Queens
Follow The Queendom Luxury Beauty Bar Stylist
♡ I N S T A G R A M @mikostylz
♡ I N S T A G R A M @nailedbysimone
♡ I N S T A G R A M @thelash_brat
♡ I N S T A G R A M @_uniquebrows
♡ I N S T A G R A M @makeupbyjoisha
♡ I N S T A G R A M @slayk.inc
♡ I N S T A G R A M @thespatrap
https://linktr.ee/everythingroyalty
Oh nothing but a beauty queen. She make it look so easy, hey guys! Welcome back to my channel. I am salisa if you guys are new here, make sure you like comment and subscribe by the title of this video. You know i'm getting ready to show you how i made my 30 inch blonde frontal wig that i wore for my birthday. As you can see here, i have four bundles that i'm getting ready to color and i believe i used t10 and t28 to achieve this natural blonde beige. Looking color, i did wet the bundles after i wet the bundles. I dipped them inside of the toner in developer mixture and i used 50 volume developer. I did end up toning this hair two times because the hair didn't come out the way i needed it to so i colored the bundles and then after i made the wig. I toned the whole entire wig to achieve the look that i wanted. So here you see i'm just parting, my hair, i'm going to do some straight back braids. I typically do about eight do as many as needed to make sure that your hair is flat. A whole bunch of braids is not necessary, but having a flat foundation is necessary, so make sure that you are braiding your braids small enough. So this way it's flat, i'm here i just want to show you guys, my frontal, so this is the hd front, so this was the first time that i toned it and then i actually needed to tone it again. But, as you can see here the knot you can see the knots on my skin. I do not like that. I hate that so what i did was i went ahead and i customized the knot so so, when i put it against my skin tone, it matches. So here i'm showing you guys how to customize my knots to match a brown skin tone, no matter what skin tone you are. You should always customize your knot, so if you're booking with a stylus and actually, if you need to customize your front door, your lace, closure or whatever - and you say no because you're wearing blonde hair, you are incorrect. You still do need to customize that lace piece. It'S just a different process instead of bleaching it we have to do something else that pretty much makes this frontal or lace piece. Just look like it's coming out of your scalp when it is applied, which is very essential. So that's pretty much what i'm doing here. If you would like to know the tips and tricks that i use to achieve a flawless install for dark skin or just in general, with using blonde hair, make sure you subscribe to this channel and also make sure that you look out for upcoming classes um. I do have a class that is available on my website at www.crownsforqueens.com, where you can learn all these tips and tricks on how to either bleach knots or customize it for blonde hair. How to tone hair to a particular color. All of these classes are available to you on my website, so here i'm just flipping it over and showing you guys what it looks like pretty much applying it the same way. I would apply bleach and um i closed it. Just so, you guys can see up close like what it looks like. So the knots literally look brown, which is perfect, because when it's against my skin tone, you want to part and see brownness, not part and see white dots. Seeing white dots is not going to give you the look that you want it's going to give off wig. You want to be able to part your hair in different directions and see whatever skin tone your skin is like. So you want to see that color up close um, that's when you know that you've achieved a flawless melts without it even being melted. Yet so once that's done, i'm just going to wash that out and move on to this. So the next step is doing my cap ball cap, so i'm just gon na secure my baby hairs, pull them back using some gorilla snot, and then i put my cap on cut it around my ears and then i use some gots to be spray to secure The rest of the cap, i sit under the dryer for a little bit once that's dry. I take some foundation and i blend it into my cap once that is done. I'M just going to secure the back of my cap onto my braid foundation sewing it into place, and i like to go a little bit darker than my skin tone on my cap. When i'm using blonde hair, like i said i really want for when you look at my roots or my scalp, for it to give off brown nothing white um. So after i pretty much match my foundation, the tone that i want - and i did kind of do - a little dark hair, but it still worked out. I'M just going to cut around my hairline and i'm cutting just enough where my hair is still being covered by the cap after i tone my hair for the second time after making the wig, i went ahead and shampooed it with purple shampoo. Let it sit on for 15 minutes and then i wash it out and let the whole entire wig dry, as you can see all the different tones and dimensions of this blonde wig. It'S just. I literally made it to perfection if you're interested in getting a custom. Wig or learning how to make a custom wig head on over to crowntrappings.com, like i said before, i have classes available and i also have um the ability for you to book a custom made wig. So here i'm just securing my frontal piece onto my wig cap. Once my frontal piece is secure on my whip cap, i get my sewing machine out. All my custom wigs are made on sewing machines. They literally will last you a lifetime because they're just constructed in that way. I'M here i'm just threading my bobbin bobbin circle. I can't really remember what the thing is called um, but i'm using blonde thread, because this is a blonde wig and you just want to have flawlessness every you know the wig is made to perfection um. So here i'm just pretty much sewing on the bundles onto my cap. Like i said before, i have four bundles. I just finished plucking my wig um. This is what it looks like, so i had to recolor it because the frontal was a different color than the actual wig. Now it is literally one color and i love it, so you have to take your time all right, so i just finished plucking it and hot combing it with this hot comb crown for queens. Of course, you guys can purchase it now on the website. It is definitely up um. I did not record the plucking process because it's just very tedious, if you do want more information on how to plug and all that stuff. I do have online classes and courses available at crownsportqueens.com, so you guys can shoot over there. I'M going to include it in the description below i'm sorry. I have like a piece of blonde hair over my eyelash and i can't see okay, so i'm just gon na size, the wig real quick before i put it on and it's still a little wet. I got ta blow dry a little bit more, but i'm just sizing it. So i can see what it looks like and to see if i need to pluck anymore, so i was given kind of like smoky gray, which is fine. I think it's also this light to this. Oh right, it's getting gray, but it's giving like a natural blonde in person like uh. I know how to explain it, but i'm gon na do all fours down on me at all, and this is hd lace. So i now have hd lace in um 613, so you guys can purchase this um on the website as well. Crowntropqueens.Com excuse me, i'm a middle part girl, so i'm going to do mental parts and you guys see those roots. That'S what it's supposed to give? Okay, when you do blonde hair your roots should not! You should not have blonde knots, that's not cute, because then definitely if you have brown skin or any skin tone, you should um customize your knots and then like. I was saying as well: that'll be um available on the crown to queen's university courses. Um yeah, you just want to be able to do that because, yes, you could put makeup or whatever, but then let's say you want to switch your part, then you got to do makeup on that side. You got to do it's just not gon na get. What it's supposed to give me you got makeup, smeared everywhere, like this, just gives natural like natural and then once i melt this and it's going to be given for the cut now i, like my hair to be plucked natural, thin, i'm going to leave. I think the middle, how it is, i think, i'm going to glue it like right there i'll be having a hard time with my hair, because i always be feeling like either i glue it down good or i don't glue it down good so like as far As like forehead space and blonde hair, i feel like it's going to make me laugh out a bigger forehead. If i put it like right here, that's going to be a big forehead, but then, if i put it right here, it's it's not going to give okay. I'M going to pluck more right here, because i want that to be more more natural look at her. So this is what it looks like in the inside, and this is what customizing a 613 knots look like. Okay, so even if you are getting blonde hair installed, you still have to get a customizer steel customization fee for that um. Obviously, it's just not bleaching. It'S a different type of customizing process. So don't give your stylist a hard time, because we just want y'all to be cute. Y'All, see us and then y'all be we're trying to figure out why we cute and you're not cute, because you're not trying to get what we're giving giving us a hard time. So here i'm showing you the importance of owning a hot home. Ladies okay, if you do not have one head over to crowns for queens and get this hot comb that i'm using now, you can see the difference between the left side and the right side. The hot comb is needed. Okay, all that mousse and all that wax and stuff is just add a product. Get you a good hot comb that gets hot, and once you hit that top with the hot comb. It'Ll be perfection so here i'm just showing you how i ended up styling my hair. I did wear curled and i wore straight hair. I'M straightening it with a fabulous flat iron and i'm touching the roots, of course, with that crunch for queens, hot comb. Defining my part with a little bit of concealer and i'm ready to go slime. So thank you guys for tuning in to today's video here i've posted a few clips of me with my hair. I hope you guys learned something. I hope this was educational. I hope you guys are looking forward to the next video um like such and make sure you like comment, subscribe, i'll, see you guys later. Thank you. You


Comments
Sheila C: Beautifully done
Crissy J: Very pretty!
Joanne Providance: Gorgeous